When using consumer-grade hardware in a 19″ environment, sooner or later you will encounter certain obstacles. Many issues can be resolved remotely, whether via remote desktop, AnyDesk, or Teamviewer in the case of Windows with GUI, or via SSH for Linux.
Enterprise hardware offers more, for example IPMI. But how do you access the BIOS/UEFI on inexpensive consumer hardware without any peripherals?
This is where server consoles come into play. In principle, these are compact access solutions that offer a screen and a keyboard with or without an integrated mouse or replacement (touchpad). The signal sources can be switched back and forth between several devices, allowing easy access and configuration of everything.
Of course, something like this can be purchased as a finished product, but the price of the hardware is usually not reasonable. That’s why I built my own solution.
Components
Actually, not much is needed:
- A display that fits into a 19″ rack
- Keyboard and mouse or similar
- KVM switch* for switching between servers
- A base, e.g., a 19″ shelf
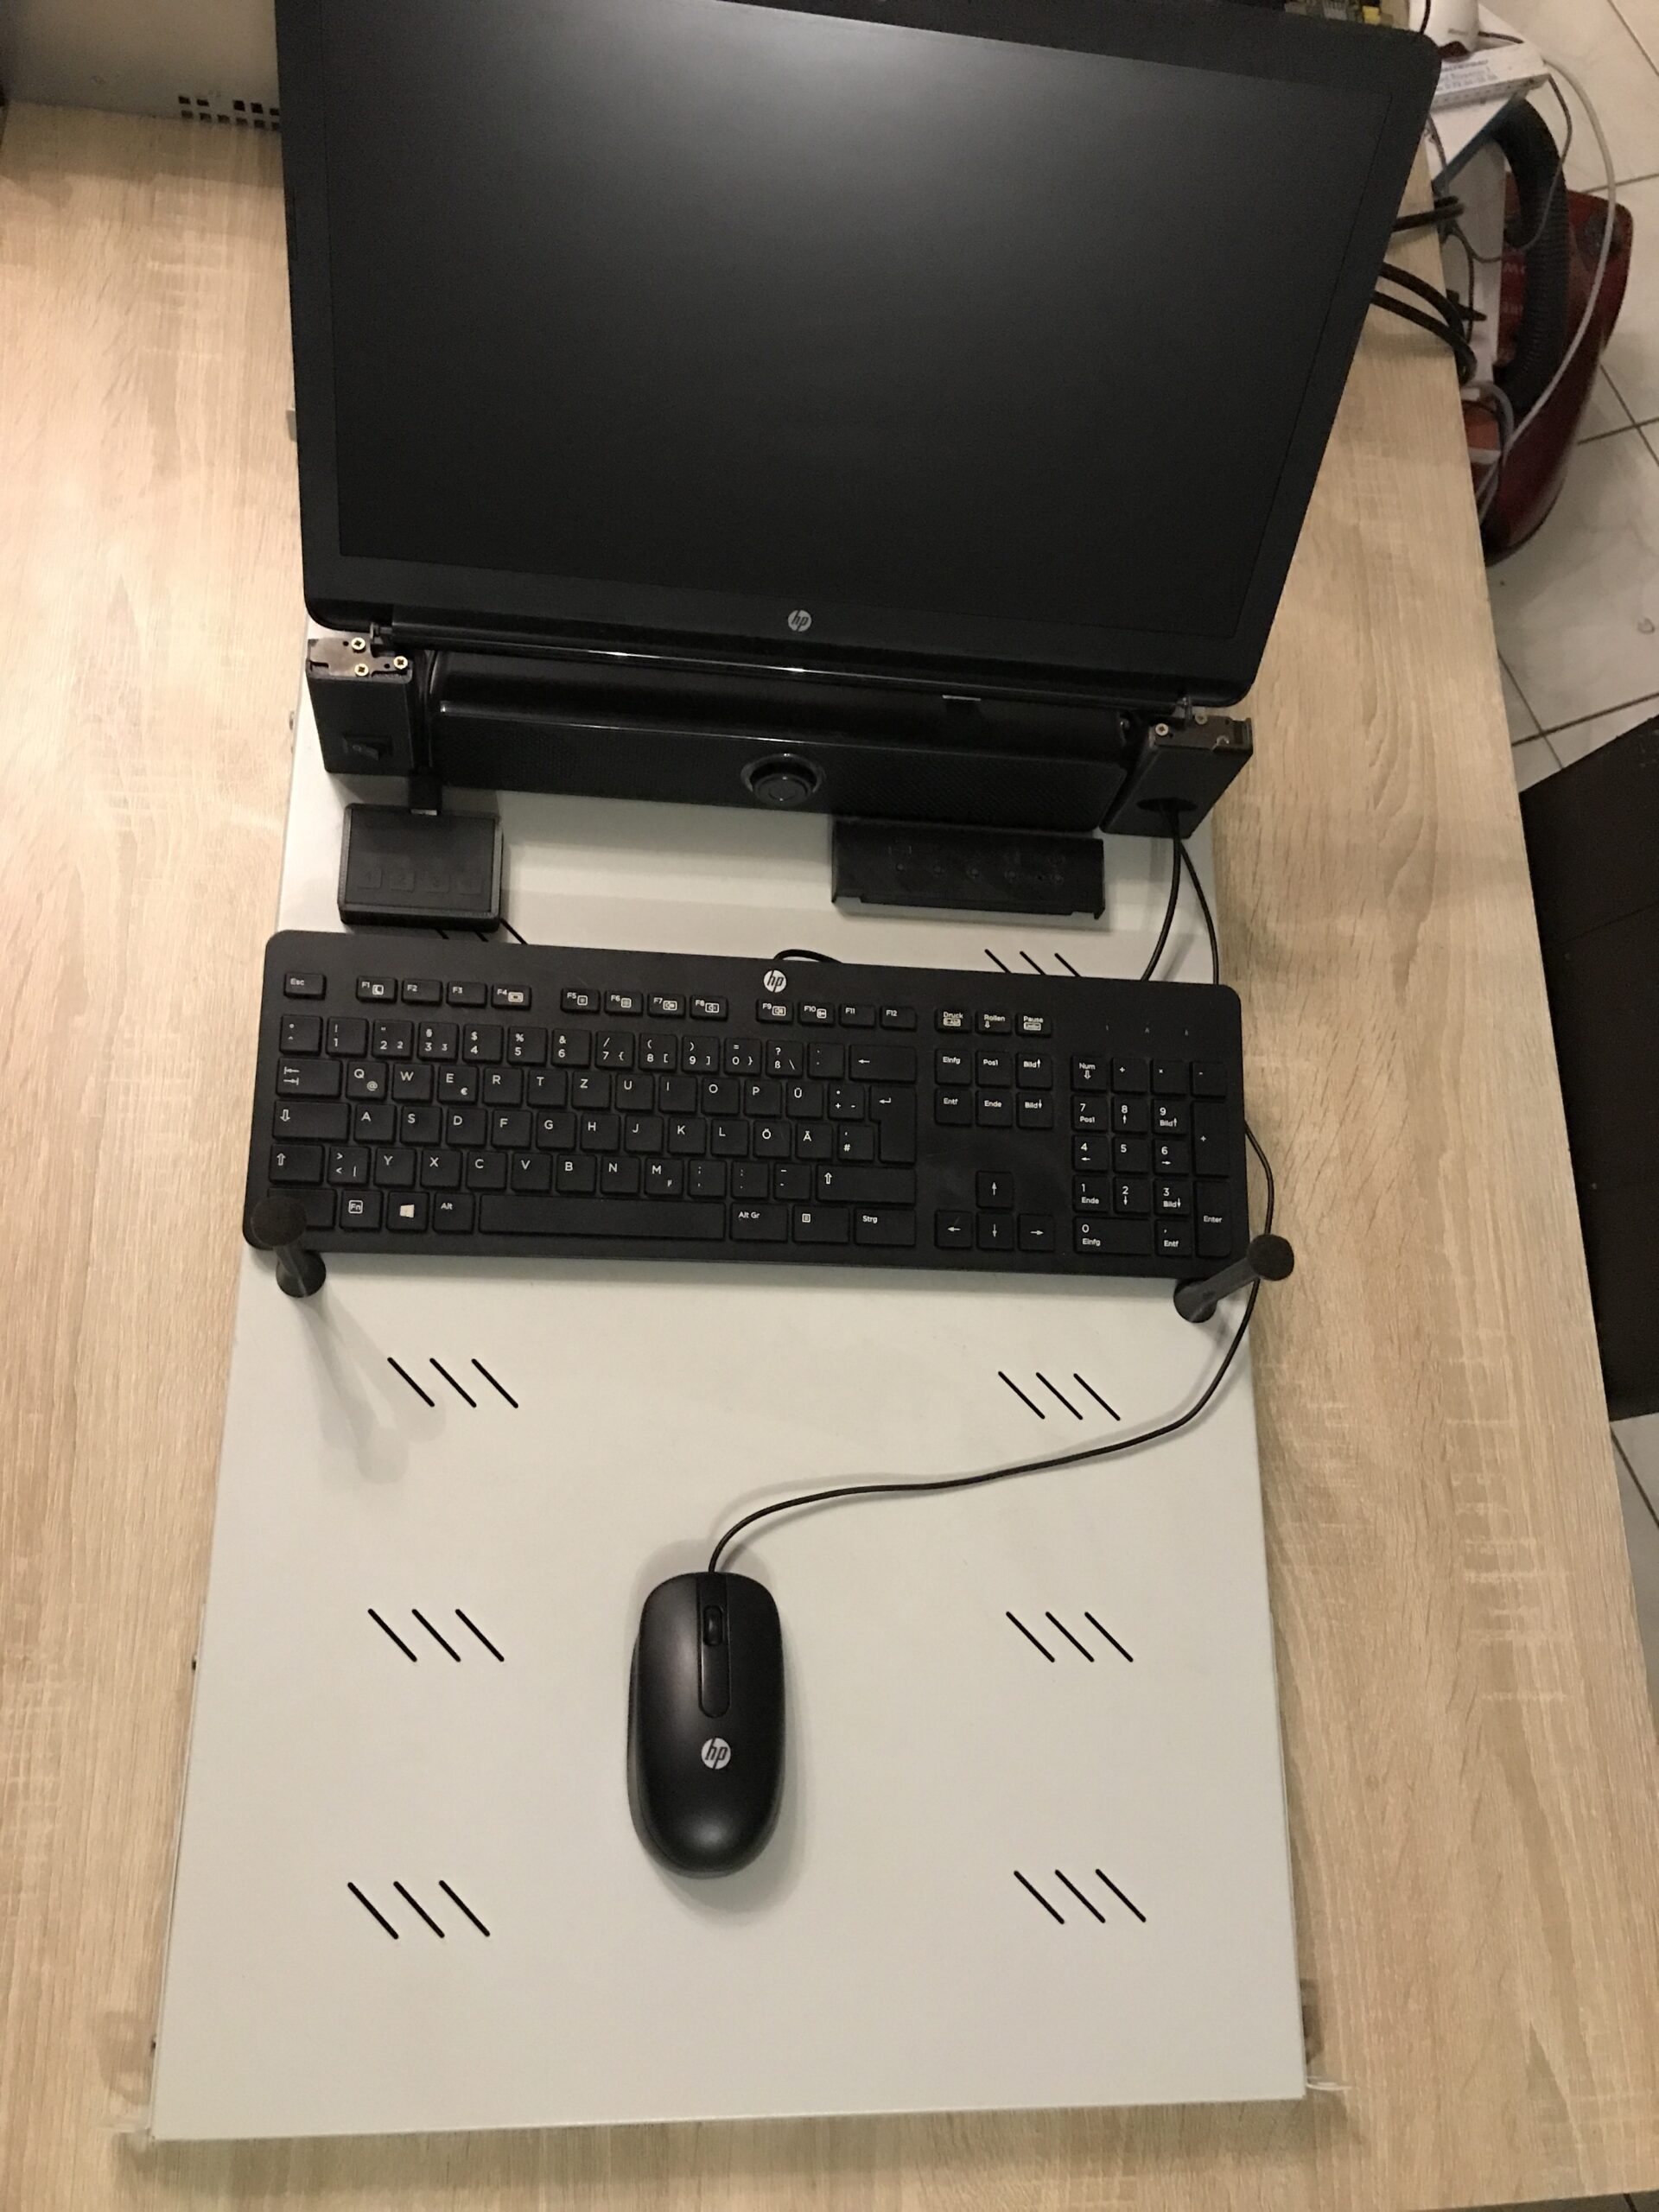
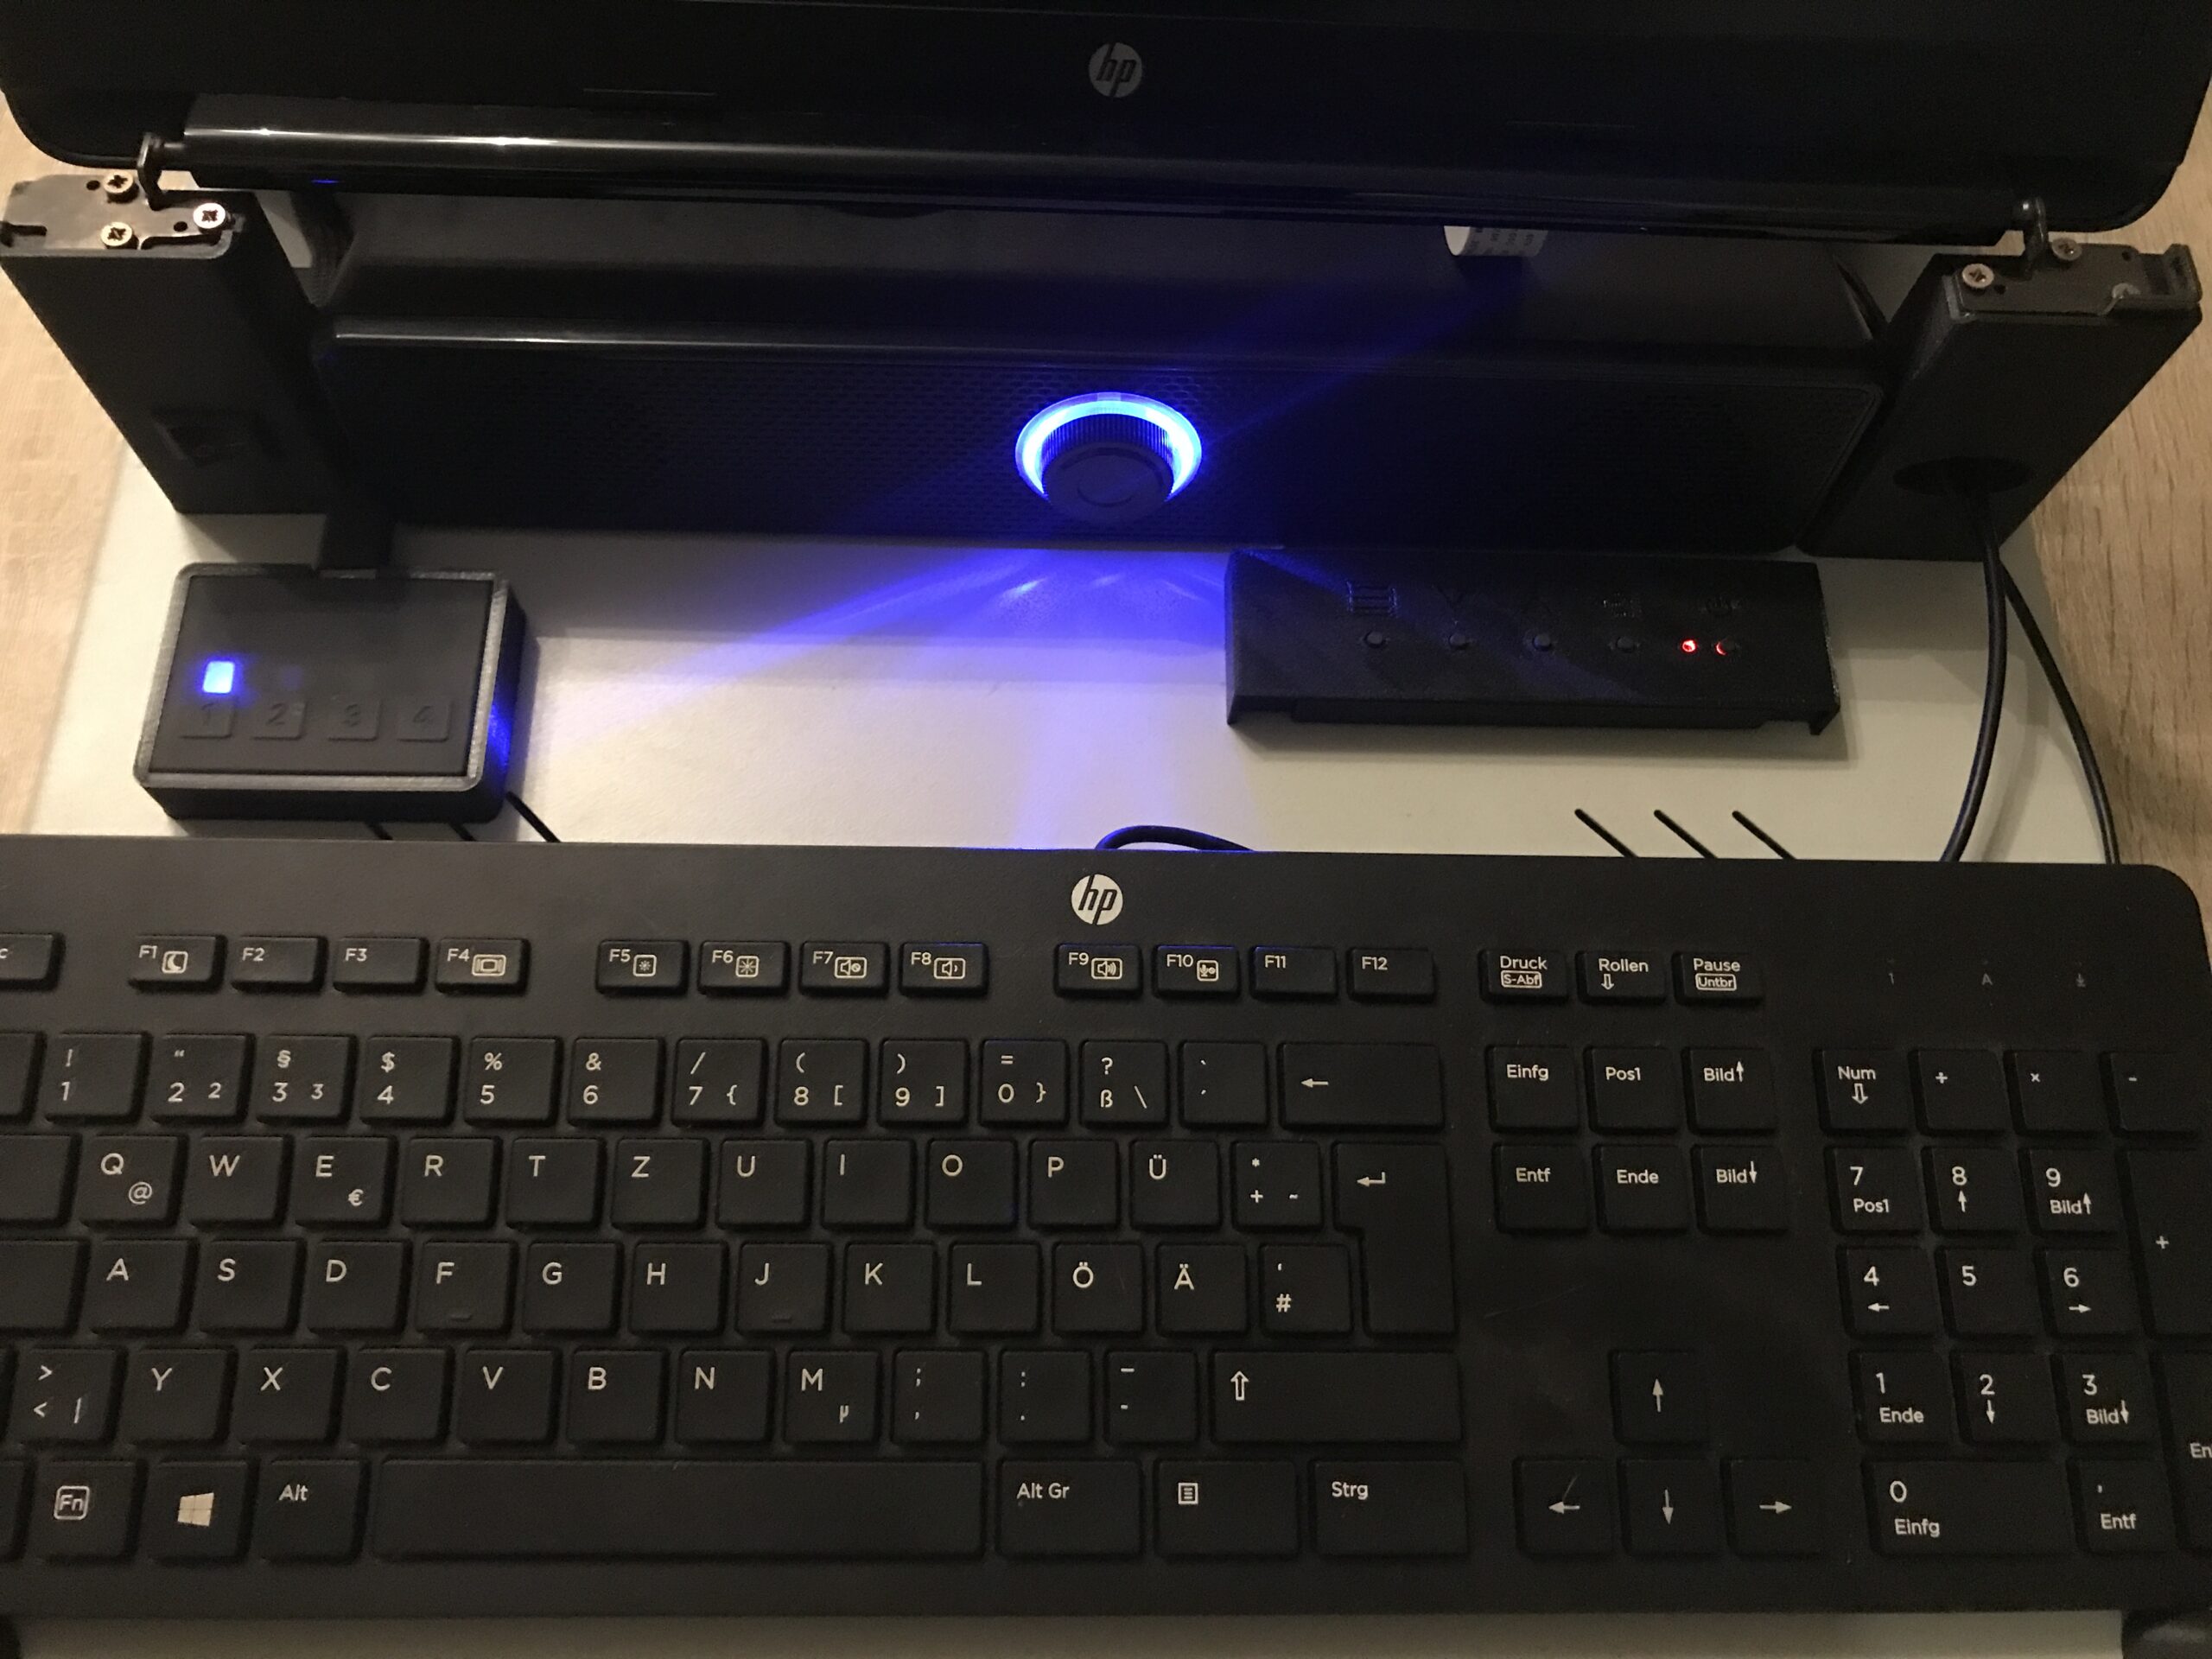
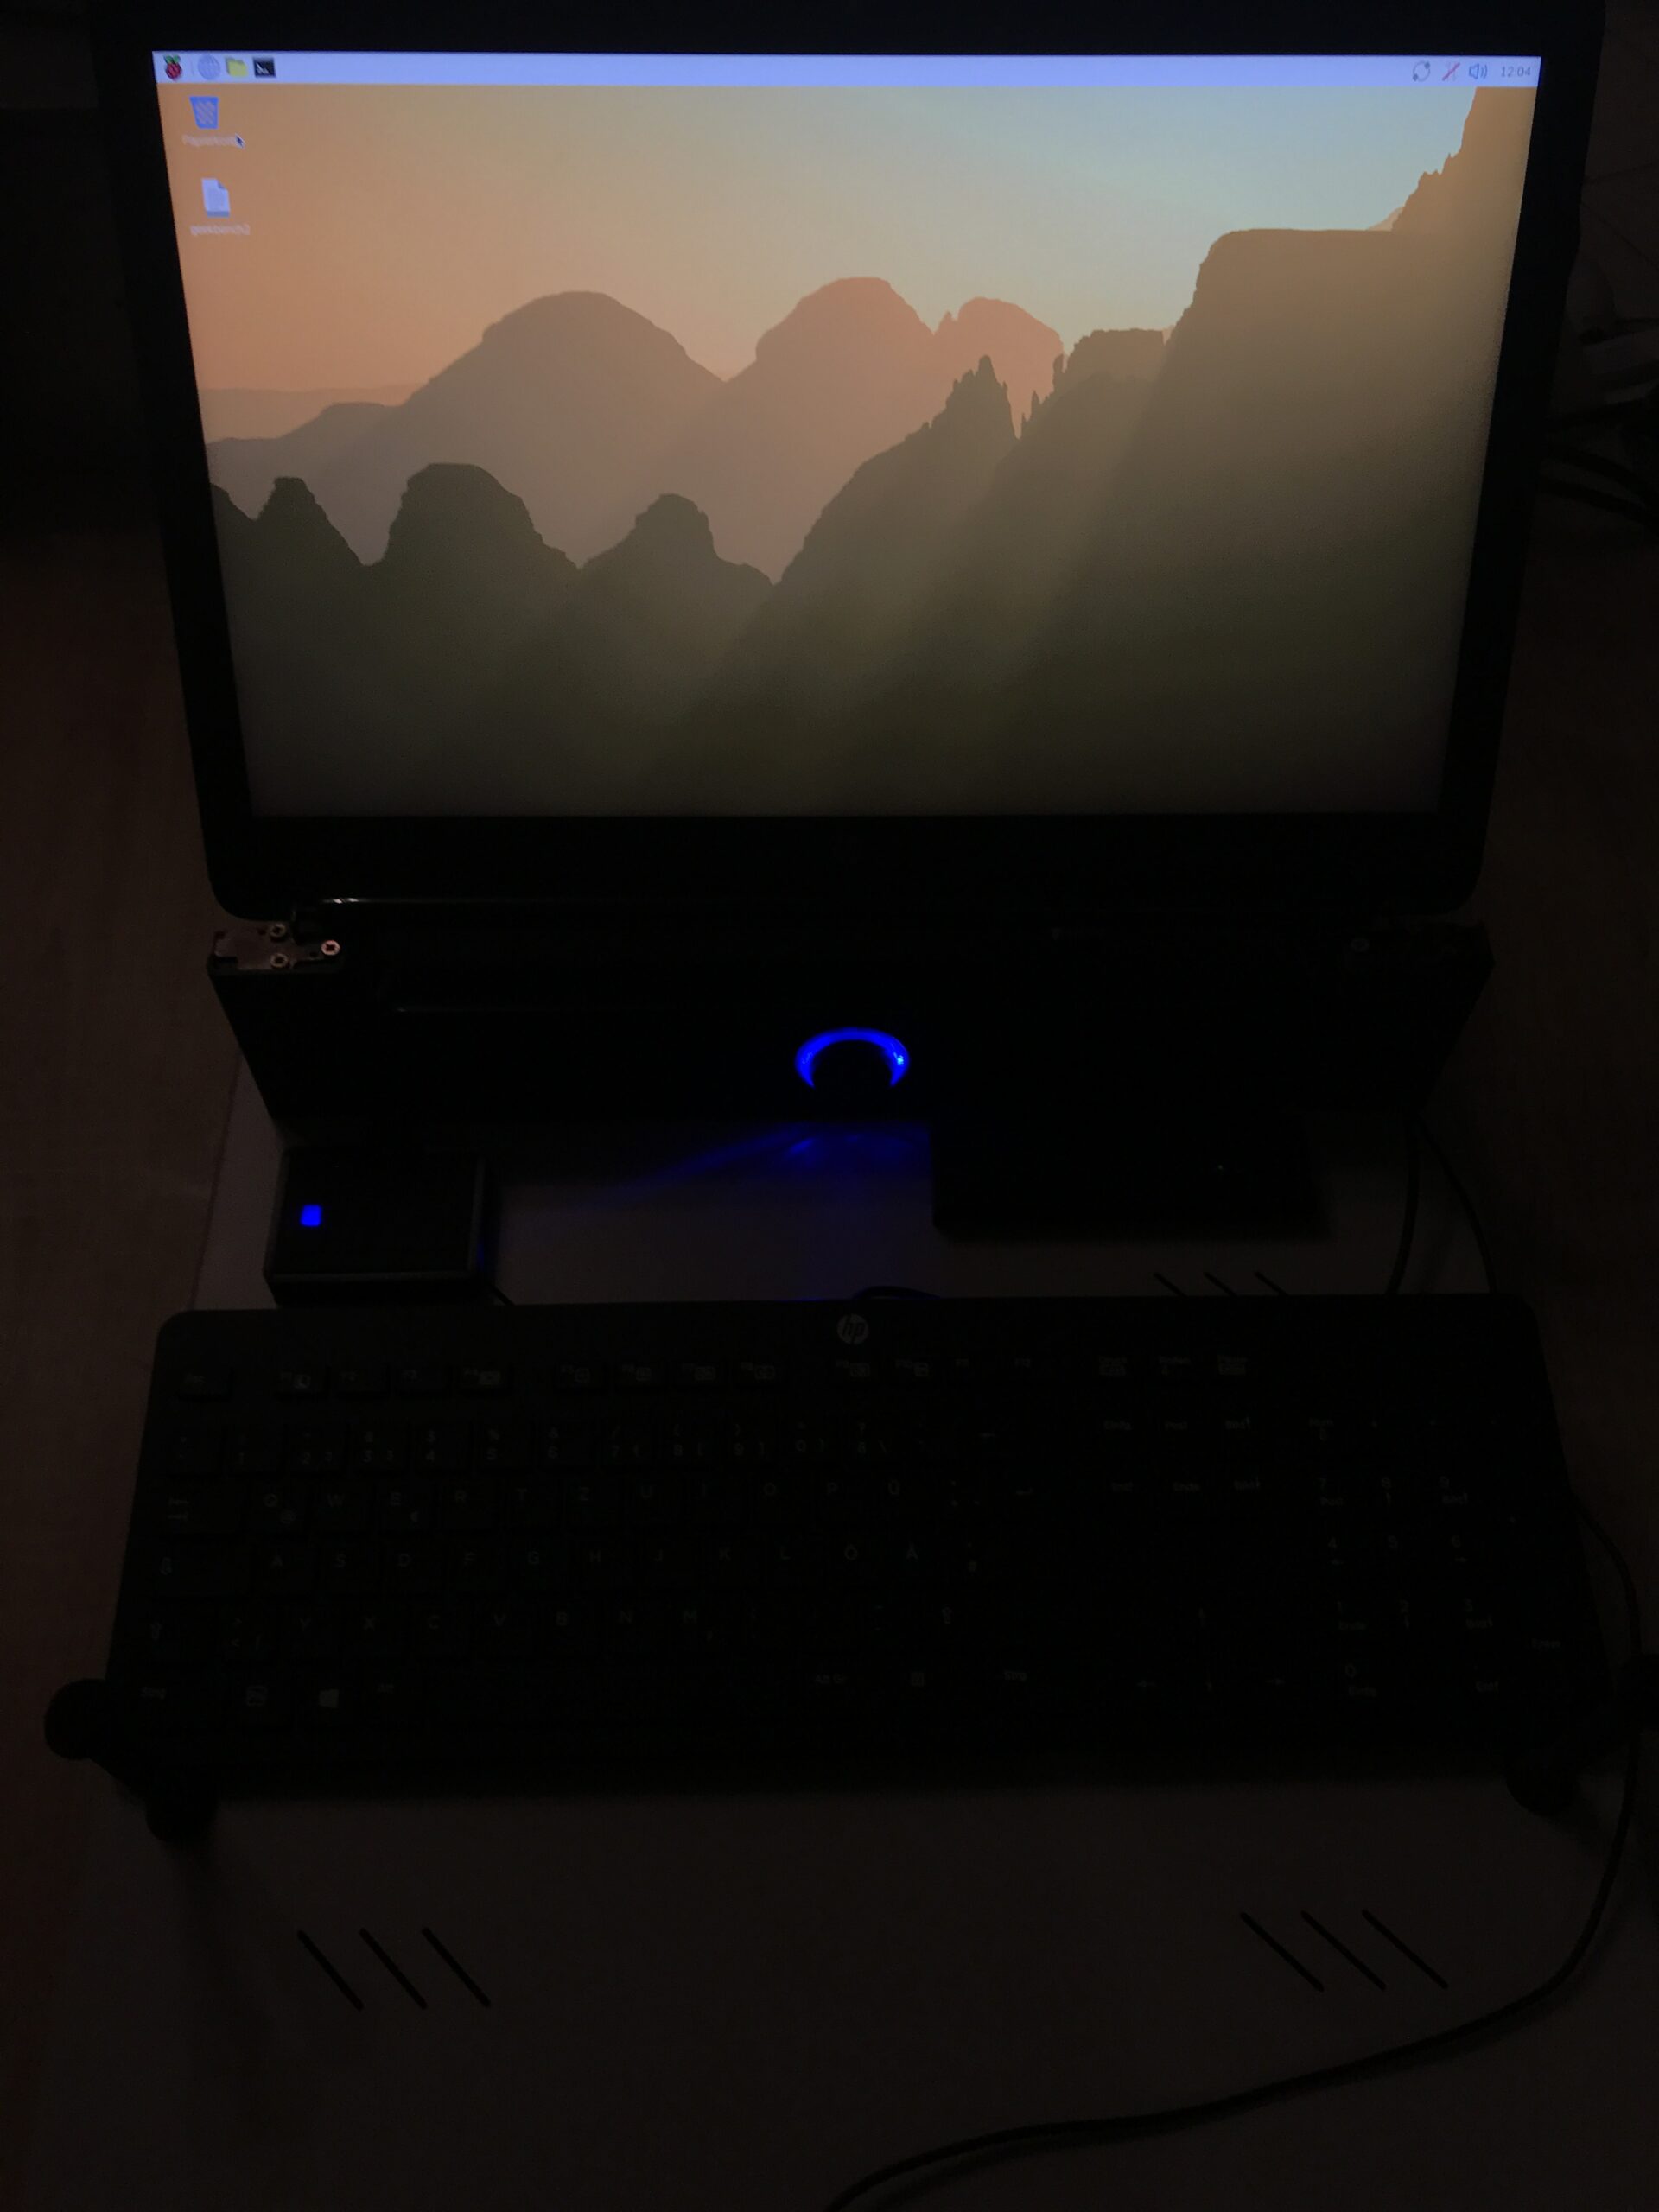
In my case, I continued to use the entire screen of the HP 17-by2132ng notebook, which is currently used as a low-power Proxmox server: It is controlled via eDP (LVDS used to be very common), and inexpensive controllers are available for this in the Far East.
Why this solution?
The panel is an energy-efficient and space-saving 17″ IPS LCD with a resolution of 1920×1080 pixels at 60 Hz with usable brightness, and it was left over anyway due to broken hinges on the notebook side. Especially since the entire part fits almost perfectly into a rack in terms of width.
Conceived, built.
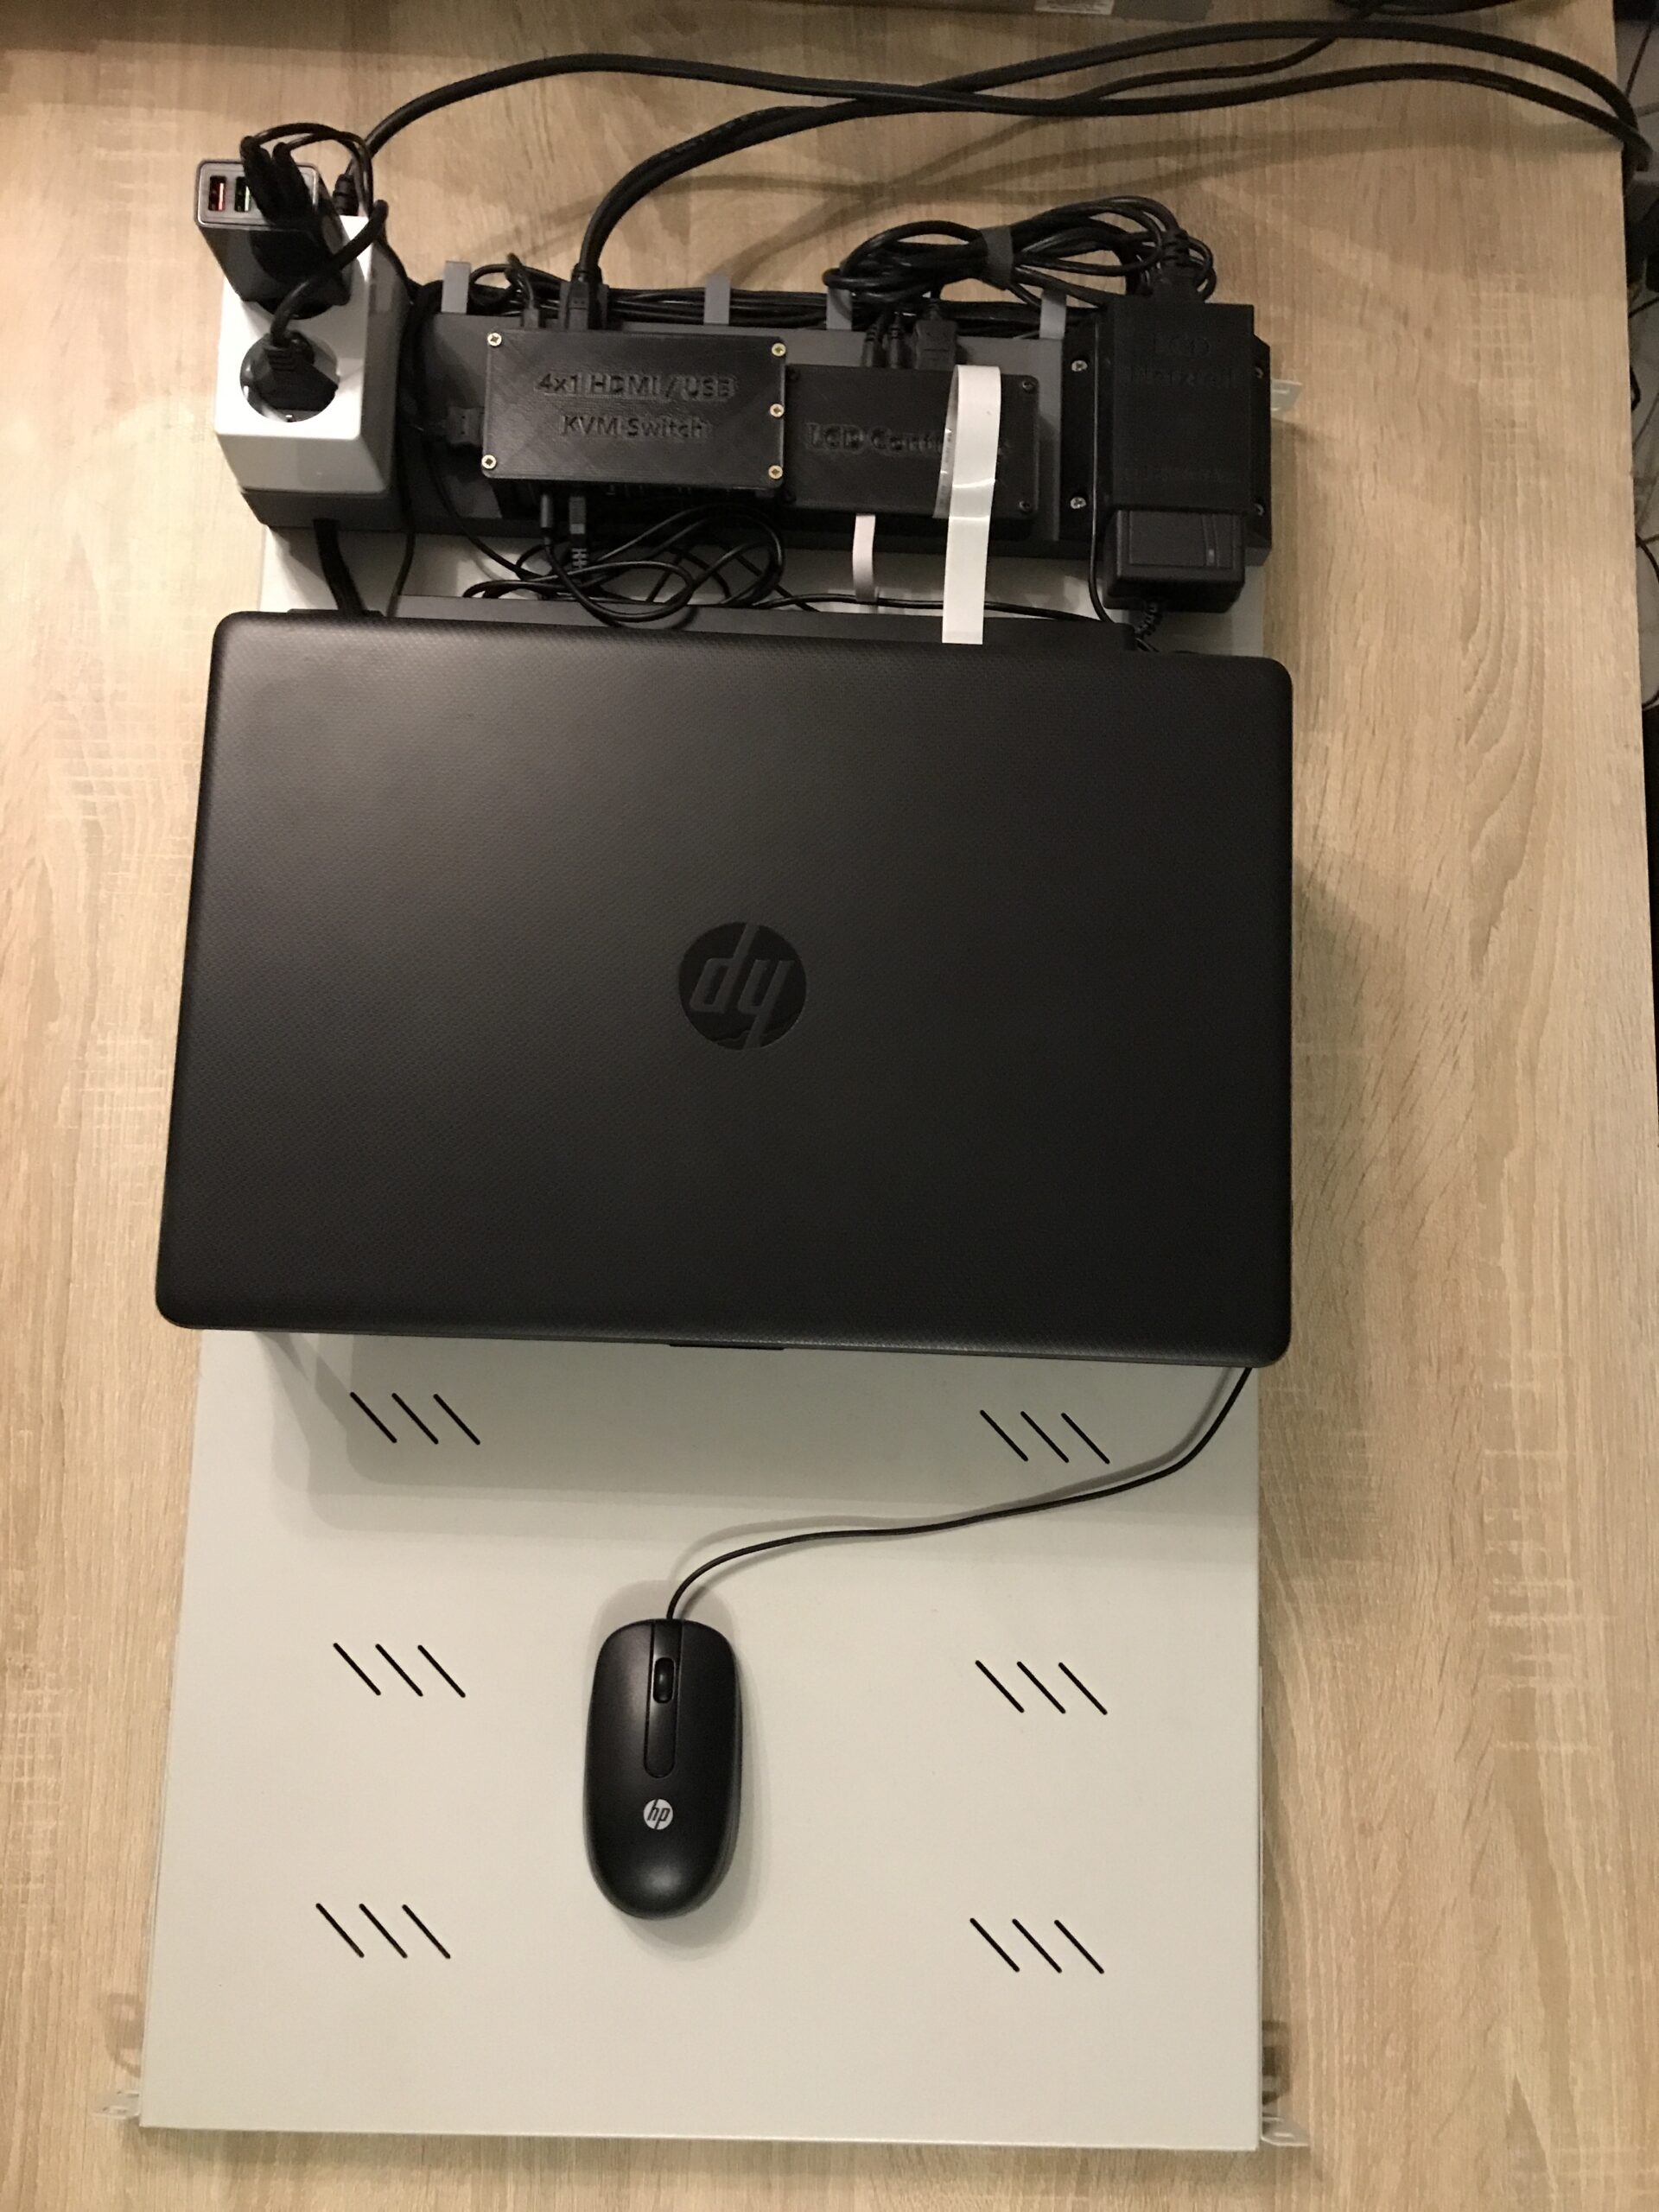
First, I used a 19″ shelf in my now favorite color, light gray (RAL 7035), with a length of 750 mm (minimum, adjustable) as a base and determined the positioning of everything.
I ultimately used the following components:
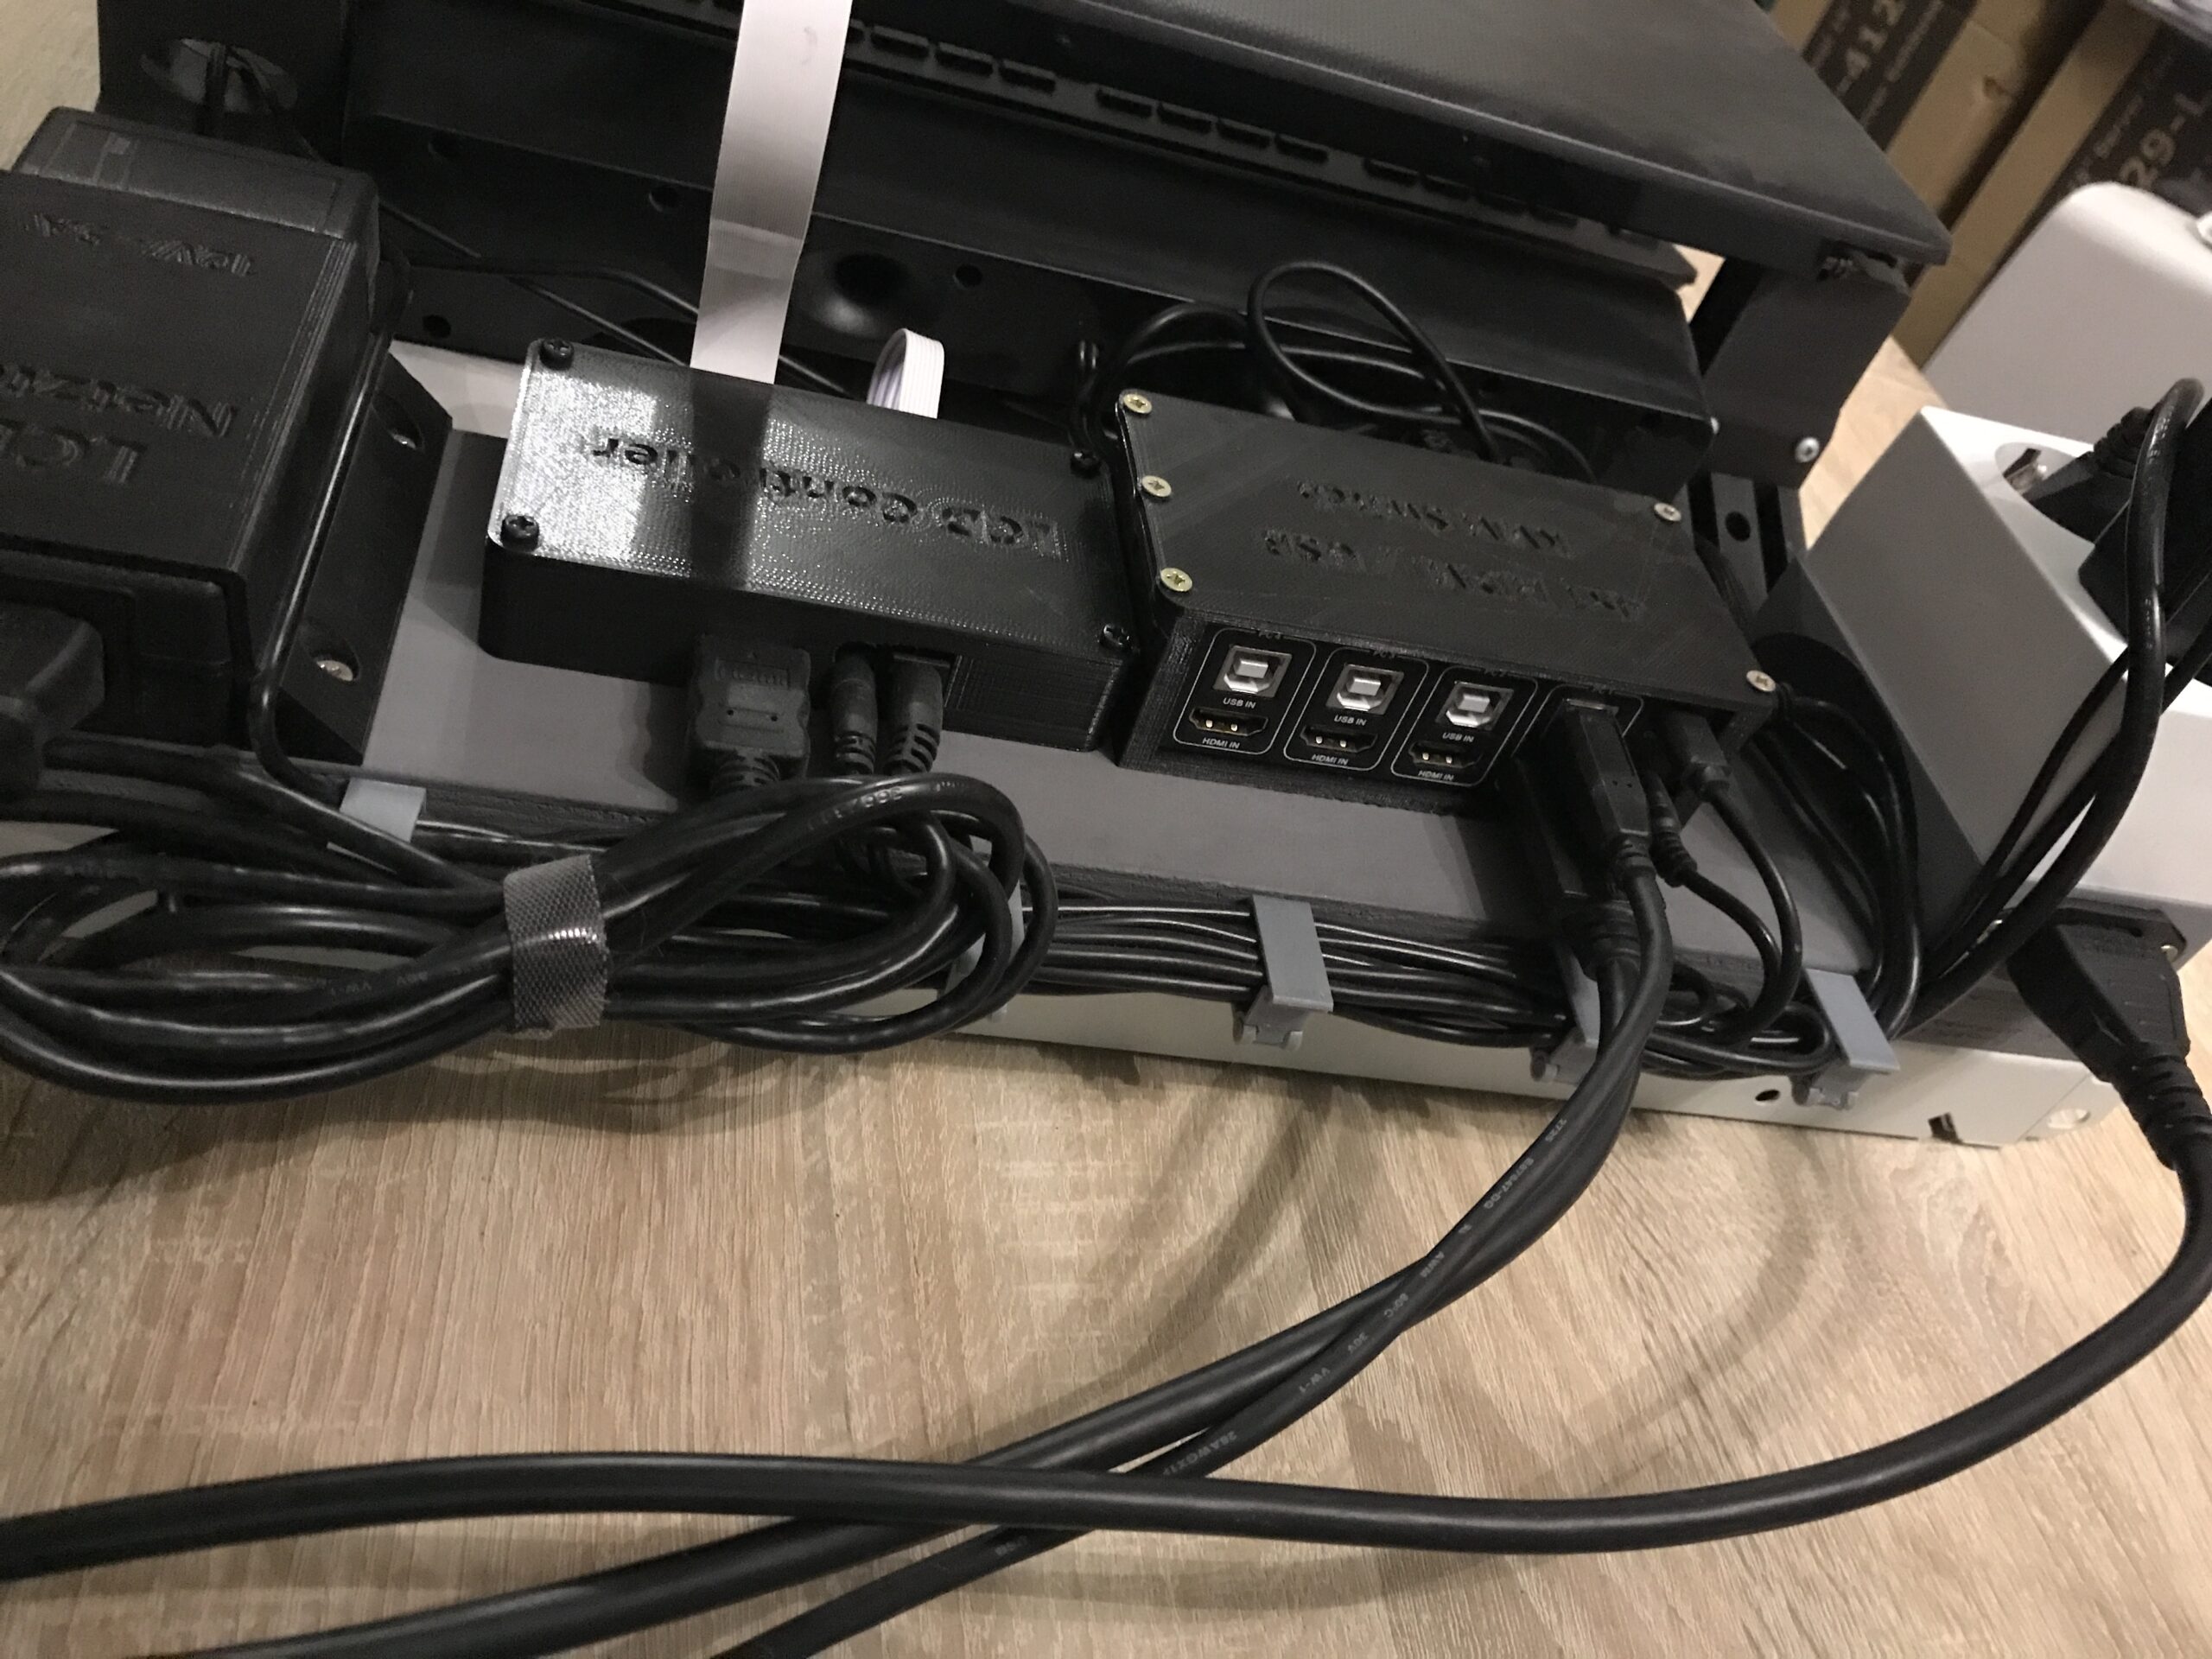
- The entire screen of the HP notebook, webcam with ribbon cables and antennas have been removed
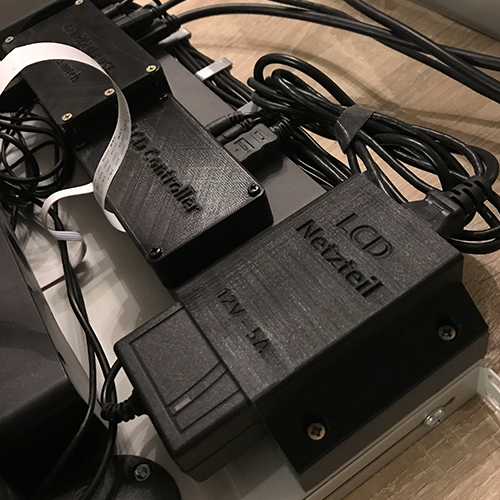
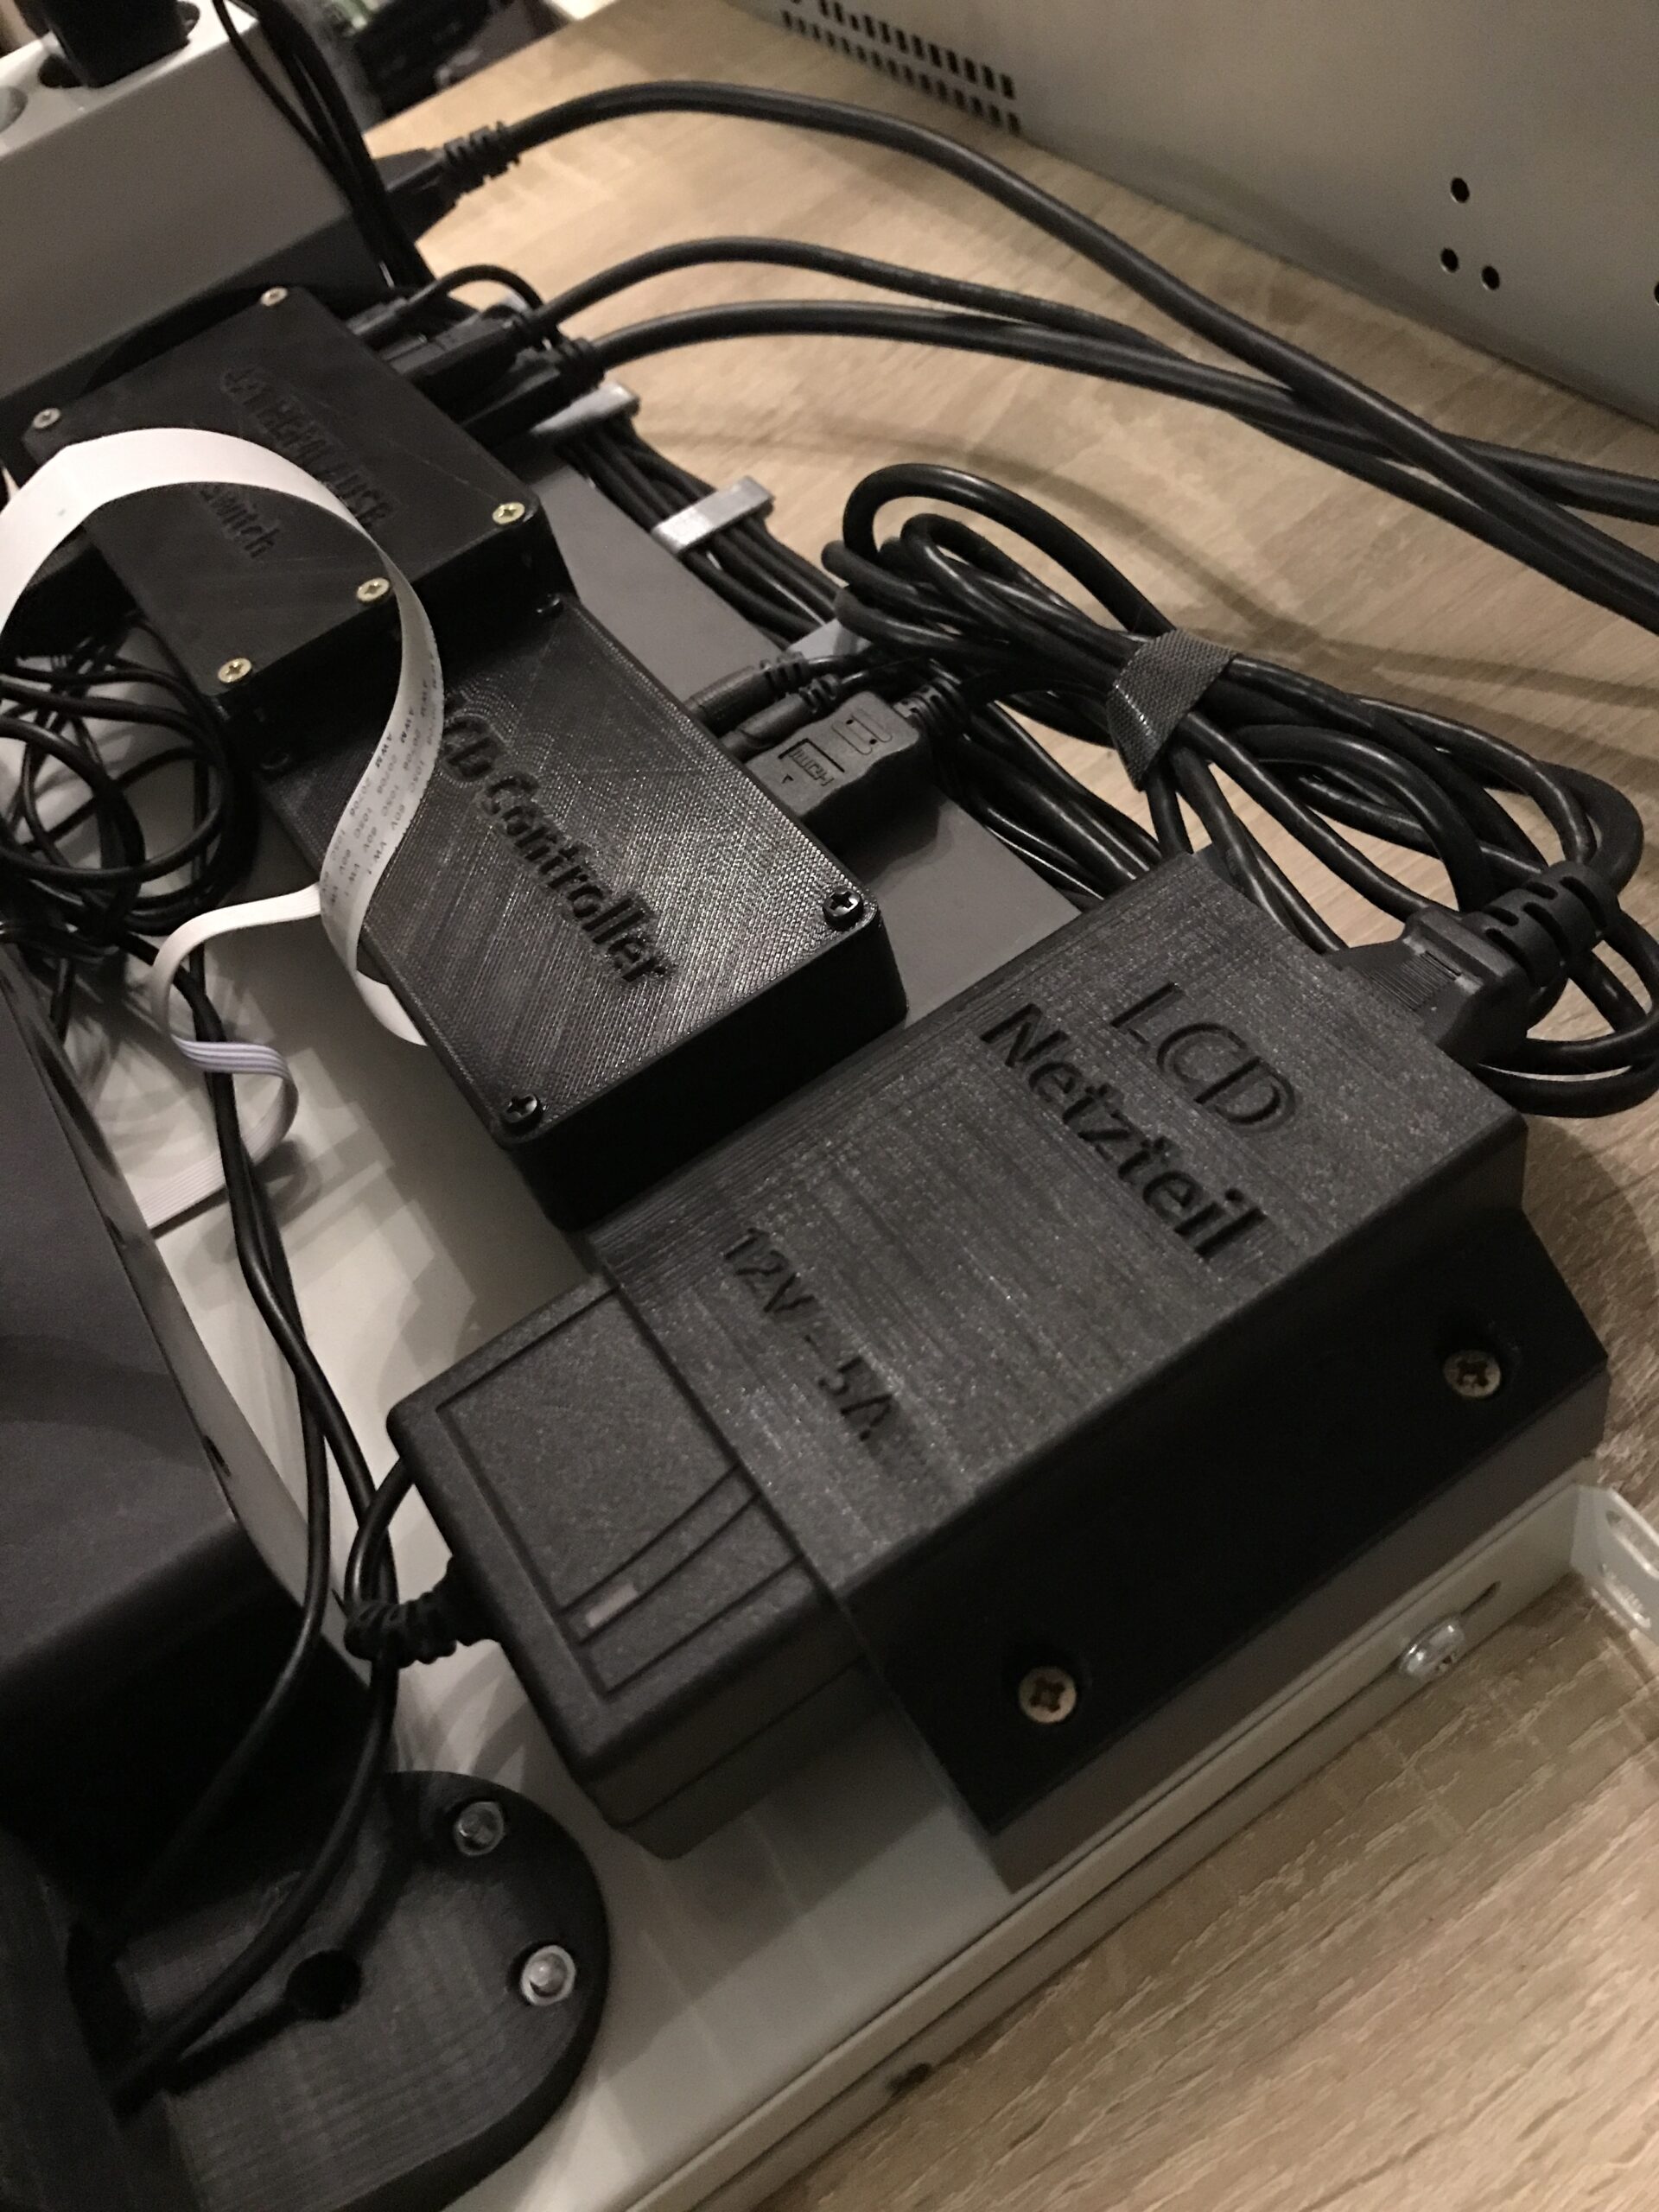
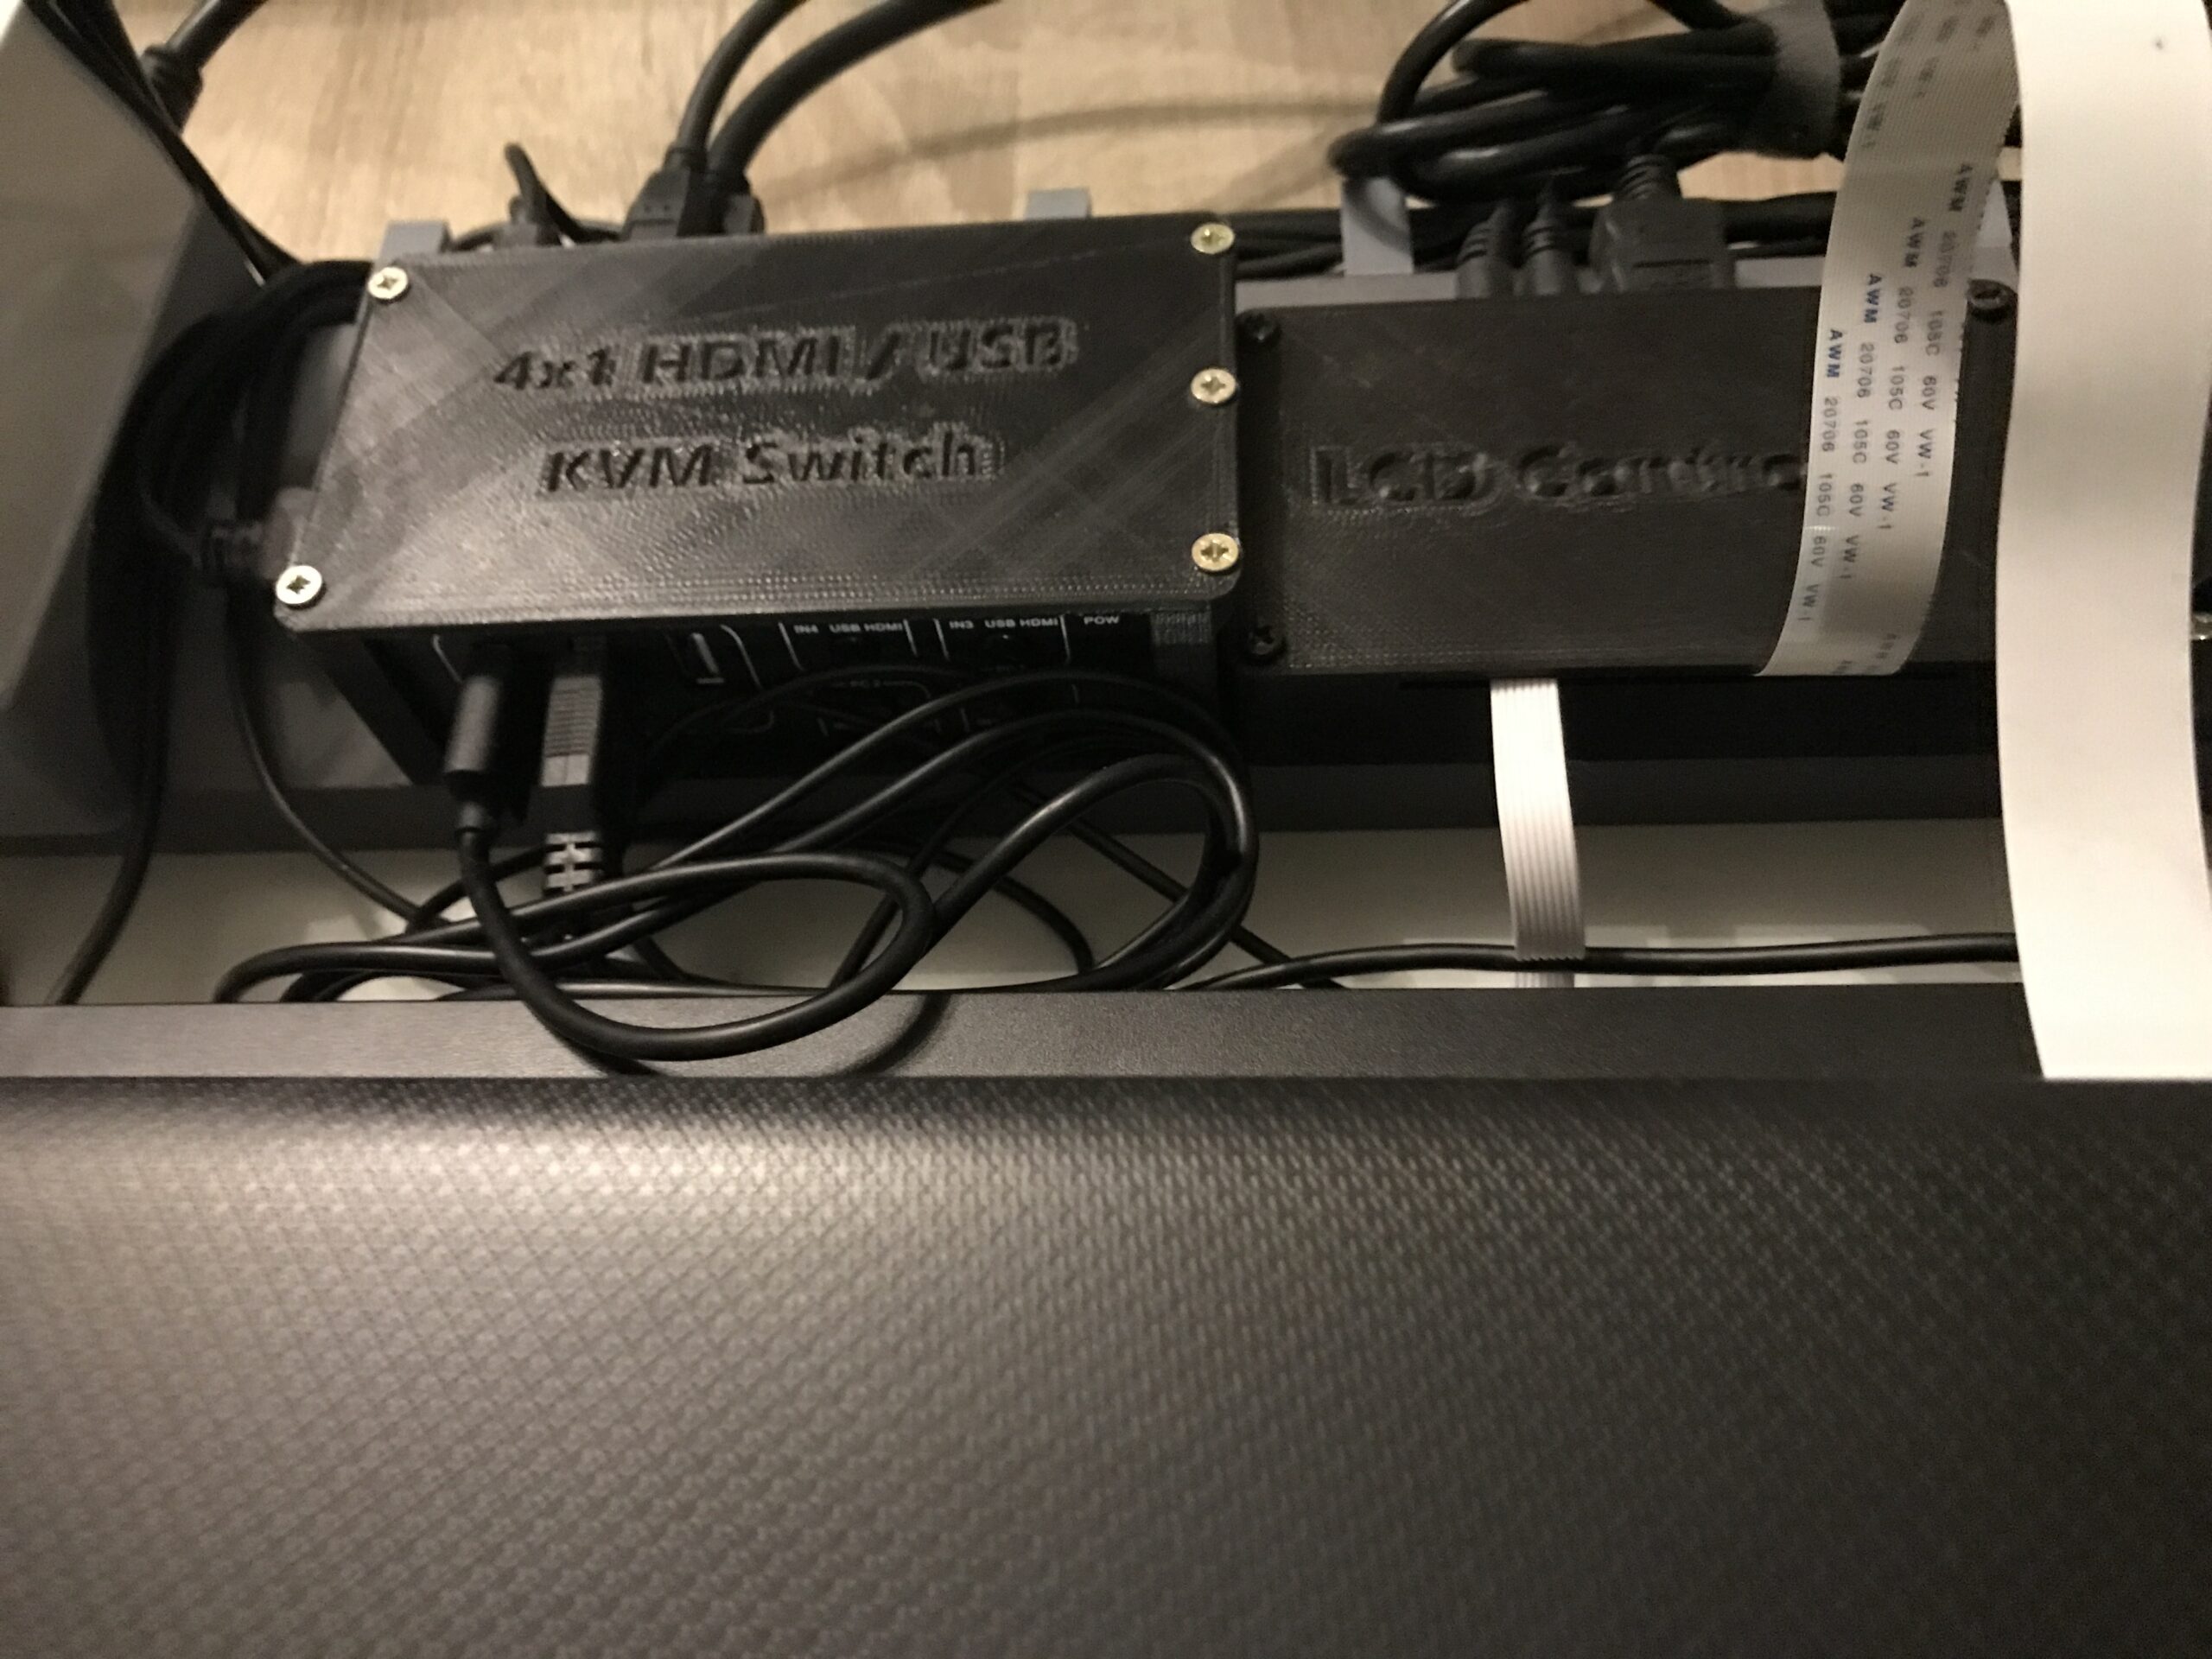
- Screen controller including matching power supply
- Flat stereo speaker
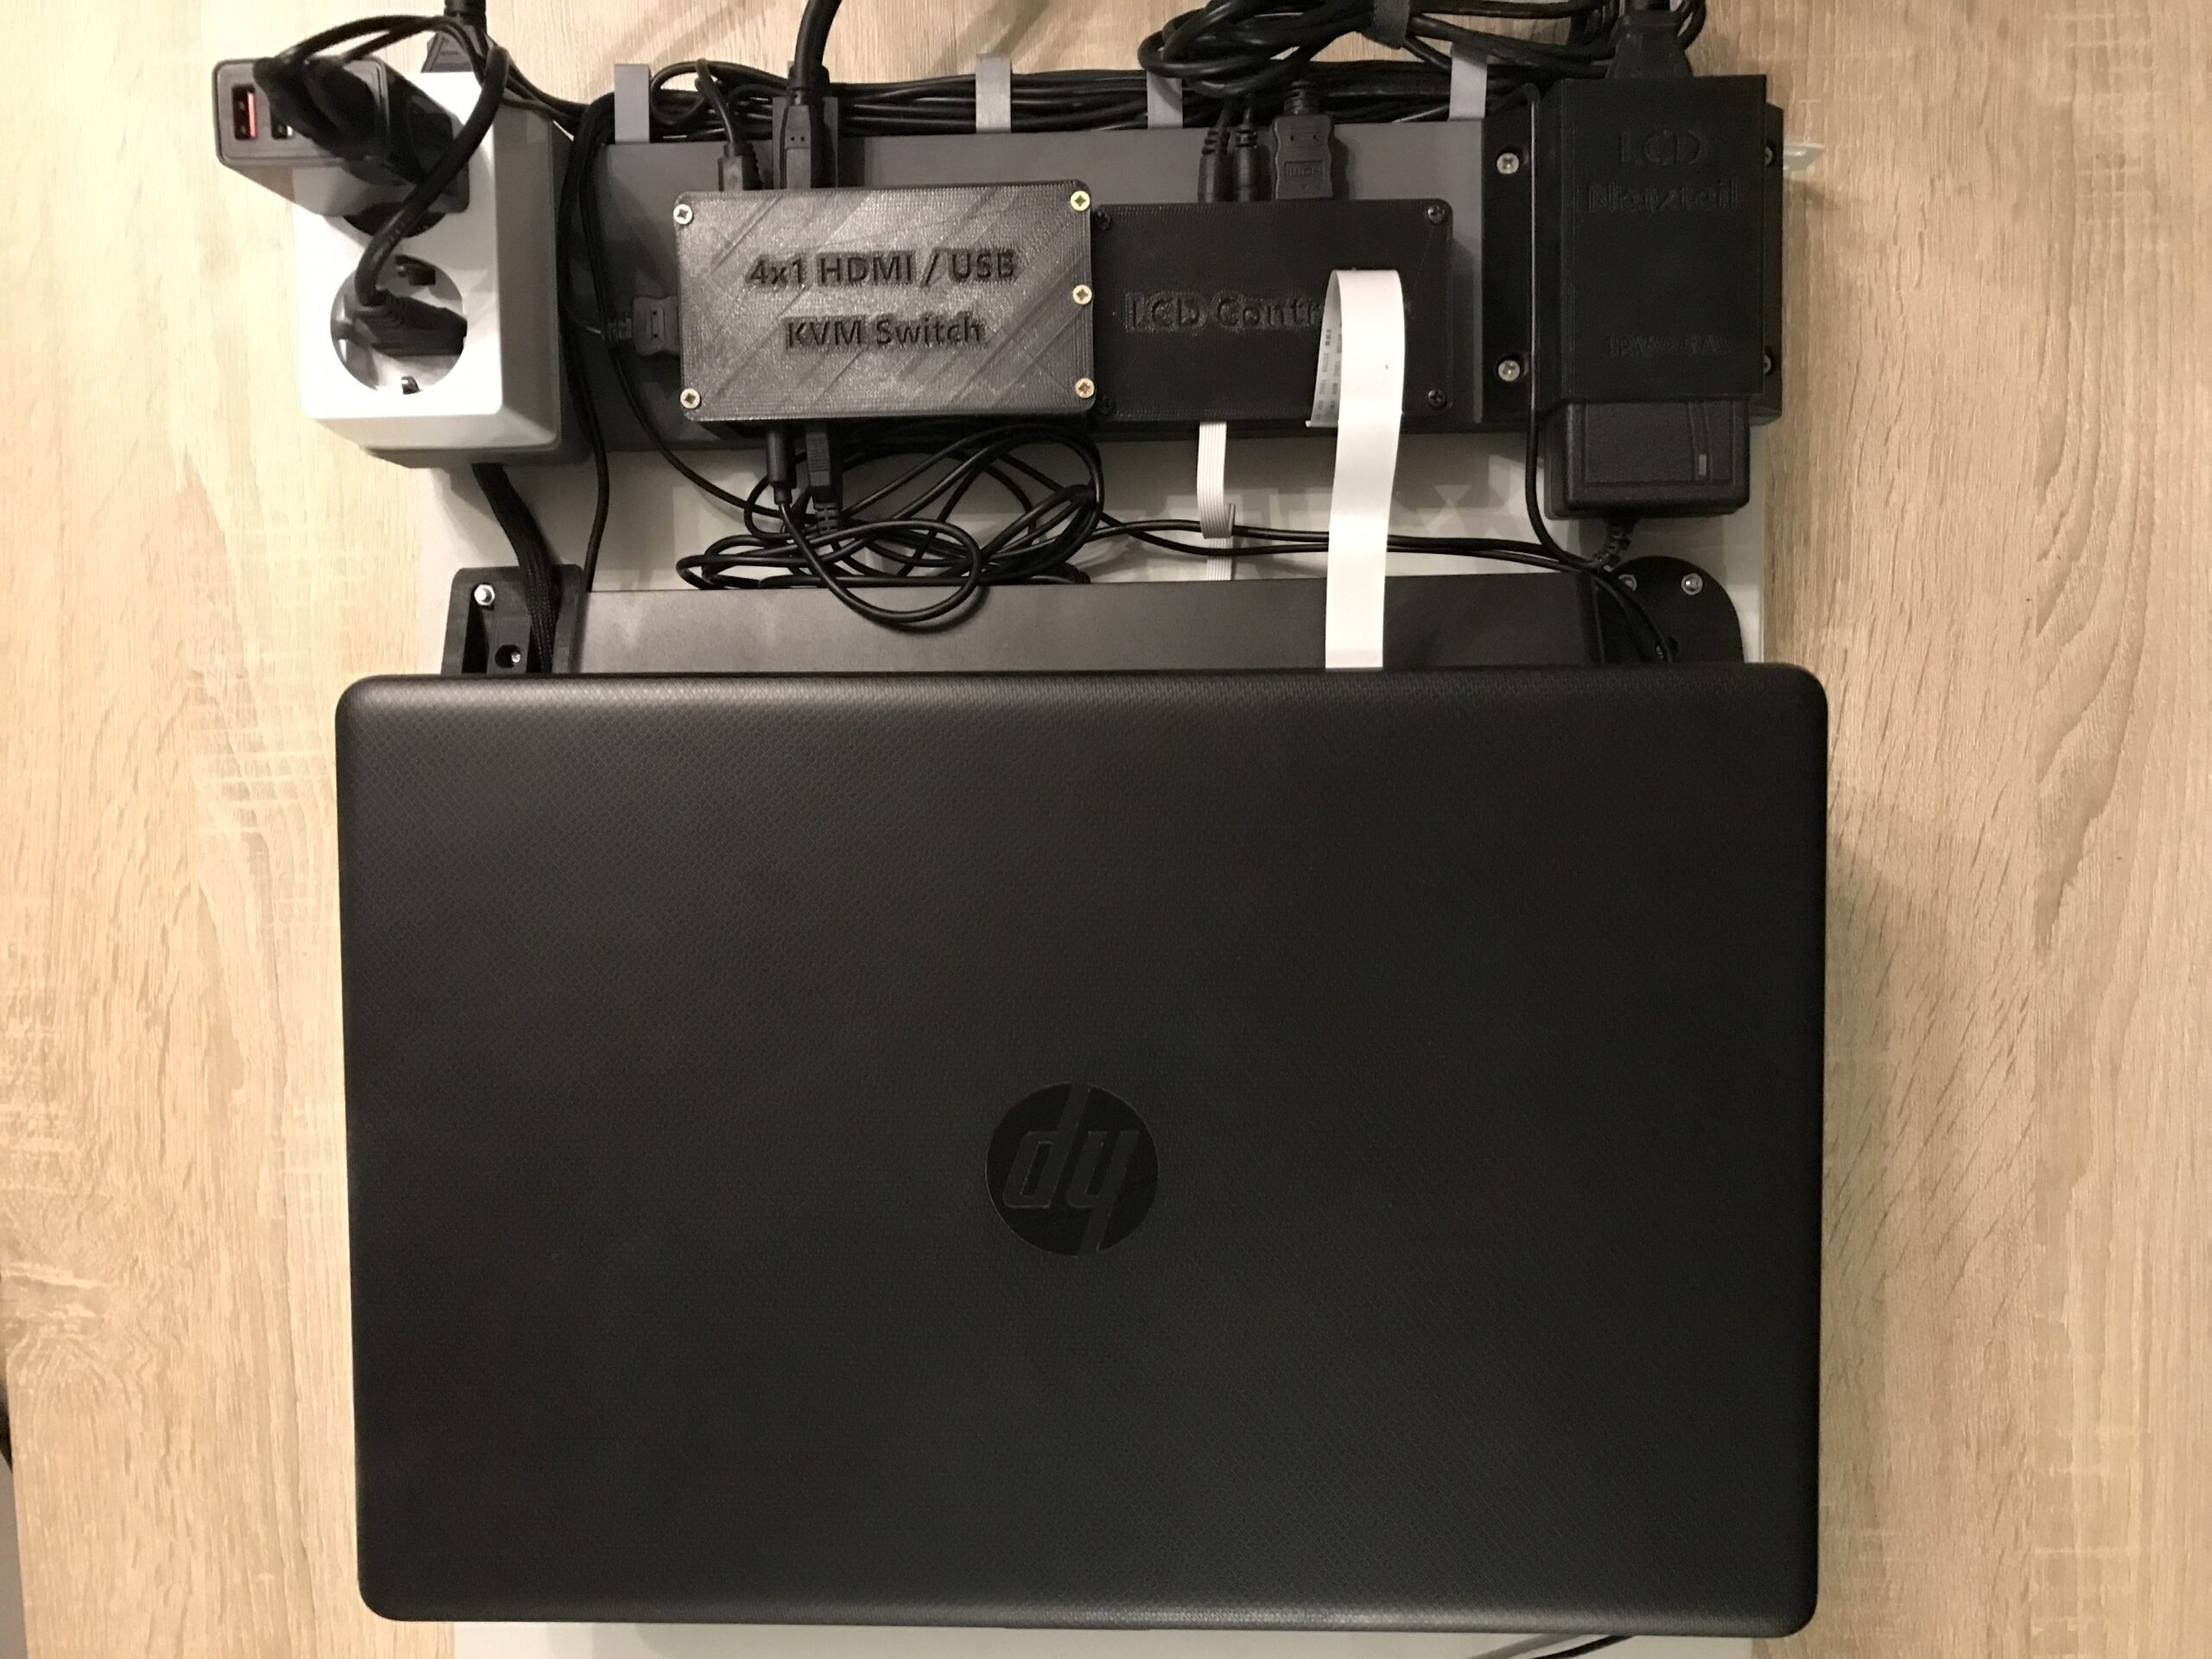
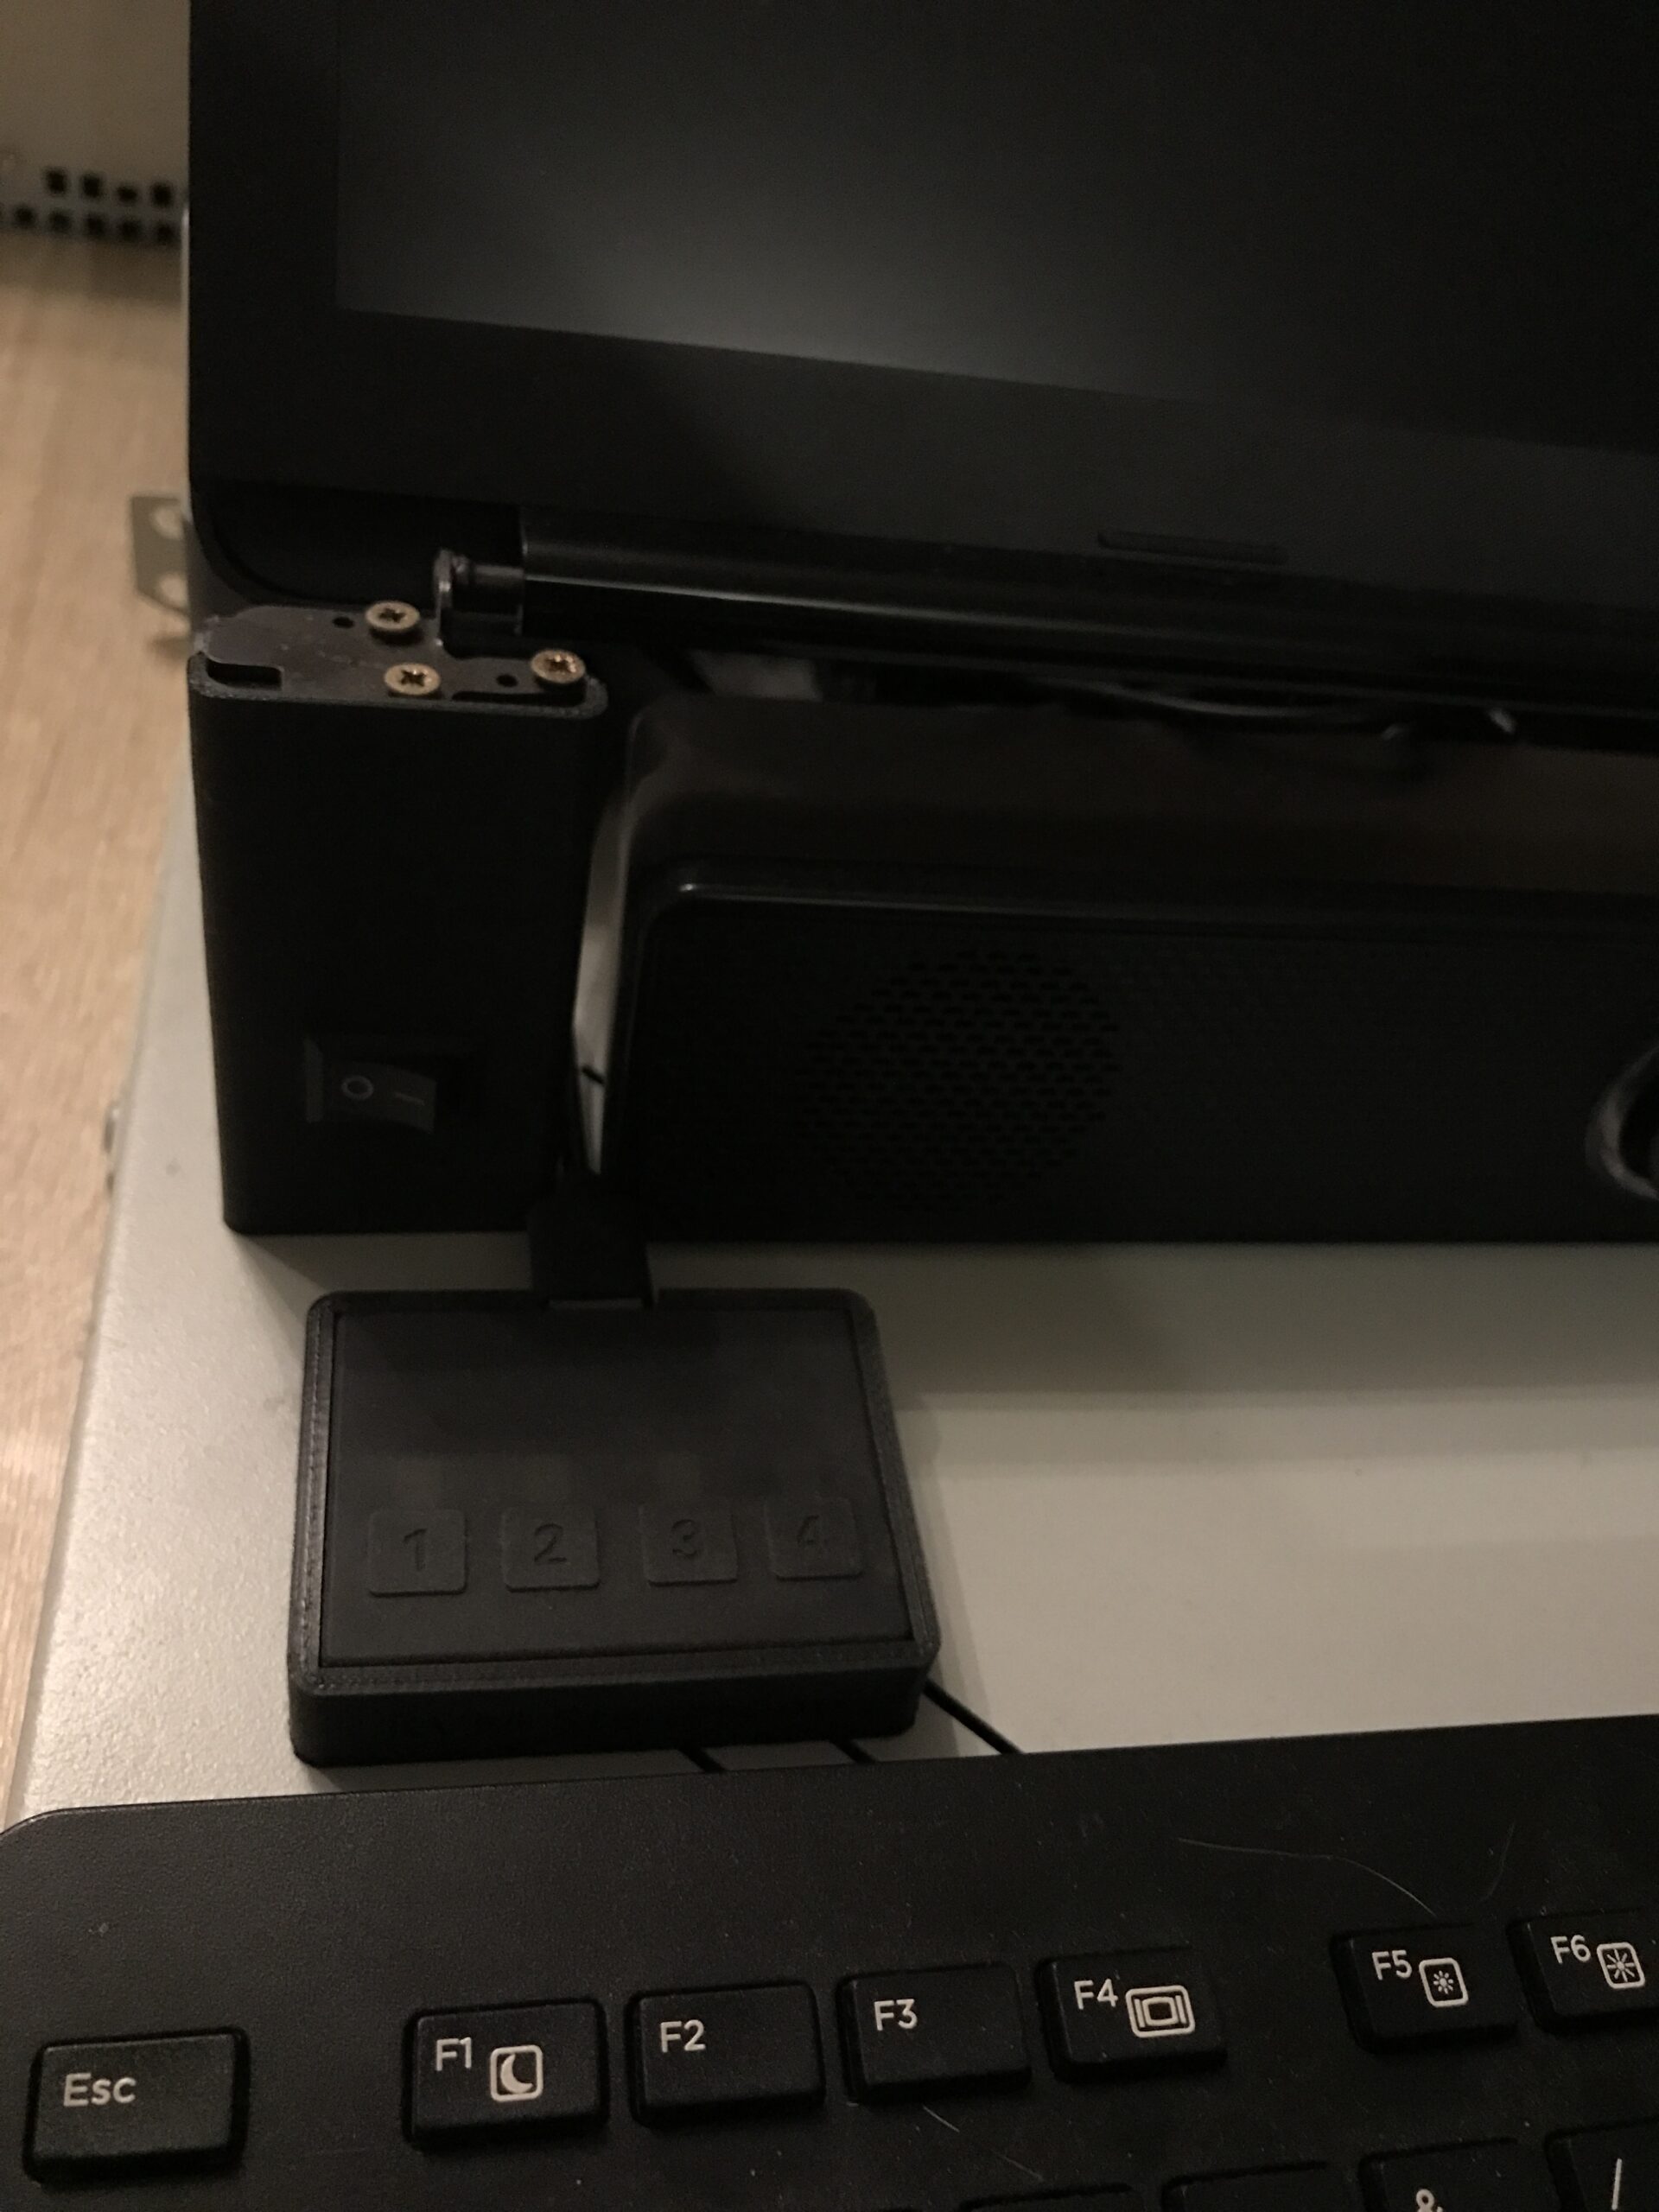
- Quad HDMI+USB KVM switch
- HP keyboard and mouse
- Quad USB power supply
- Double safety socket
- C14 socket
- Some Velcro cable ties and small parts (screws, nuts, etc.)
After some CAD and 3D printing, the finished result looks like this:
Thoughts on the design
- A 230V / 10A rocker switch is integrated into the left “foot” of the screen mount as the main switch.
- The right “foot” has an oval opening to allow easy access for the USB cables from the keyboard and mouse.
- All devices are fixed in housings that are screwed onto a gray-painted 20 mm multiplex strip.
- When closed, the screen also functions as a dust cover for the mouse and keyboard (the mouse is stored on the keyboard).
- The speaker receives its analog stereo signal from the LCD controller, which splits the audio signal from the HDMI input. This is convenient, saves cables, and provides sound output.
- The entire project is powered by a single power cable and switched on or off with a single switch.
- Cable management is provided in the form of printed clips screwed into the multiplex.
It is questionable whether four separate servers will be sufficient for me. On the other hand, I also own enterprise servers, and these can be managed adequately with IPMI. The current plan is to connect the three Proxmox servers and the Proxmox backup server there.