
The following procedure has proven to work well, regardless of the newly built system:
First, check whether there are any BIOS/UEFI updates available from the motherboard manufacturer, in my case ASUS—there was a newer version (v1501). I installed this using a FAT32-formatted USB stick. Even if there had been no newer version, continue with:
Set everything in UEFI to factory settings and then to minimum settings, i.e.:
- RAM at minimum clock speed, i.e., simply leave the existing setting (presumably 2133 MHz for DDR4) unchanged.
- Processor settings all “original”
- Prepare Windows—disable CSM/Legacy, enable TPM, boot order, enable Secure Boot if desired, etc.
First, install a fresh copy of Windows, if you don’t already have one, to rule out software problems later on and avoid unnecessary background processes and legacy issues that could interfere with overclocking. I installed Windows 11 Pro 24H2, bypassing the “incompatibilities.”
Required software
Once Windows is installed, you can let the system install the drivers itself via a working Internet connection—that’s the easiest way. Then install the updates offered and restart the whole thing. Next, check in Device Manager to see if drivers have been installed for everything relevant—usually they have.
However, I always take the “old-school” approach:
Before I even install Windows, I download the latest drivers for the components I am using from the manufacturer’s websites (in this case, ASUS, Nvidia, and Intel). Then I install Windows offline and, once that is complete, I install the drivers I downloaded earlier, also offline.
This has the advantage of usually resulting in newer driver versions than those offered by Windows Update. Sometimes the manufacturer’s websites also contain additional information, such as notes on current or past problems, etc., which you would never see if you used the automatic method.
I used the following software to overclock the CPU and GPU:
- HWiNFO – For monitoring
- Prime95 – For load generation, optionally with or without AVX / AVX2
- Cinebench R23 – For generating faults and testing differences
- ASUS ROG RealBench – To generate load in order to test stability
- Unigine Heaven – To generate load on the GPU in order to test stability
- MSI Afterburner – For overclocking the GPU
- MemTest86 – To generate faults on the RAM and memory controller in order to test stability
My goal is to achieve stability in ASUS ROG RealBench, as I believe it reflects moderate to heavy everyday use equally well.
Processor overclocking
Actually, the whole thing isn’t complicated, but you need to have a lot of time and patience.
I first overclocked the i7-7700K statically, ensured stability, and repeatedly pushed it to its limits (voltage, temperatures). Since my goal was 5.00 GHz on all four cores with hyperthreading enabled, I started with that—the delidding I had done beforehand should have made this feasible in terms of temperature.
So I simply set the core voltage to 1.30 volts in the BIOS and set the “CPU Core Ratio” for “All Cores” to “50”. Then I saved, booted Windows, and started HWiNFO / Prime95 with AVX and AVX2 and let it run.
First observation: It runs stably for at least 1-2 hours, but gets quite warm (around 80-85 °C).
Then back into the UEFI and down with the voltage, now to 1.25 volts – then tested again.
Temperatures have dropped to just under 80 °C, still everything stable.
I did this until I reached 1.18 volts, at which point I had my first “quick” blue screen.
So I increased it again to 1.22 volts. It then ran for many hours, stable with acceptable temperatures (still ~ 80 °C). Without delidding, even that would have been either barely possible or not possible at all; I’m at the limit.
Next, I ensured stability with ROG RealBench, which is a realistic everyday measure for me; it has to be stable in the end. It was, it runs smoothly and, of course, cooler; I saw a maximum of 75 °C on the hottest core.
Great, I would be satisfied with that in principle.
But now, of course, I want to know what will limit me in the end:
The cooling or the voltage?
How far will it go?
Then I dared to increase the clock speed, setting the multiplier to “51,” i.e., 5.10 GHz. I also adjusted the voltage to 1.30 volts to match. Lo and behold: Prime95 with AVX quickly forces the cooler to its knees thermally, the first thermal throttling kicks in, and later the first blue screen appears (well over 100 °C!).
So I continued with 1.28 volts. Same result, thermal throttling—but later. No blue screen.
But you can already see the limit with AVX, 5.00–5.10 GHz. Then the air cooler, which otherwise does a really good job and is also tolerably quiet, reaches its limit.
After only a few minutes of ROG RealBench, a blue screen appears.
The journey with AVX seems to be over here, from now on I’ll optimize the system for “stable everyday use with a little AVX.”
And I’ve still come a long way:
The final result:
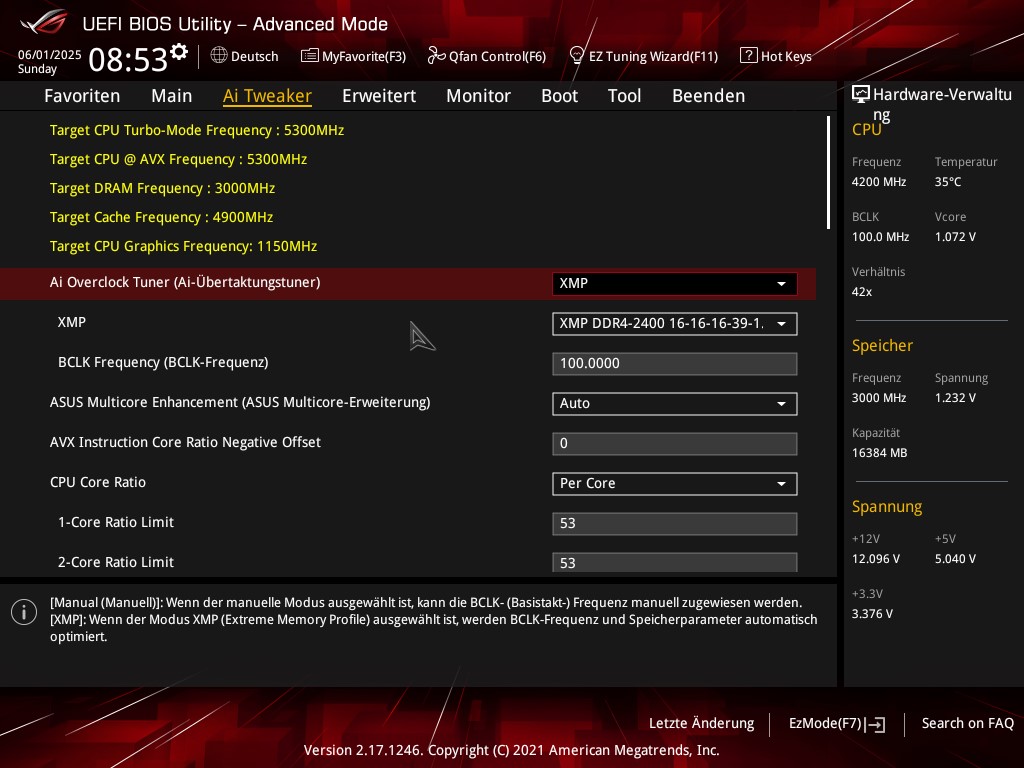
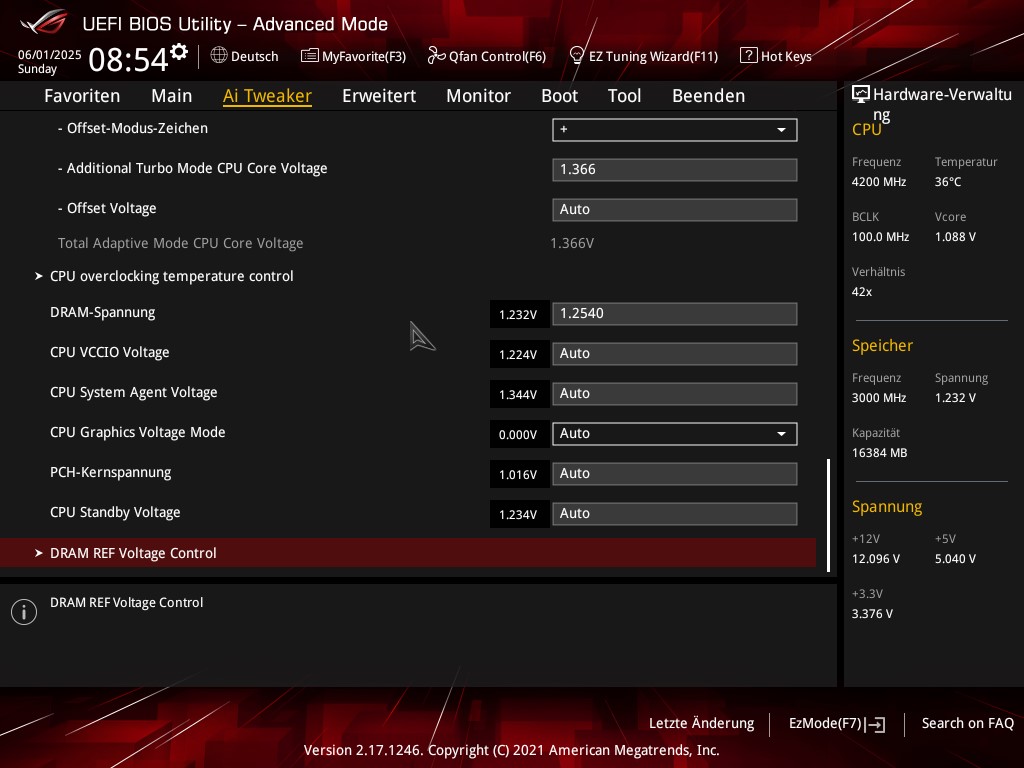
First of all: I made it very easy for myself with the RAM. I simply loaded the stored XMP profile for 2400 MHz 16-16-16-39 at 1.20 volts, slightly increased the DRAM voltage to 1.2540 volts, and set the memory frequency to 3000 MHz, nothing else!
The whole thing ran for days with Memtest86 without any errors. That was a 25% performance boost for free.
Above 3000 MHz, errors occurred that would have required very time-consuming fine-tuning to fix, but that wasn’t my focus.
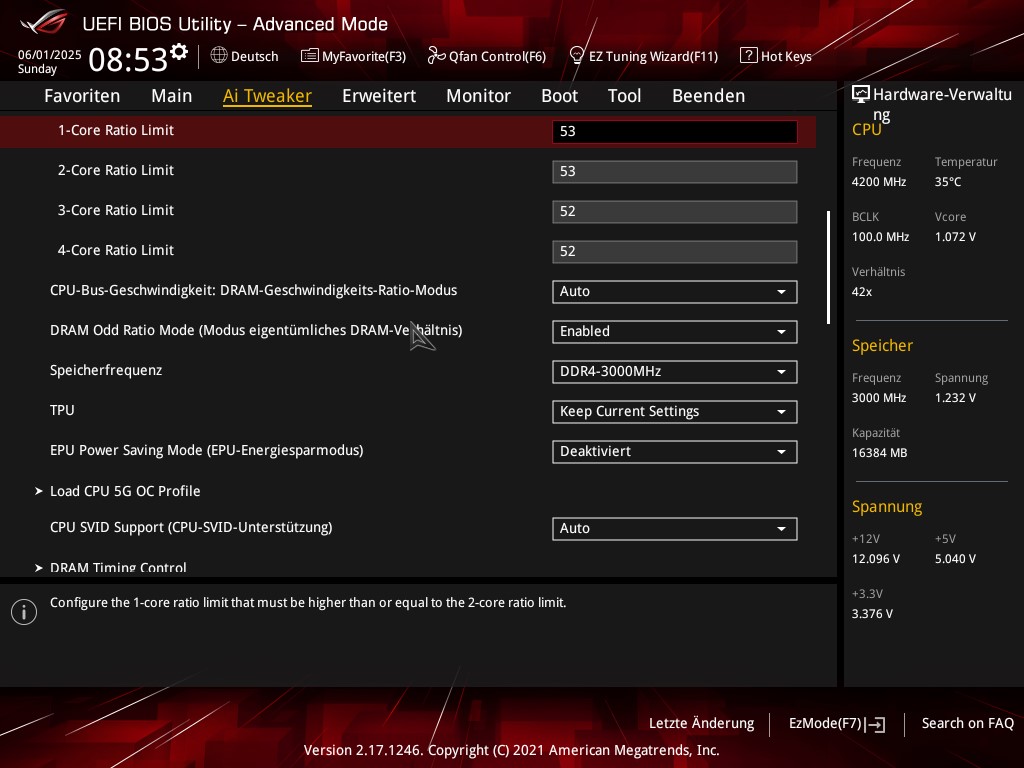
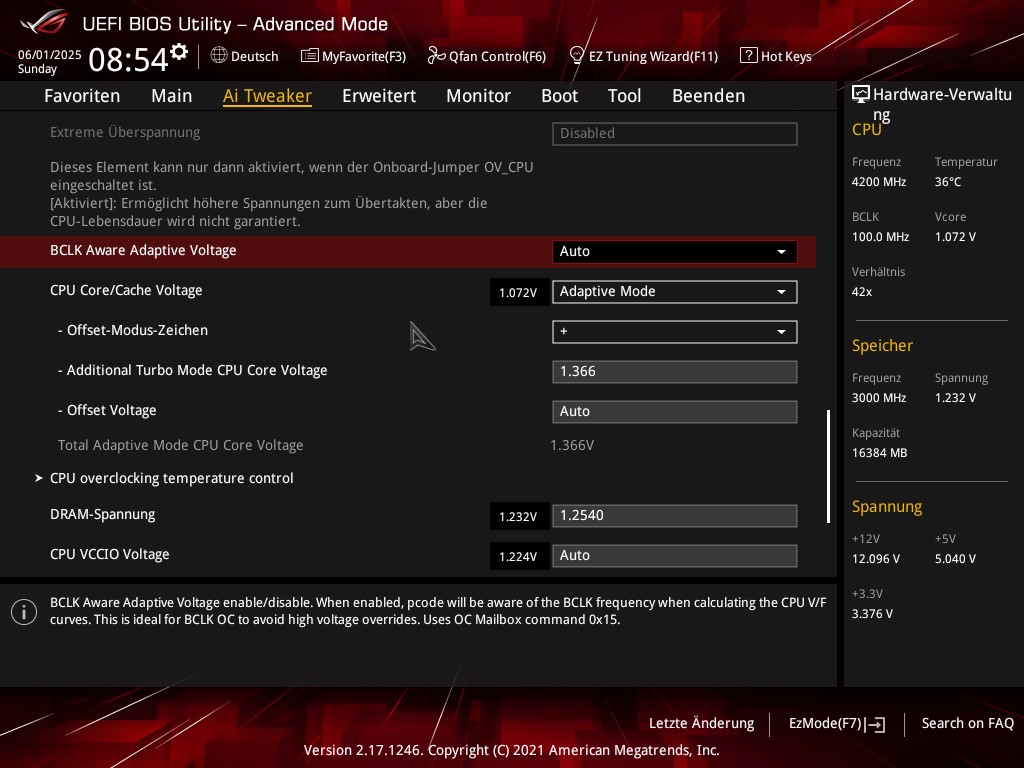
For the processor, I switched from static overclocking at 5.20 GHz with over 1.35 volts to adaptive overclocking. 5.30 GHz on all cores got too hot – it took a few minutes, but throttling kicked in.
In the end, of course, I spent hours experimenting and days testing to see what worked best and how close I could get to the limits.
The CPU now runs as follows:
Load on 1–2 cores = 5.30 GHz at LLC 6 with adaptive auto voltage, slightly above 1.42 volts in HWiNFO under load.
Load on 3–4 cores = 5.20 GHz at LLC 6, also adaptive, then 1.385 volts under load.
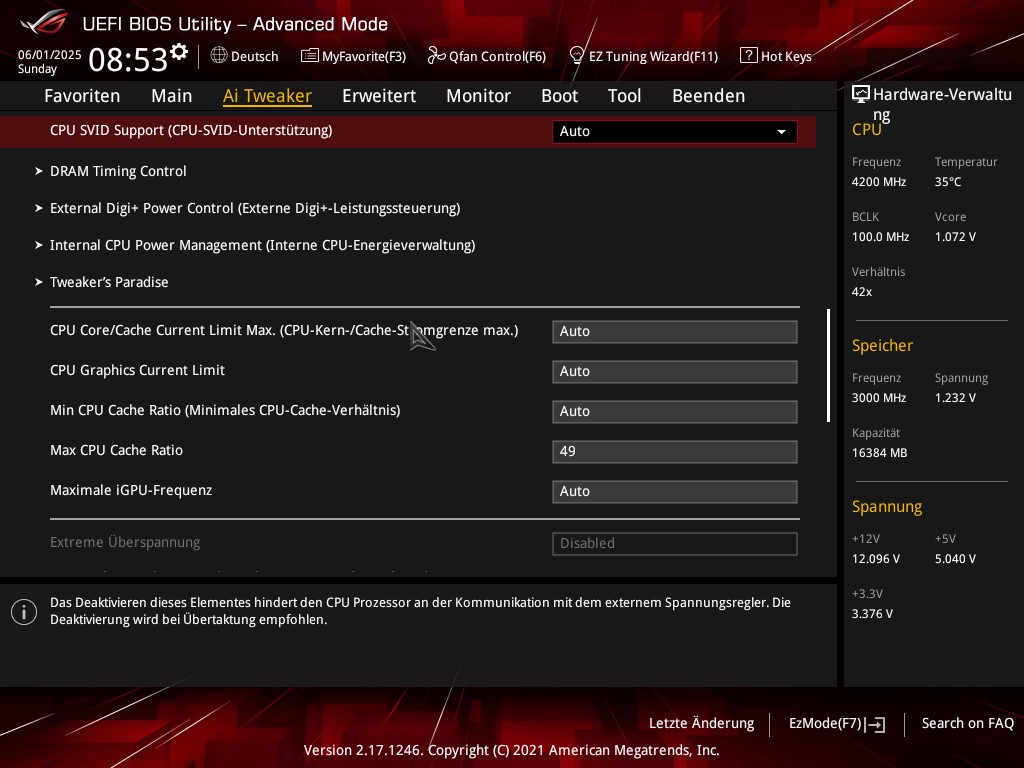
Cache = 4.90 GHz, above that it quickly became very unstable.
Without AVX, I am therefore at both the temperature and voltage limits; it would not be possible to go any further without entering even more dangerous voltage regions. I find 1.42 volts to be borderline; my limit was actually 1.40 volts.
I couldn’t use an AVX offset without the turbo and power-saving mechanisms only working halfway afterwards, or the single-core clock speeds never being reached, as Windows 11 seems to use AVX instructions quite often. I wanted to achieve a dynamic overclock that is also capable of downclocking in idle mode to save heat and power – hence the use of an adaptive “auto” offset in the first place.
Conclusion:
This inexpensive cooler packs a punch – without AVX, I can push the CPU to almost its maximum capacity. At the same time, the board’s power supply is so good that I have never experienced any problems in this regard (I didn’t have any additional airflow over the VRM coolers!).
I would describe the clock speeds as very high, achieved at the expense of equally high voltage. Here is a comparison of the changes:
| Original | Overclocked |
|---|---|
| Base clock 4.20 GHz | Base clock 4.20 GHz |
| Boost clocks 1 – Core: 4.50 GHz 2 – Cores: 4.40 GHz 3 – Cores: 4.40 GHz 4 – Cores: 4.40 GHz | Boost clocks 1 – Core: 5.30 GHz 2 – Cores: 5.30 GHz 3 – Cores: 5.20 GHz 4 – Cores: 5.20 GHz |
| RAM clock speed according to Intel 2133 / 2400 MHz | RAM clock speed 2400 XMP @ 3000 MHz CL16 |
| Power saving mechanisms Yes, all | Power saving mechanisms Yes, all |
| Power consumption Idle: ~10 Watts Full load Cinebench: ~88 Watts Full load Prime95 with AVX: ~115 Watts | Power consumption Idle, HWiNFO: 5 – 10 Watts Full load Cinebench: ~115 Watts Full load Prime95 with AVX (not stable!): ~165 Watts or more |
| Cinebench R23 Single: 1230 Points Multi: 6302 Points | Cinebench R23 Single: 1423 Points Multi: 7112 Points |
| Differences Single: + 15,7 % Multi: + 12,9 % |
Cinebench and PassMark results:
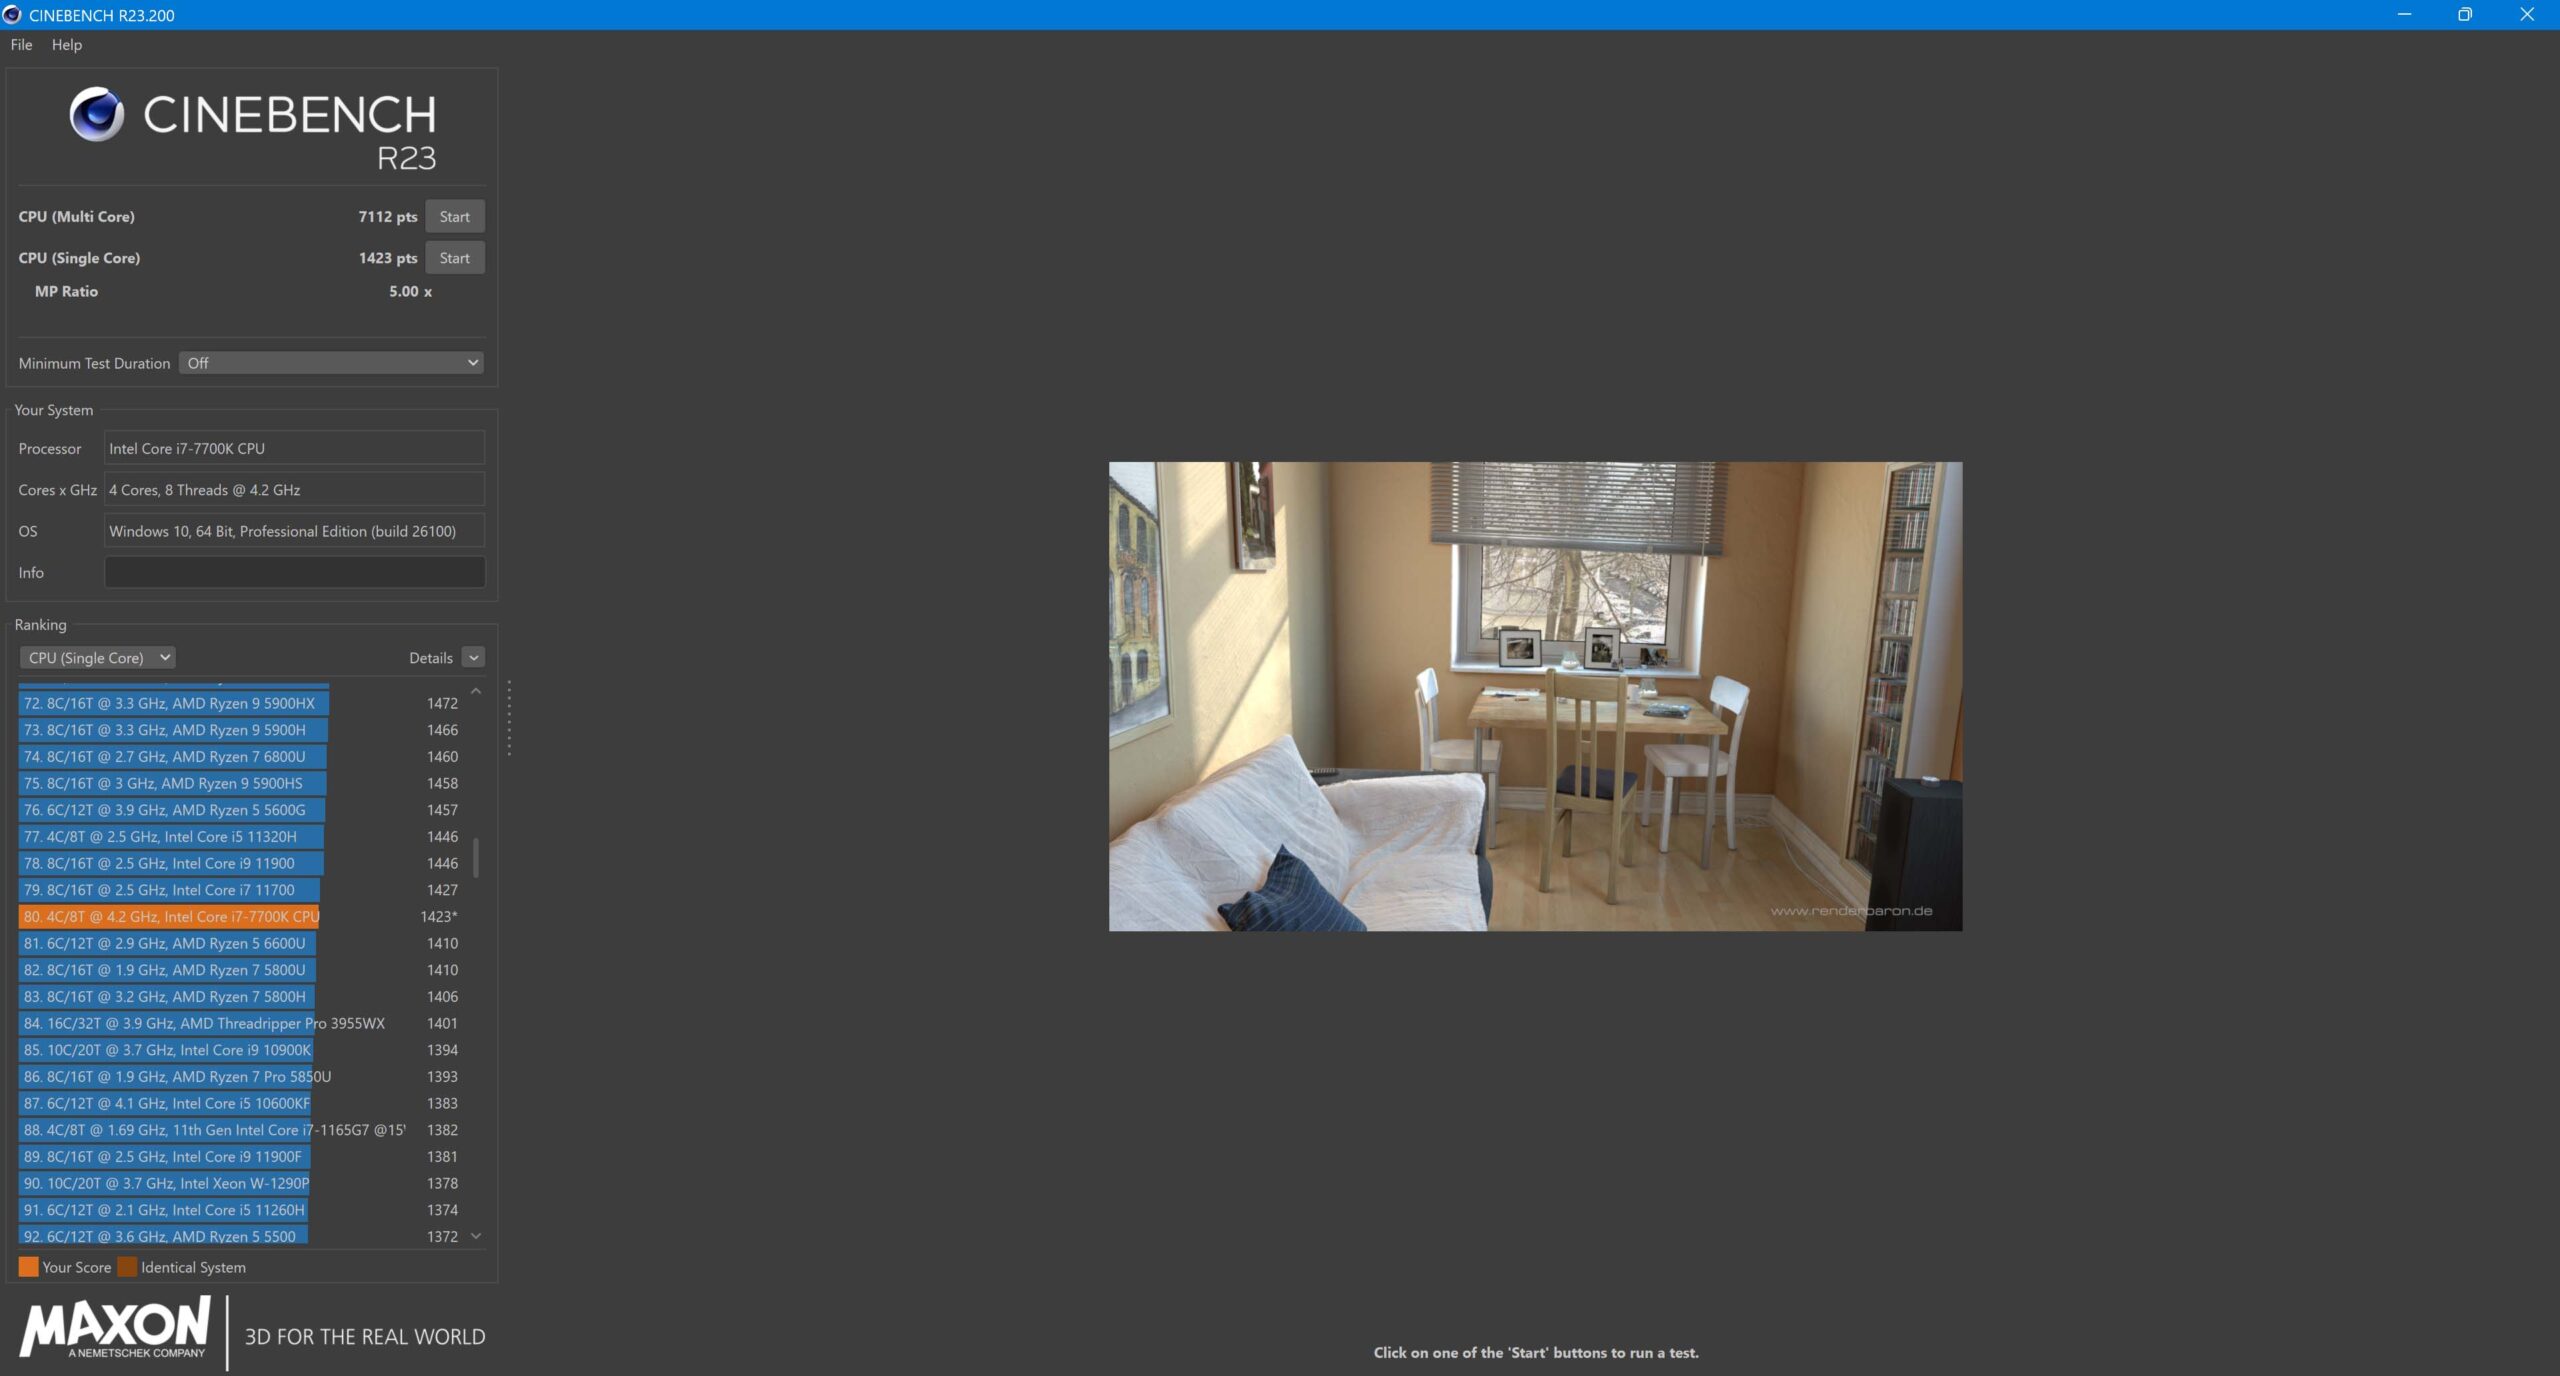
First, Cinebench R23 with single-core overview – 1423 points.
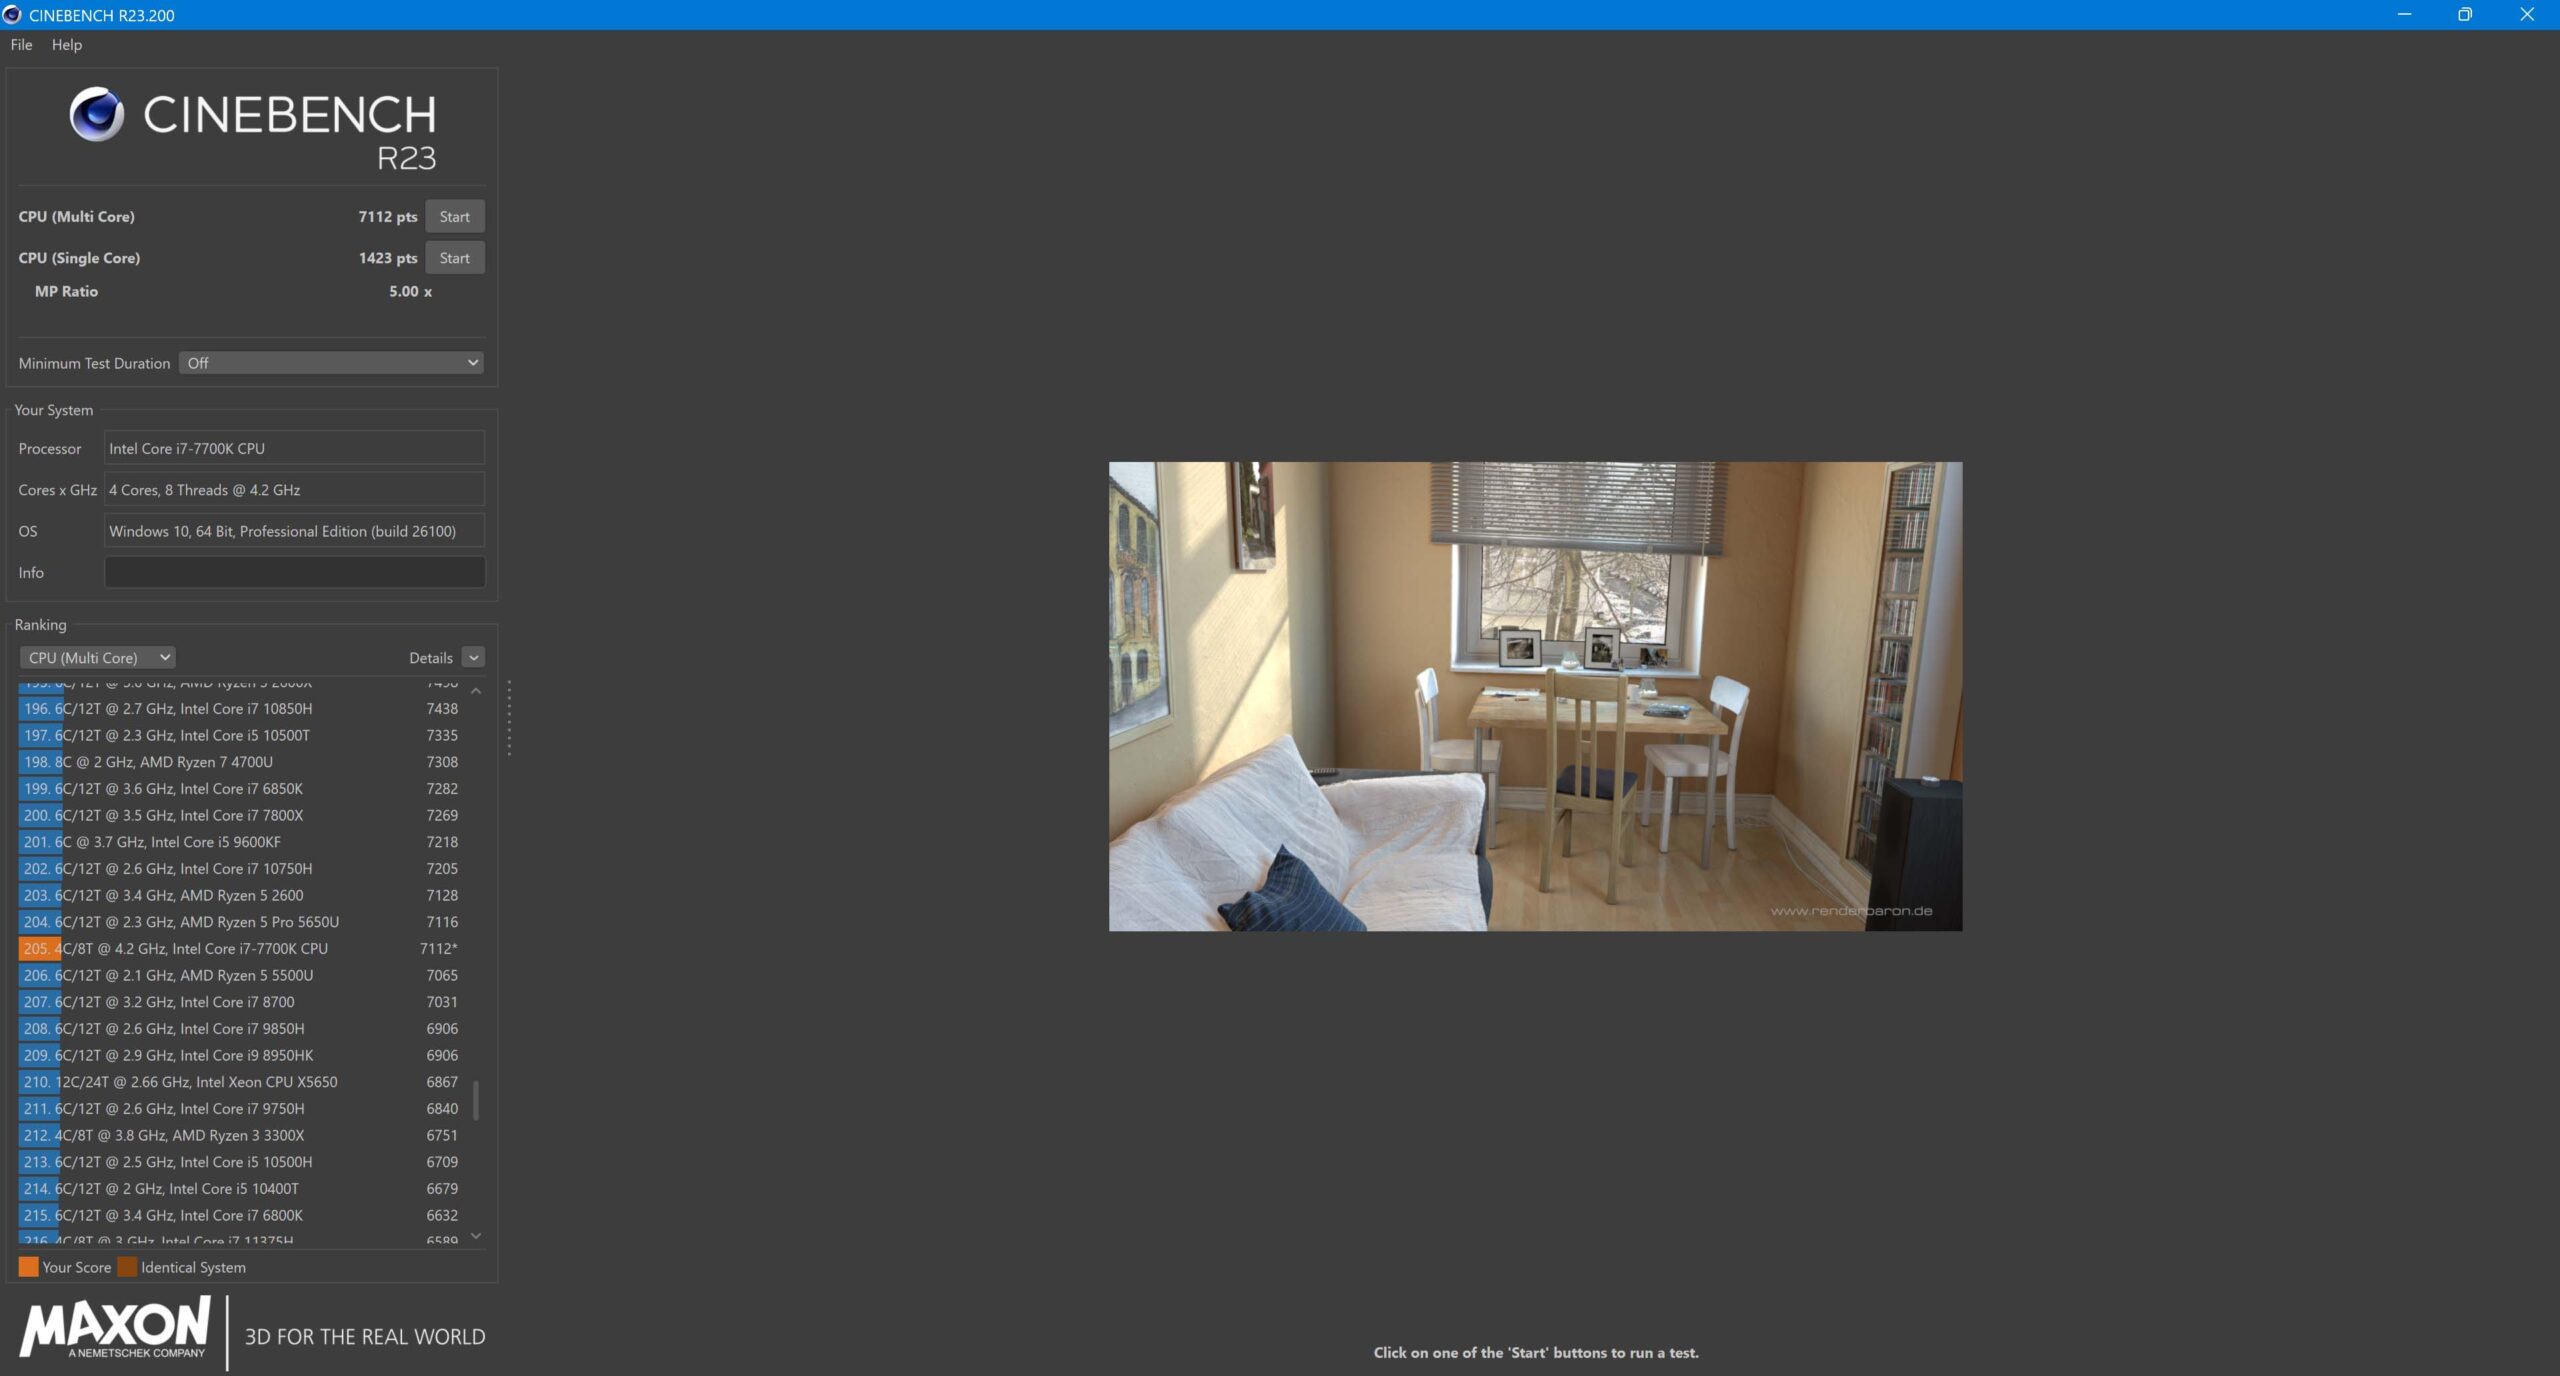
Then with multi-core overview – 7112 points.
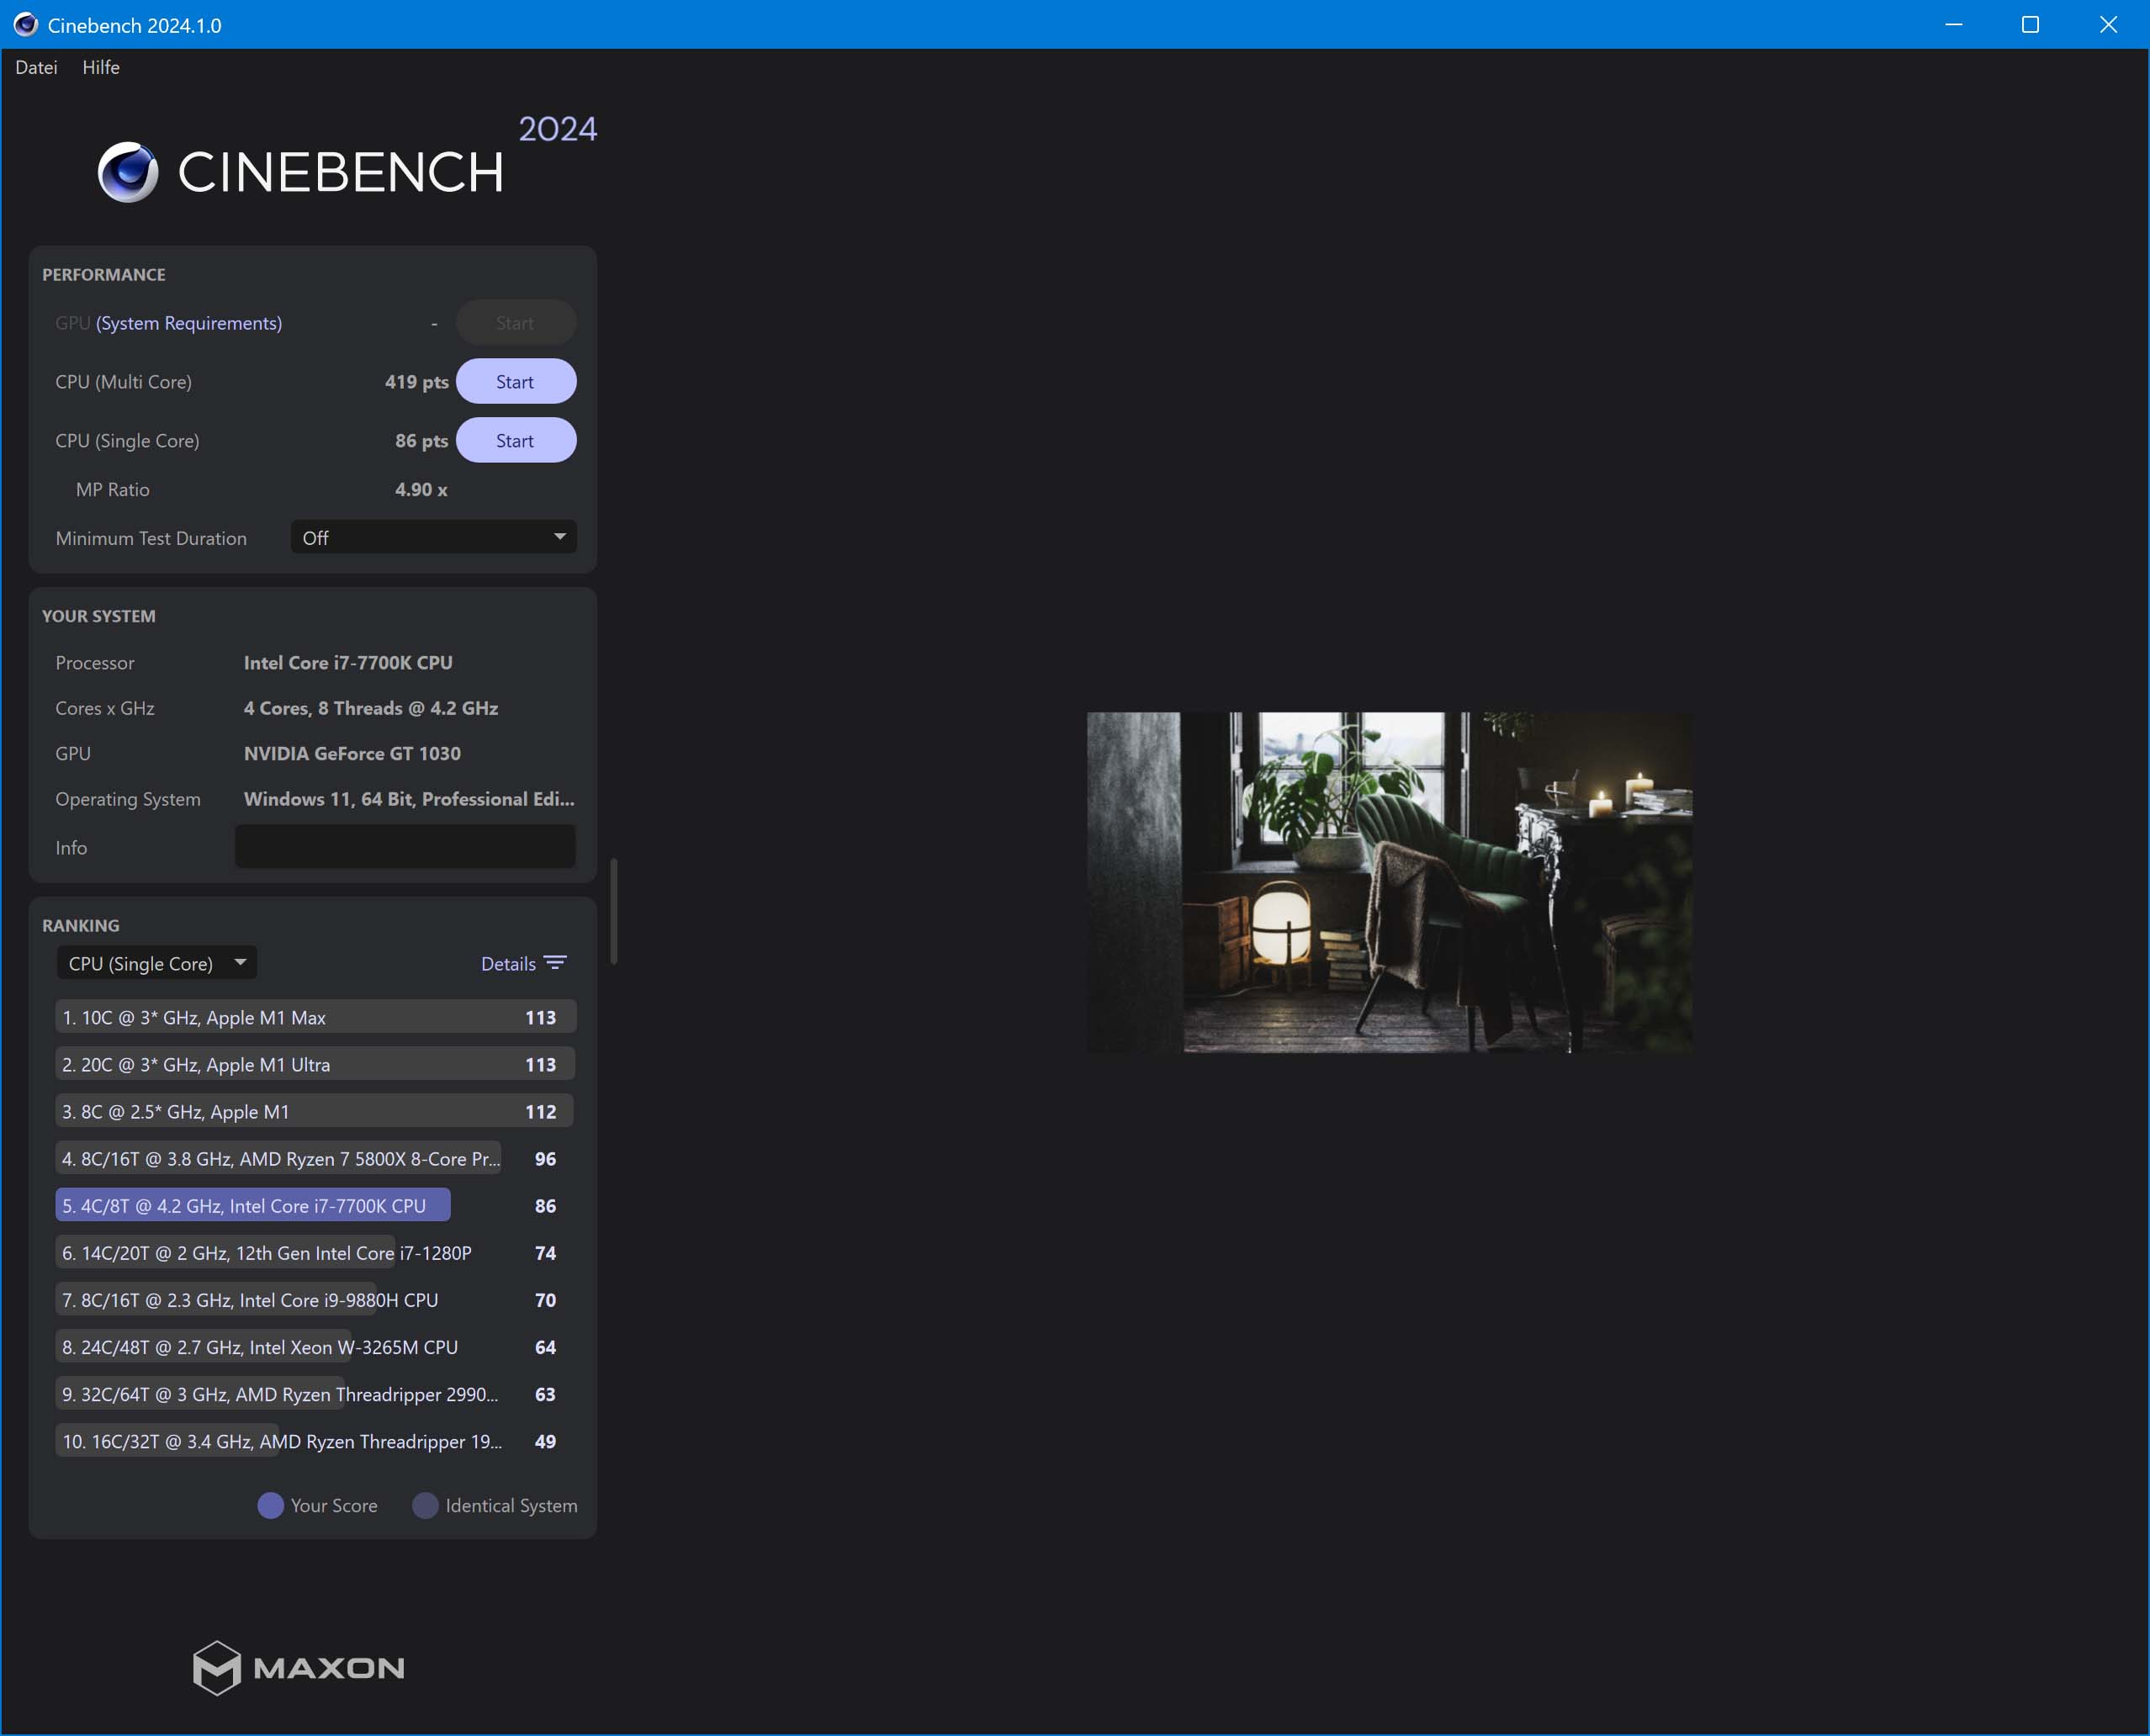
Finally, Cinebench R24 – 86 points or 419 in multi-core.
When compared to other CPU models, it is easy to see how far the i7-7700K has risen, especially in terms of single-core performance. Temperatures were consistently around 90 °C while Cinebench was running.
Click here for the PassMark PerformanceTest v11.1 Baseline.
What about the graphics output?
We’ll continue with that in the next post.