
Since the Quadro 2000M now appears to be running on the hardware side, the previously downloaded Nvidia graphics drivers must now be installed, matching the respective operating system.
However, these do not work out-of-the-box, but must be slightly modified.
In order for the modified version of the drivers to be installed, driver signing must be temporarily disabled in Windows 10 and 11. This should not be relevant for Windows XP, Vista, 7, or 8/8.1.
How to disable driver signing:
- Restart the computer by holding down the Shift key and clicking on “Restart” in the Start menu.
- Now “Please wait” should appear and, depending on the PC, it should restart.
- Now select the “Troubleshoot” button.
- Then click on “Advanced options” -> “Startup settings”
- A list of possible options should appear; select “Restart”
- When Windows restarts, the list should appear again and you can select the correct entry, “Disable driver signing” by pressing “7”
- Then simply wait until the operating system has completely restarted. The driver should now install without any problems.
The signature is only checked during installation. Once everything has been installed and the computer has been restarted, this check is automatically re-enabled and the driver still runs without any problems.
Let’s get started with the driver modification:
I will now show you the procedure for Windows 11 Professional. For Windows Vista, 7, 8, and 8.1, the procedure should be identical or very similar. For Windows XP, the procedure differs slightly as fewer files need to be edited. Fortunately, you can see this immediately by simply paying close attention to the file names and entries (just ignore the missing files).
I have successfully performed this driver modification on Windows XP Pro SP3, Windows 7 Ultimate x64 SP1, Windows 10 Pro 22H2, and Windows 11 Pro 24H2, and everything is running 100% stable.
Getting started:
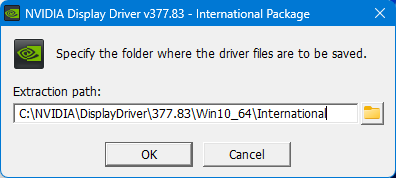
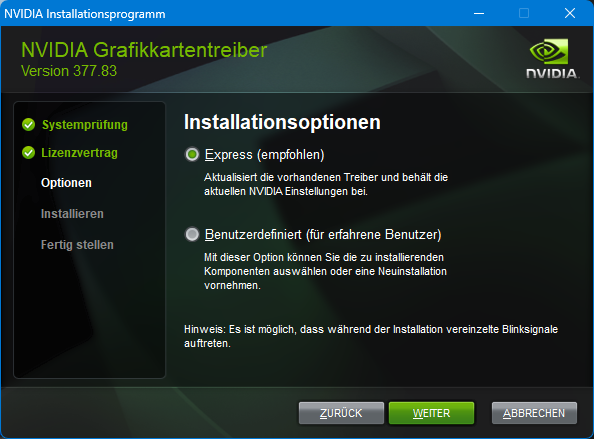
Now, pretend you want to install the driver normally and click “OK” here:
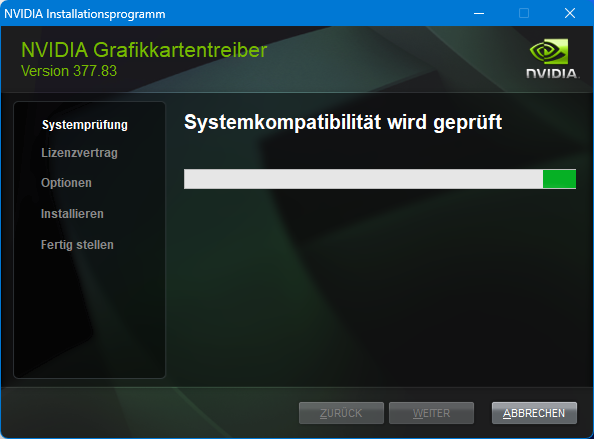
Until the setup, which runs automatically after unpacking (with the usual administrator rights prompt in between), then reports “The graphics driver could not find compatible graphics hardware”:

Then finish the setup with “X” or “Close” and navigate to the directory
where the driver was previously temporarily unzipped. By default, this would be at least in Windows 10 and 11:
C:\NVIDIA\DisplayDriver\377.83\Win10_64\International\Display.Driver\Find out the PCI ID of the installed GPU:
Now open Device Manager and find the graphics card that should not yet have a “real” name (“Microsoft Basic Display Adapter,” the standard driver).
Once you have found it, right-click on the graphics card entry and open “Properties”.
From there, go to the “Details” tab and select “Hardware IDs” in the combo box that appears.
Then copy the first entry with CTRL+C or the context menu, or simply compare it with the following entry and then conveniently copy everything that follows without modification if the string matches:
The PCI ID of my Dell MXM card is:
PCI\VEN_10DE&DEV_0DDA&SUBSYS_1521103C&REV_A1
Note the vendor (manufacturer), i.e. Nvidia (“10DE”), which makes sense. The Quadro 2000M obviously has the device ID “0DDA”, so far so good. But here’s where it gets interesting: the Sub-ID appears to be “1521” and this is completely missing from the driver. That’s where the problem lies, so let’s change that now.
If the PCI ID copied earlier in Device Manager now shows a number other than “1521” at the location shown, this number must be replaced with the different number in all subsequent text (in which case it is a Quadro 2000M from another board partner, with a different internal model number).
Reminder:
This driver modification applies EXCLUSIVELY to this specific Nvidia Quadro 2000M type. Other models may be compatible, but everything that is now being changed would have to be adapted, otherwise nothing will work.
Next, files need to be edited:
Notepad++ is very helpful for this kind of thing, firstly because of the option to obtain administrator rights retrospectively (which you also need in a subfolder of C:\ to edit files) and secondly because of the convenient context menu entry for opening files. Nevertheless, I will show the process here using Windows’ own “Editor.”
The easiest way is to find the sections beginning with “Entry” using the search function in the editor you are using (CTRL+F). The following entries must be added, first in the file:
nv_dispwi.inf
In the entry (quite high up in the file):
[NVIDIA_Devices.NTamd64.10.0…14310]
Add at the end of the block:
%NVIDIA_DEV.0DDA.1521.10DE% = Section003, PCI\VEN_10DE&DEV_0DDA&SUBSYS_1521103C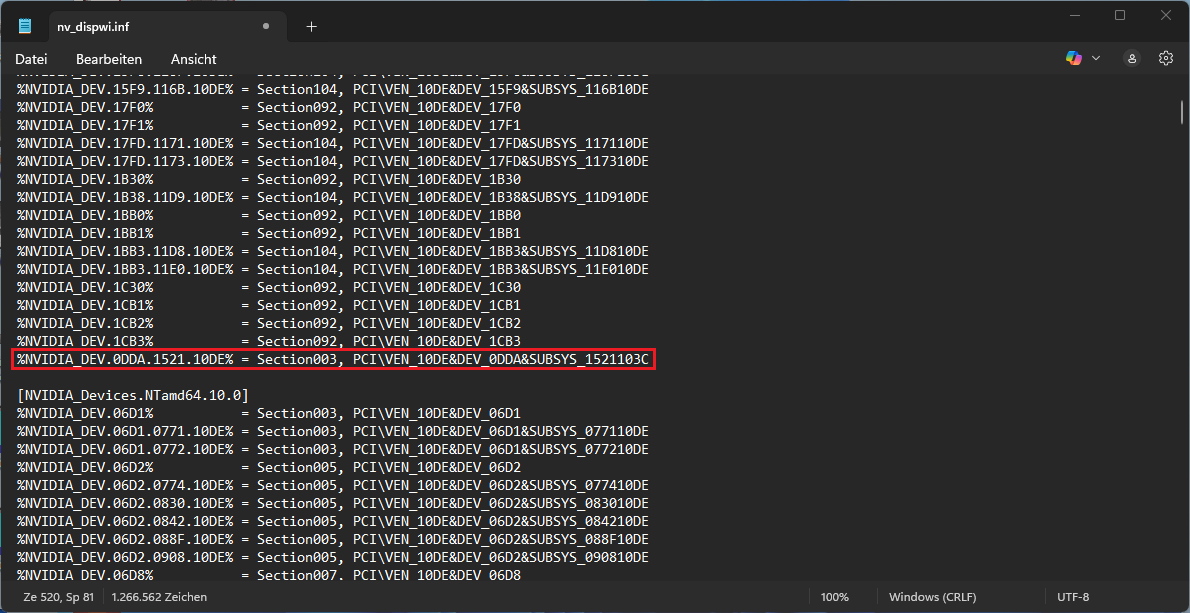
Then in the entry (directly below):
[NVIDIA_Devices.NTamd64.10.0]
Add the same at the end of the block:
%NVIDIA_DEV.0DDA.1521.10DE% = Section003, PCI\VEN_10DE&DEV_0DDA&SUBSYS_1521103C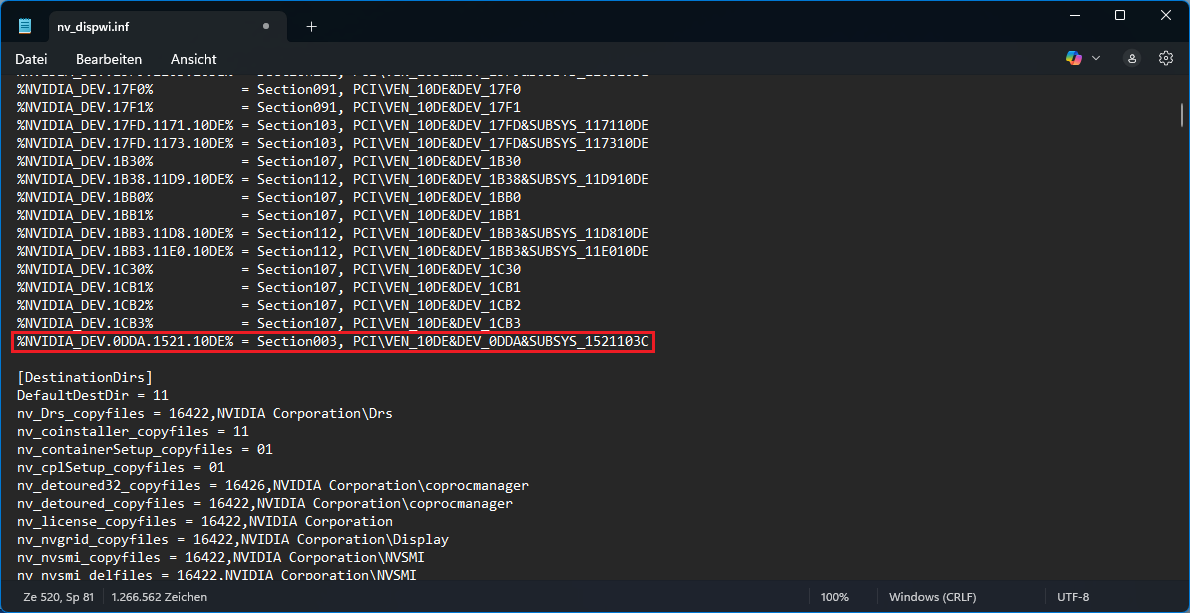
Last entry in this file (at the bottom):
[Strings]
It is best to insert this under the existing entry “Quadro 1000M”:
NVIDIA_DEV.0DDA = "NVIDIA Quadro 2000M"…this ensures that the GPU is correctly recognized and displayed throughout the system.
Note that this entry is completely missing (as is the screenshot), but curiously, many other Quadros from this generation and model series are present. Perhaps the Quadro 2000M was only available to OEMs who received special drivers at the time?
The NVS 5100M is also missing here.
Next up is this file:
nvblwi.inf
In the entry (again quite high up in the file):
[NVIDIA_Devices.NTamd64.10.0…14310]
Add at the end of the block:
%NVIDIA_DEV.0DDA.1521.103C% = Section003, PCI\VEN_10DE&DEV_0DDA&SUBSYS_1521103C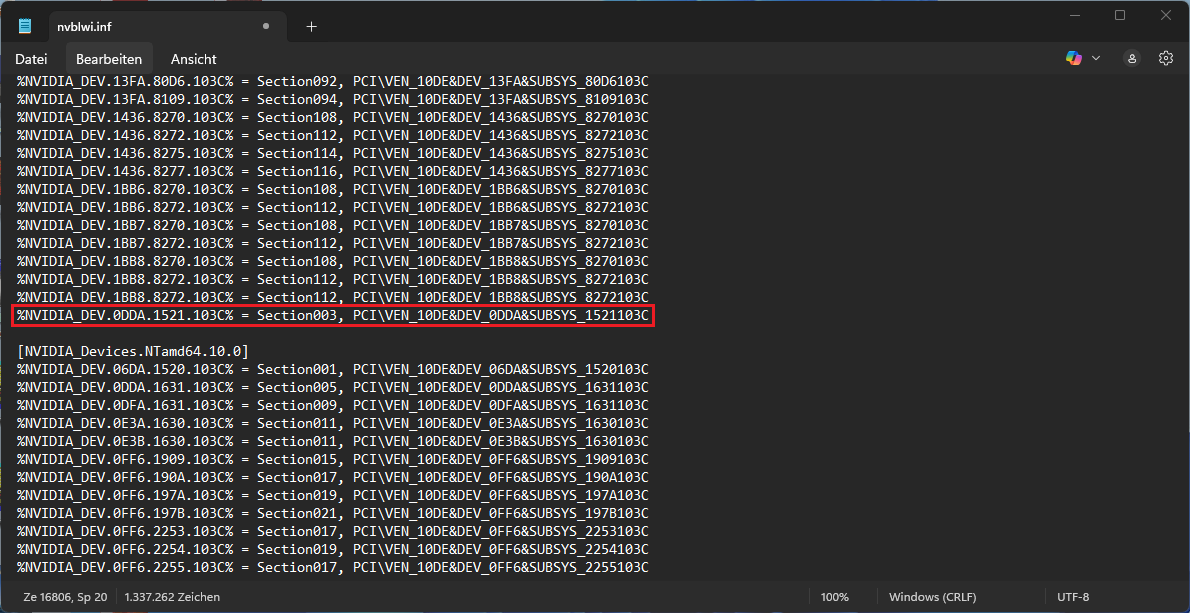
Then in the entry (directly below):
[NVIDIA_Devices.NTamd64.10.0]
Add the same at the end of the block:
%NVIDIA_DEV.0DDA.1521.103C% = Section003, PCI\VEN_10DE&DEV_0DDA&SUBSYS_1521103C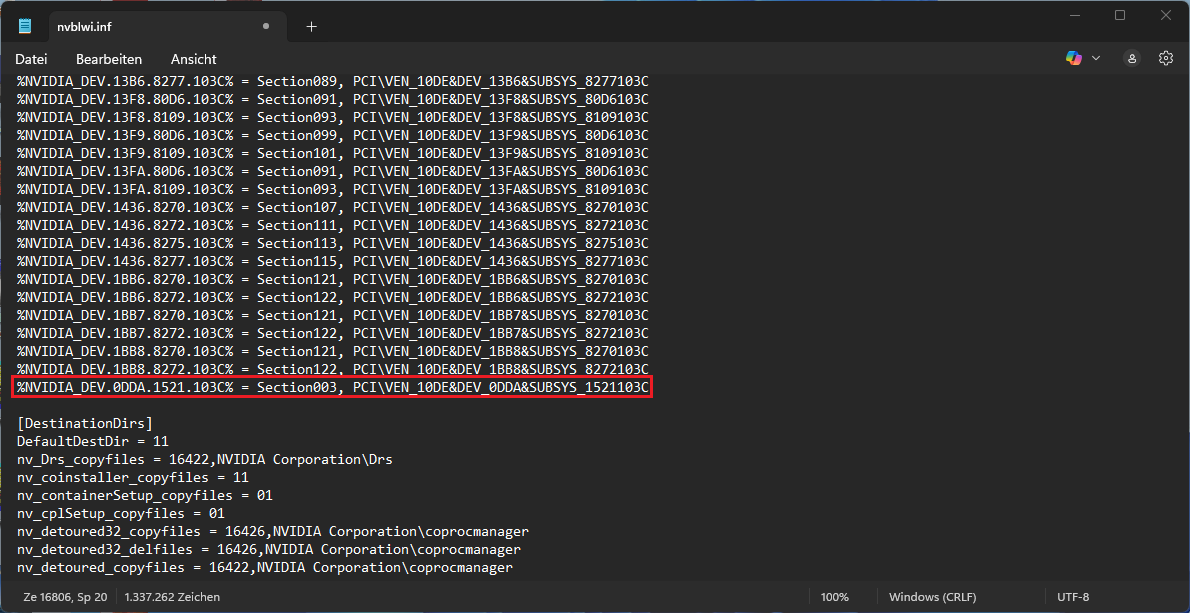
Here too, most recently in this file in the entry (far below):
[Strings]
It is best to insert this under the existing entry “Quadro 2000M” with a different ID:
NVIDIA_DEV.0DDA.1521.103C = "NVIDIA Quadro 2000M"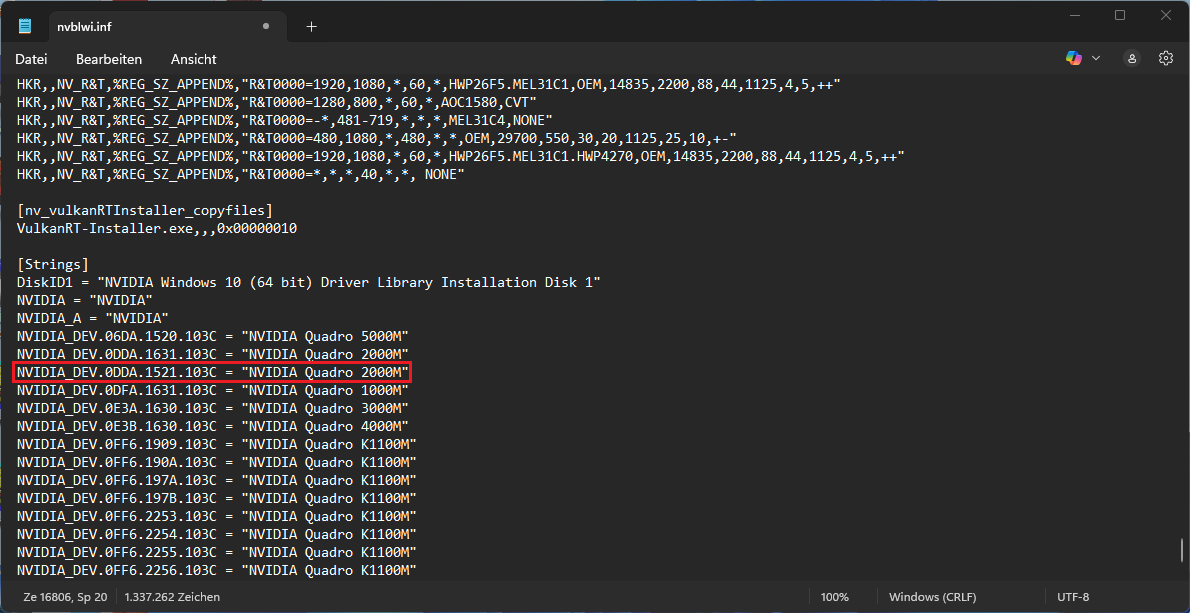
Finally, it’s time to tackle this file:
nvdmwi.inf
Only the entry:
[Strings]
Also to be supplemented with “Quadro 2000M” with the other ID:
NVIDIA_DEV.0DDA.1521.1028 = "NVIDIA Quadro 2000M"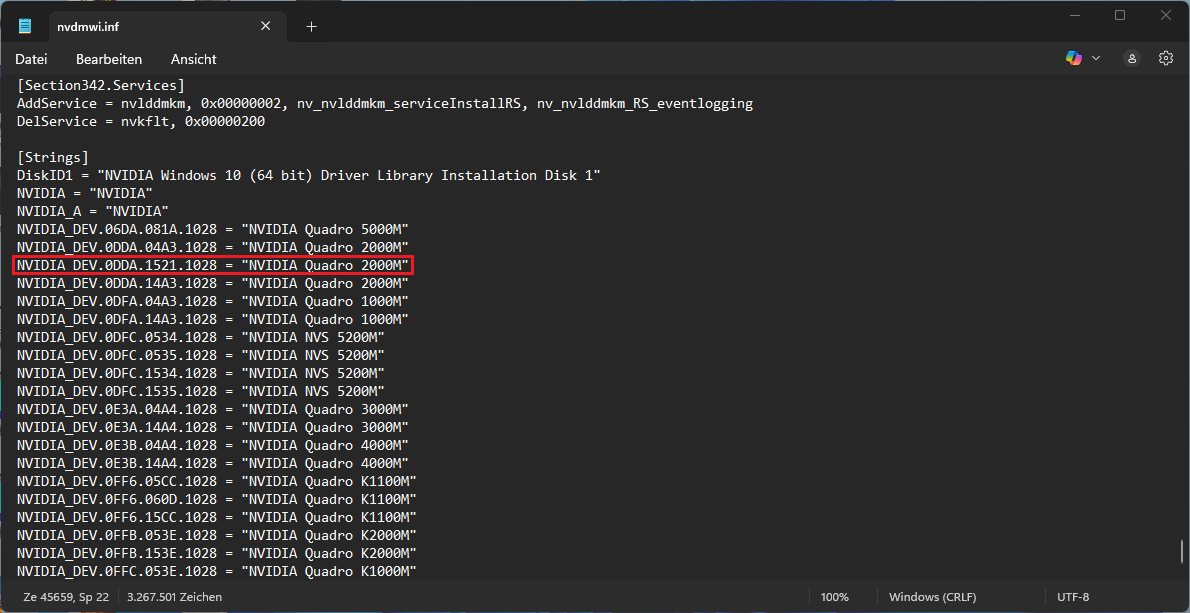
Next, the entire “NVIDIA” folder should be copied to a directory where users also have write permissions. The easiest place would be the desktop.
This is very important to note, as I otherwise received various error messages regarding file permissions and the installation was canceled!
Now we should be able to install the driver
You can then restart the installation with “setup.exe”:

…Great, it seems to be working!
Once the installation is complete, you can check that it was successful in Device Manager, preferably after restarting the system:
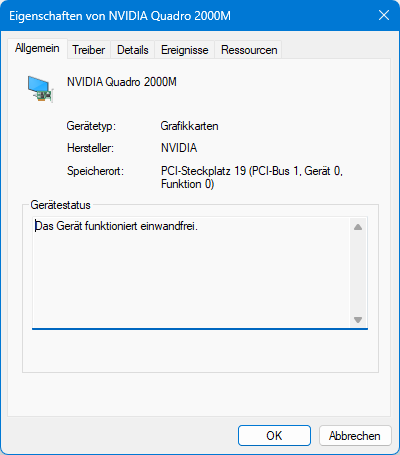
If everything works, the temporary “NVIDIA” directories and the previously downloaded driver package can be deleted.
Unexpected positive side effects:
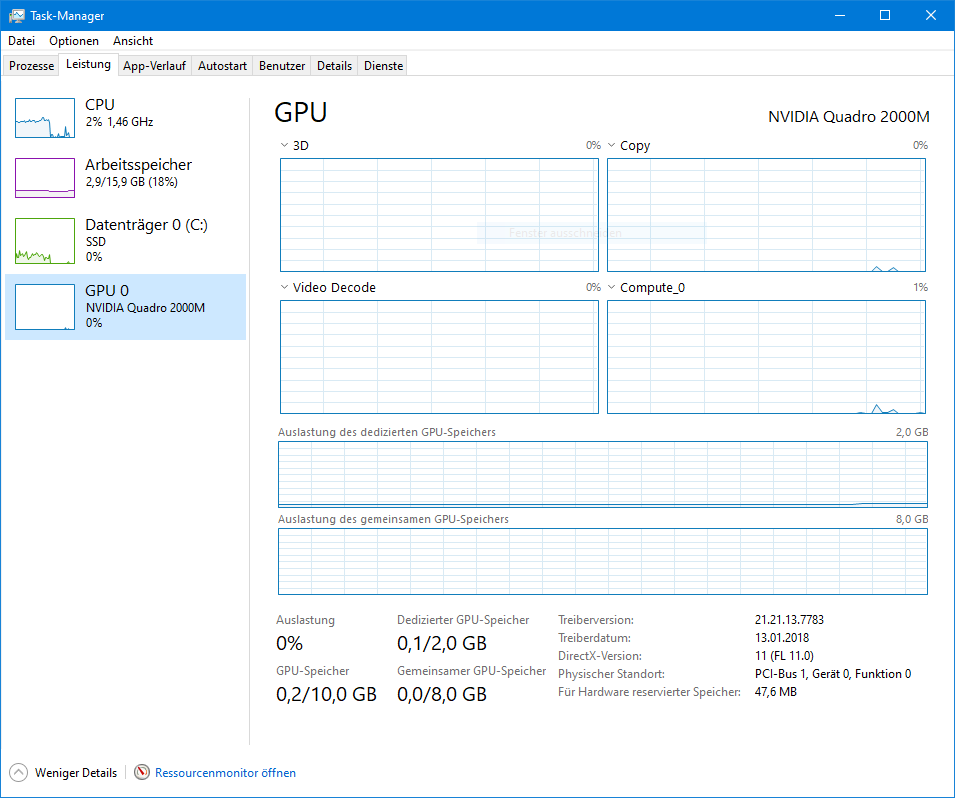
As a bonus, you can now see in the Windows 10 or 11 Task Manager that the Quadro 2000M is listed as a GPU in the “Performance” tab and can therefore be monitored. This was not the case with the NVS 5100M, which was too old – none of the cards offered by HP as compatible should be able to do this.
This is because, unlike the NVS 5100M, the Quadro 2000M supports DirectX 11 and thus also a newer WDDM from Microsoft – this compatibility is a prerequisite for this functionality. We now have this virtually free of charge:
To ensure that everything really works, I put a 3D load on the card for a longer period of time (see next post). Then I tested the DisplayPort (on the left side of the notebook) and the VGA port (at the back next to the power supply connection), both of which work without any problems.
Let’s move on to what was inevitable.