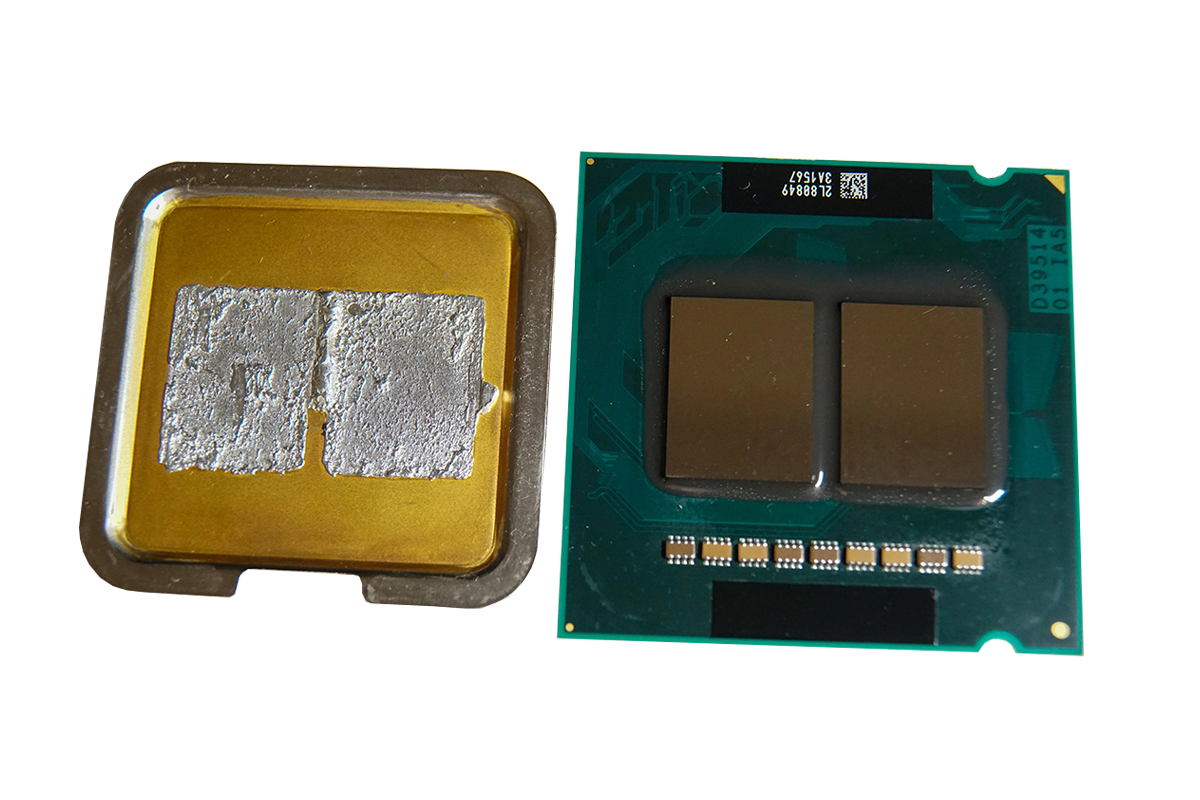
After acquiring one of these desktop processors from Intel a long time ago, I came across the bundle consisting of a motherboard and CPU again while rearranging other hardware. I personally have never overclocked on this platform, but according to everything you read in overclocking circles at the time (2007/2008), there should be quite a bit of potential. Poor heat transfer in the heat spreader is not an issue, as processors from this era were soldered.
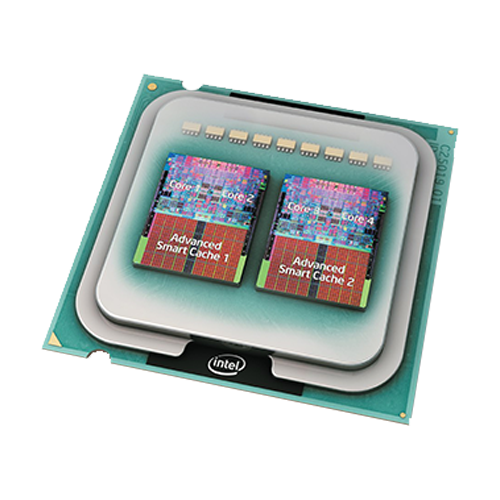
With these first quad-core processors, Intel took the same approach as it had some time before with the first dual-core processor: two dies together on one carrier. From a technical point of view, the result is therefore more of a 2 + 2 core processor, also in terms of other functionalities (shared bandwidth, shared cache, double power consumption, etc.).
Which processors are we talking about?
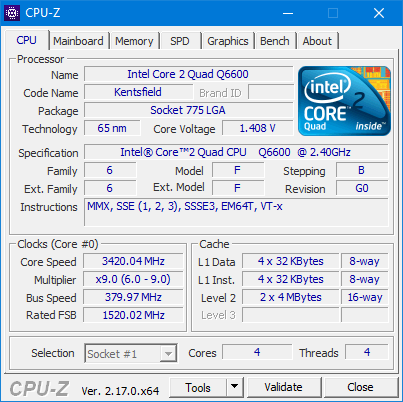
The code name Kentsfield tells seasoned overclockers everything they need to know: the first mainstream quad-core CPUs were called Intel Core 2 Quad Q6xxx. The most legendary model, the Q6600 (test from back then), was first available in the “B3” stepping with 105 watts TDP and shortly thereafter in the improved “G0” stepping, then with 95 watts TDP. The newer G0 revision is generally slightly better, especially when overclocking, where the lower power consumption is very noticeable and significantly increases the headroom.
My Q6600 is the G0 stepping, which is ideal for an “old-school FSB overclocking session.” — the multiplier is locked (only the much more expensive Extreme variants available at the time had an unlocked multiplier). The biggest advantage was getting at least equal performance from the cheapest quad-core processors compared to their expensive counterparts.
These are all the Kentsfield models from back then, excluding Xeon:
| Property | Core 2 Quad Q6400 | Core 2 Quad Q6600 | Core 2 Quad Q6700 | Core 2 Extreme QX6700 | Core 2 Extreme QX6800 | Core 2 Extreme QX6850 |
|---|---|---|---|---|---|---|
| S-Spec | SL9UN | SL9UM / SLACR | SLACQ | SL9UL | SL9UK / SLACP | SLAFN |
| Stepping | B3 | B3 / G0 | G0 | B3 | B3 / G0 | G0 |
| Clock | 2.13 GHz | 2.40 GHz | 2.67 GHz | 2.67 GHz | 2.93 GHz | 3.00 GHz |
| FSB | 1066 MT/s (266 MHz Quad-Pumped) | 1066 MT/s (266 MHz Quad-Pumped) | 1066 MT/s (266 MHz Quad-Pumped) | 1066 MT/s (266 MHz Quad-Pumped) | 1066 MT/s (266 MHz Quad-Pumped) | 1333 MT/s (333 MHz Quad-Pumped) |
| Multiplier | 8x Locked | 9x Locked | 10x Locked | 10x Unlocked | 11x Unlocked | 9x Unlocked |
| TDP | 105 Watts | 105 / 95 Watts | 95 Watts | 130 Watts | 130 Watts | 130 Watts |
| Availability | OEM only | Retail + OEM | Retail + OEM | Retail + OEM | Retail + OEM | Retail + OEM |
| Release | ? | January 2007 | July 2007 | November 2006 | April 2007 | July 2007 |
All of these processors fit into the LGA 775 socket, have 8 (4 + 4) MB L2 cache, and are quad-core. They are all manufactured by Intel with a 65 nm structure size. For serious overclocking to the limits of this generation, an Extreme model with a free multiplier would of course be essential. In my case, however, it’s more about nostalgia – apart from that, the Q6600 G0 in particular is a legend. PCGH users also thought so in 2010.
 ⧉ Intel
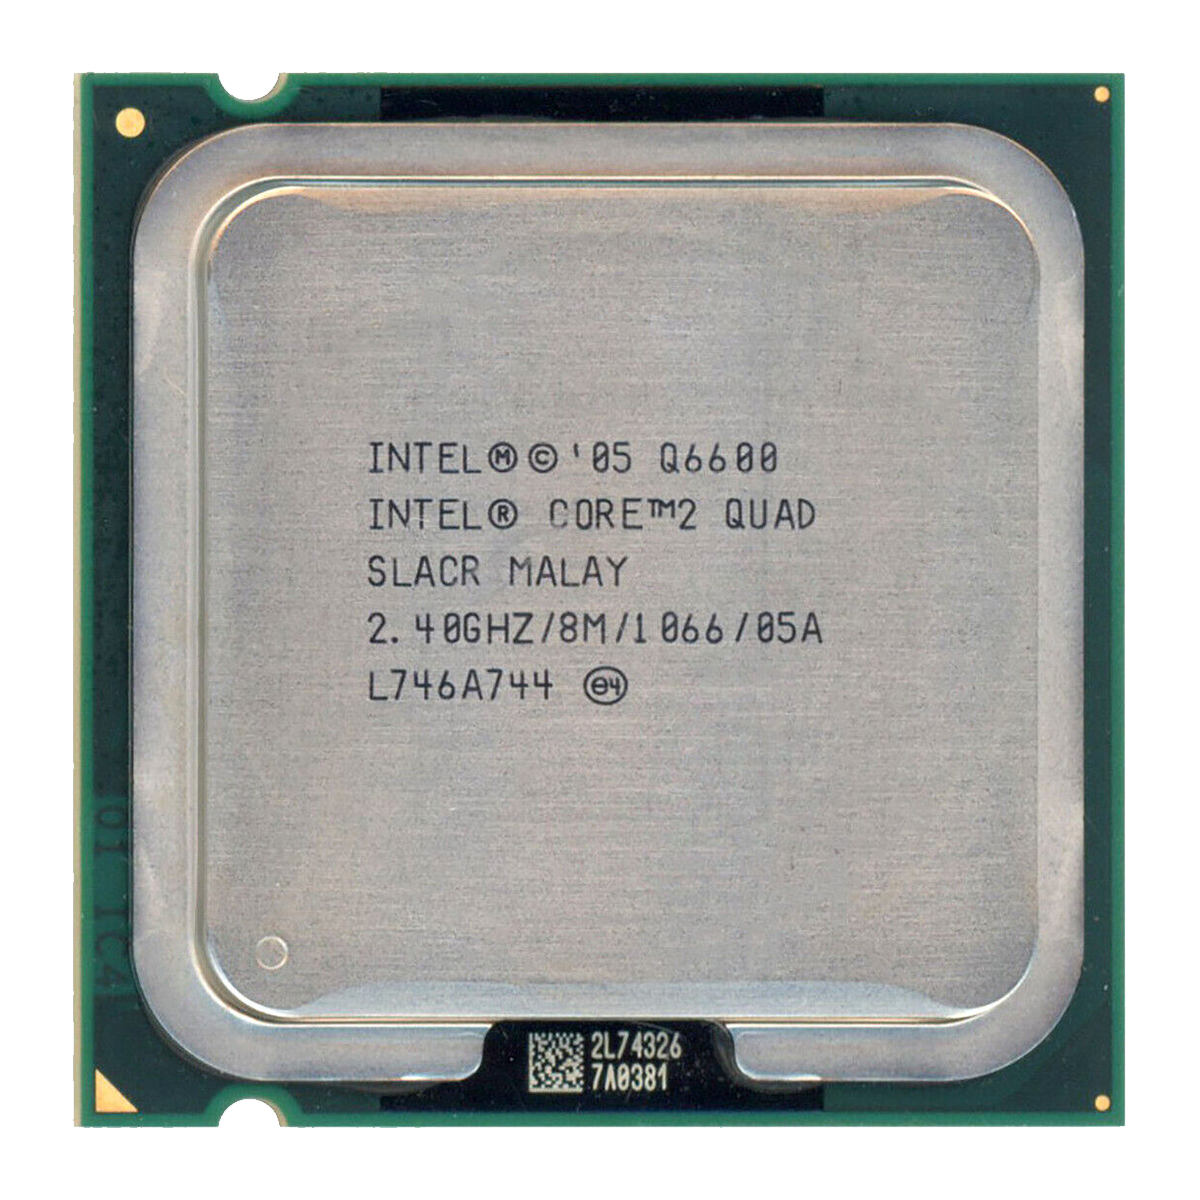 ⧉ Intel
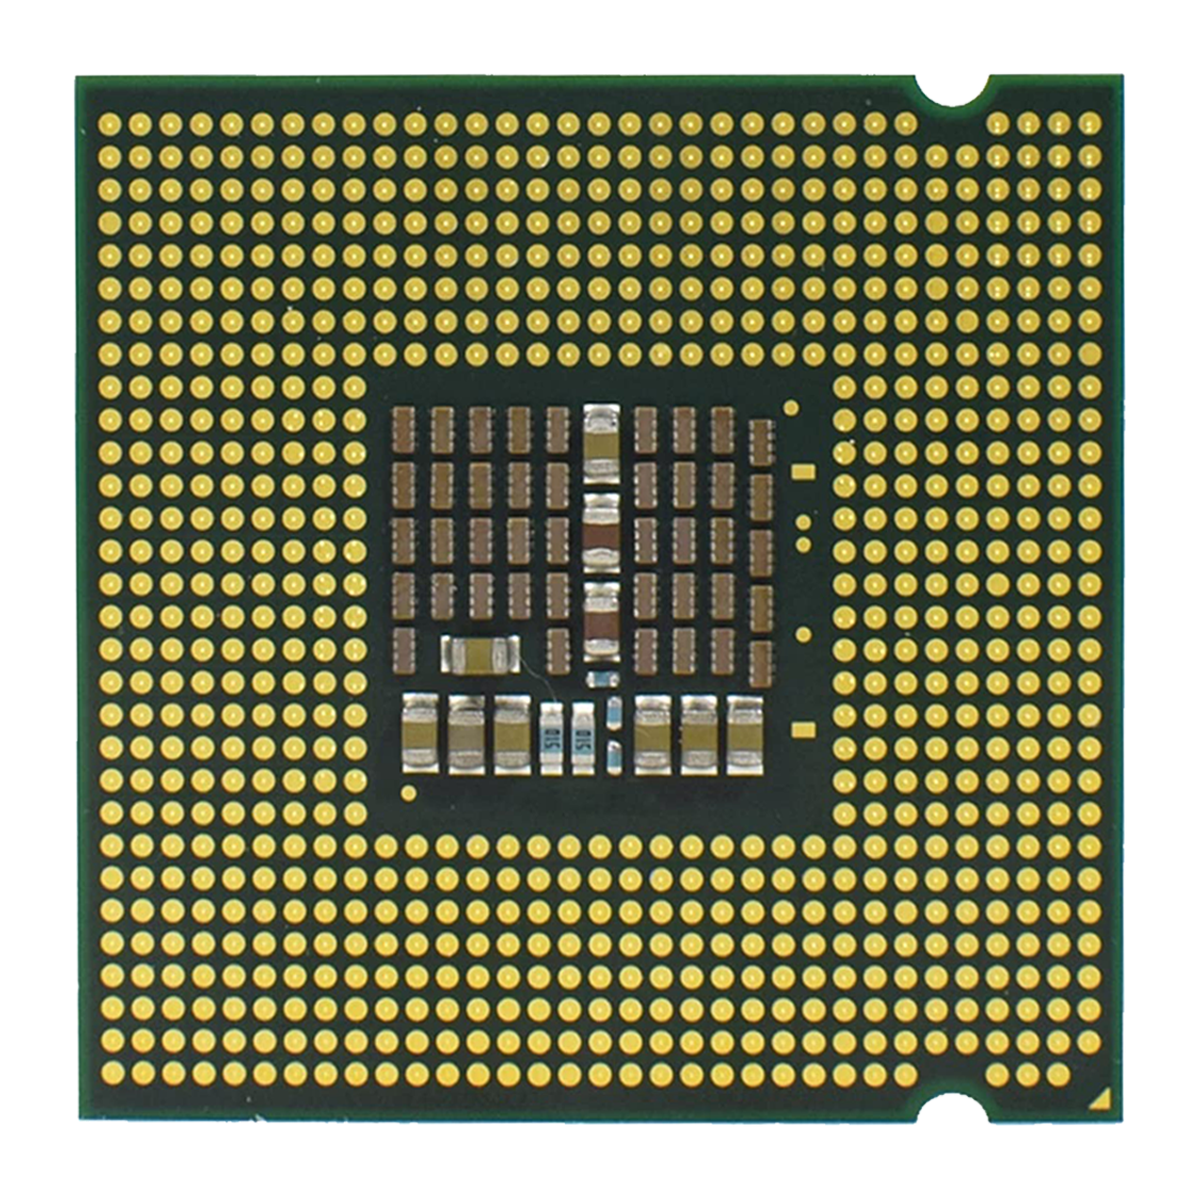 ⧉ Intel
Hm, Mainboard?
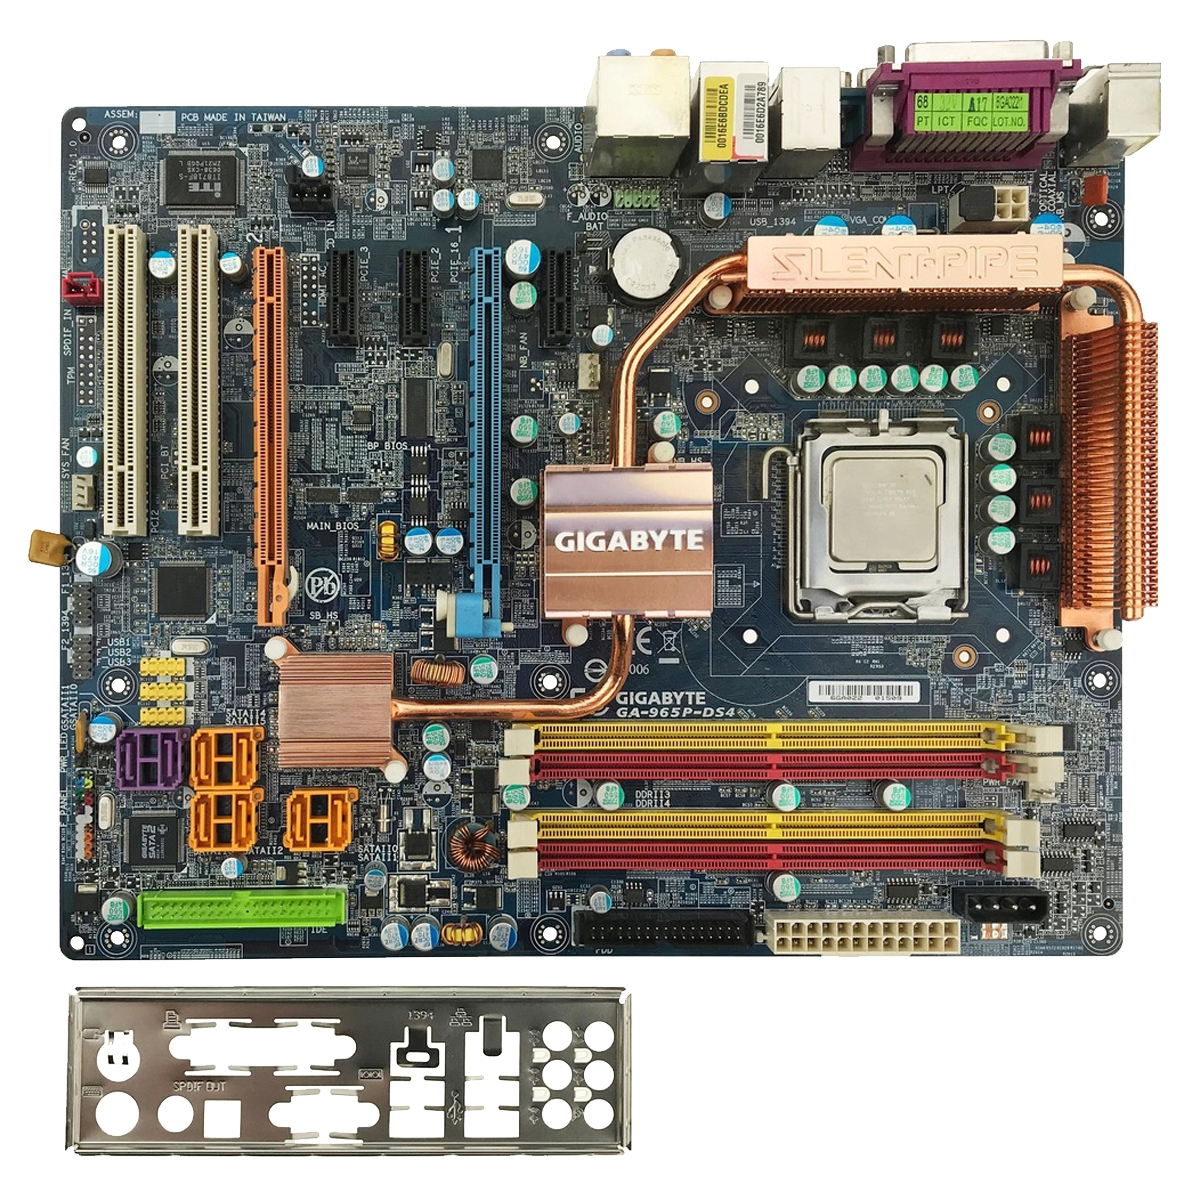
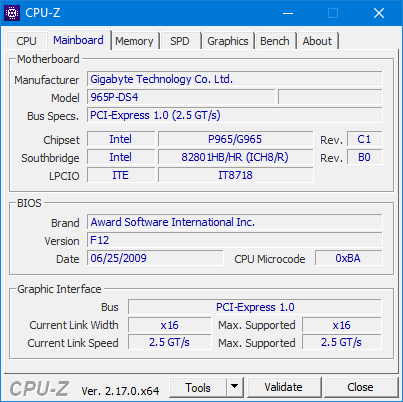
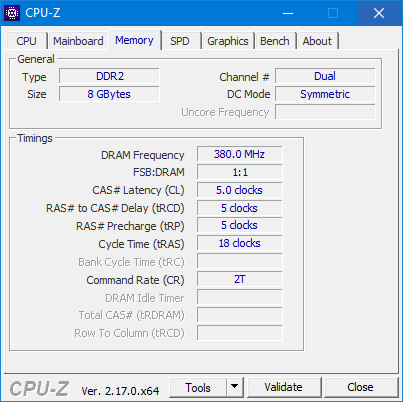
At the time, I got the CPU together with two 2 GB sticks of 667 standard RAM installed on a Gigabyte GA-965P-DS4 in revision 1.0. A usable to good board for overclocking. I replaced the RAM with four XMS2 DDR2-800 modules, each with 2 GB from Corsair – so in total, I still have 8 GB of RAM that is theoretically usable today.
I continued to use the Freezer 7 Pro from Arctic that was already on the board as a cooler, together with new MX-4 thermal paste* – whether this will be sufficient remains to be seen.
 ⧉ Gigabyte
Initial situation
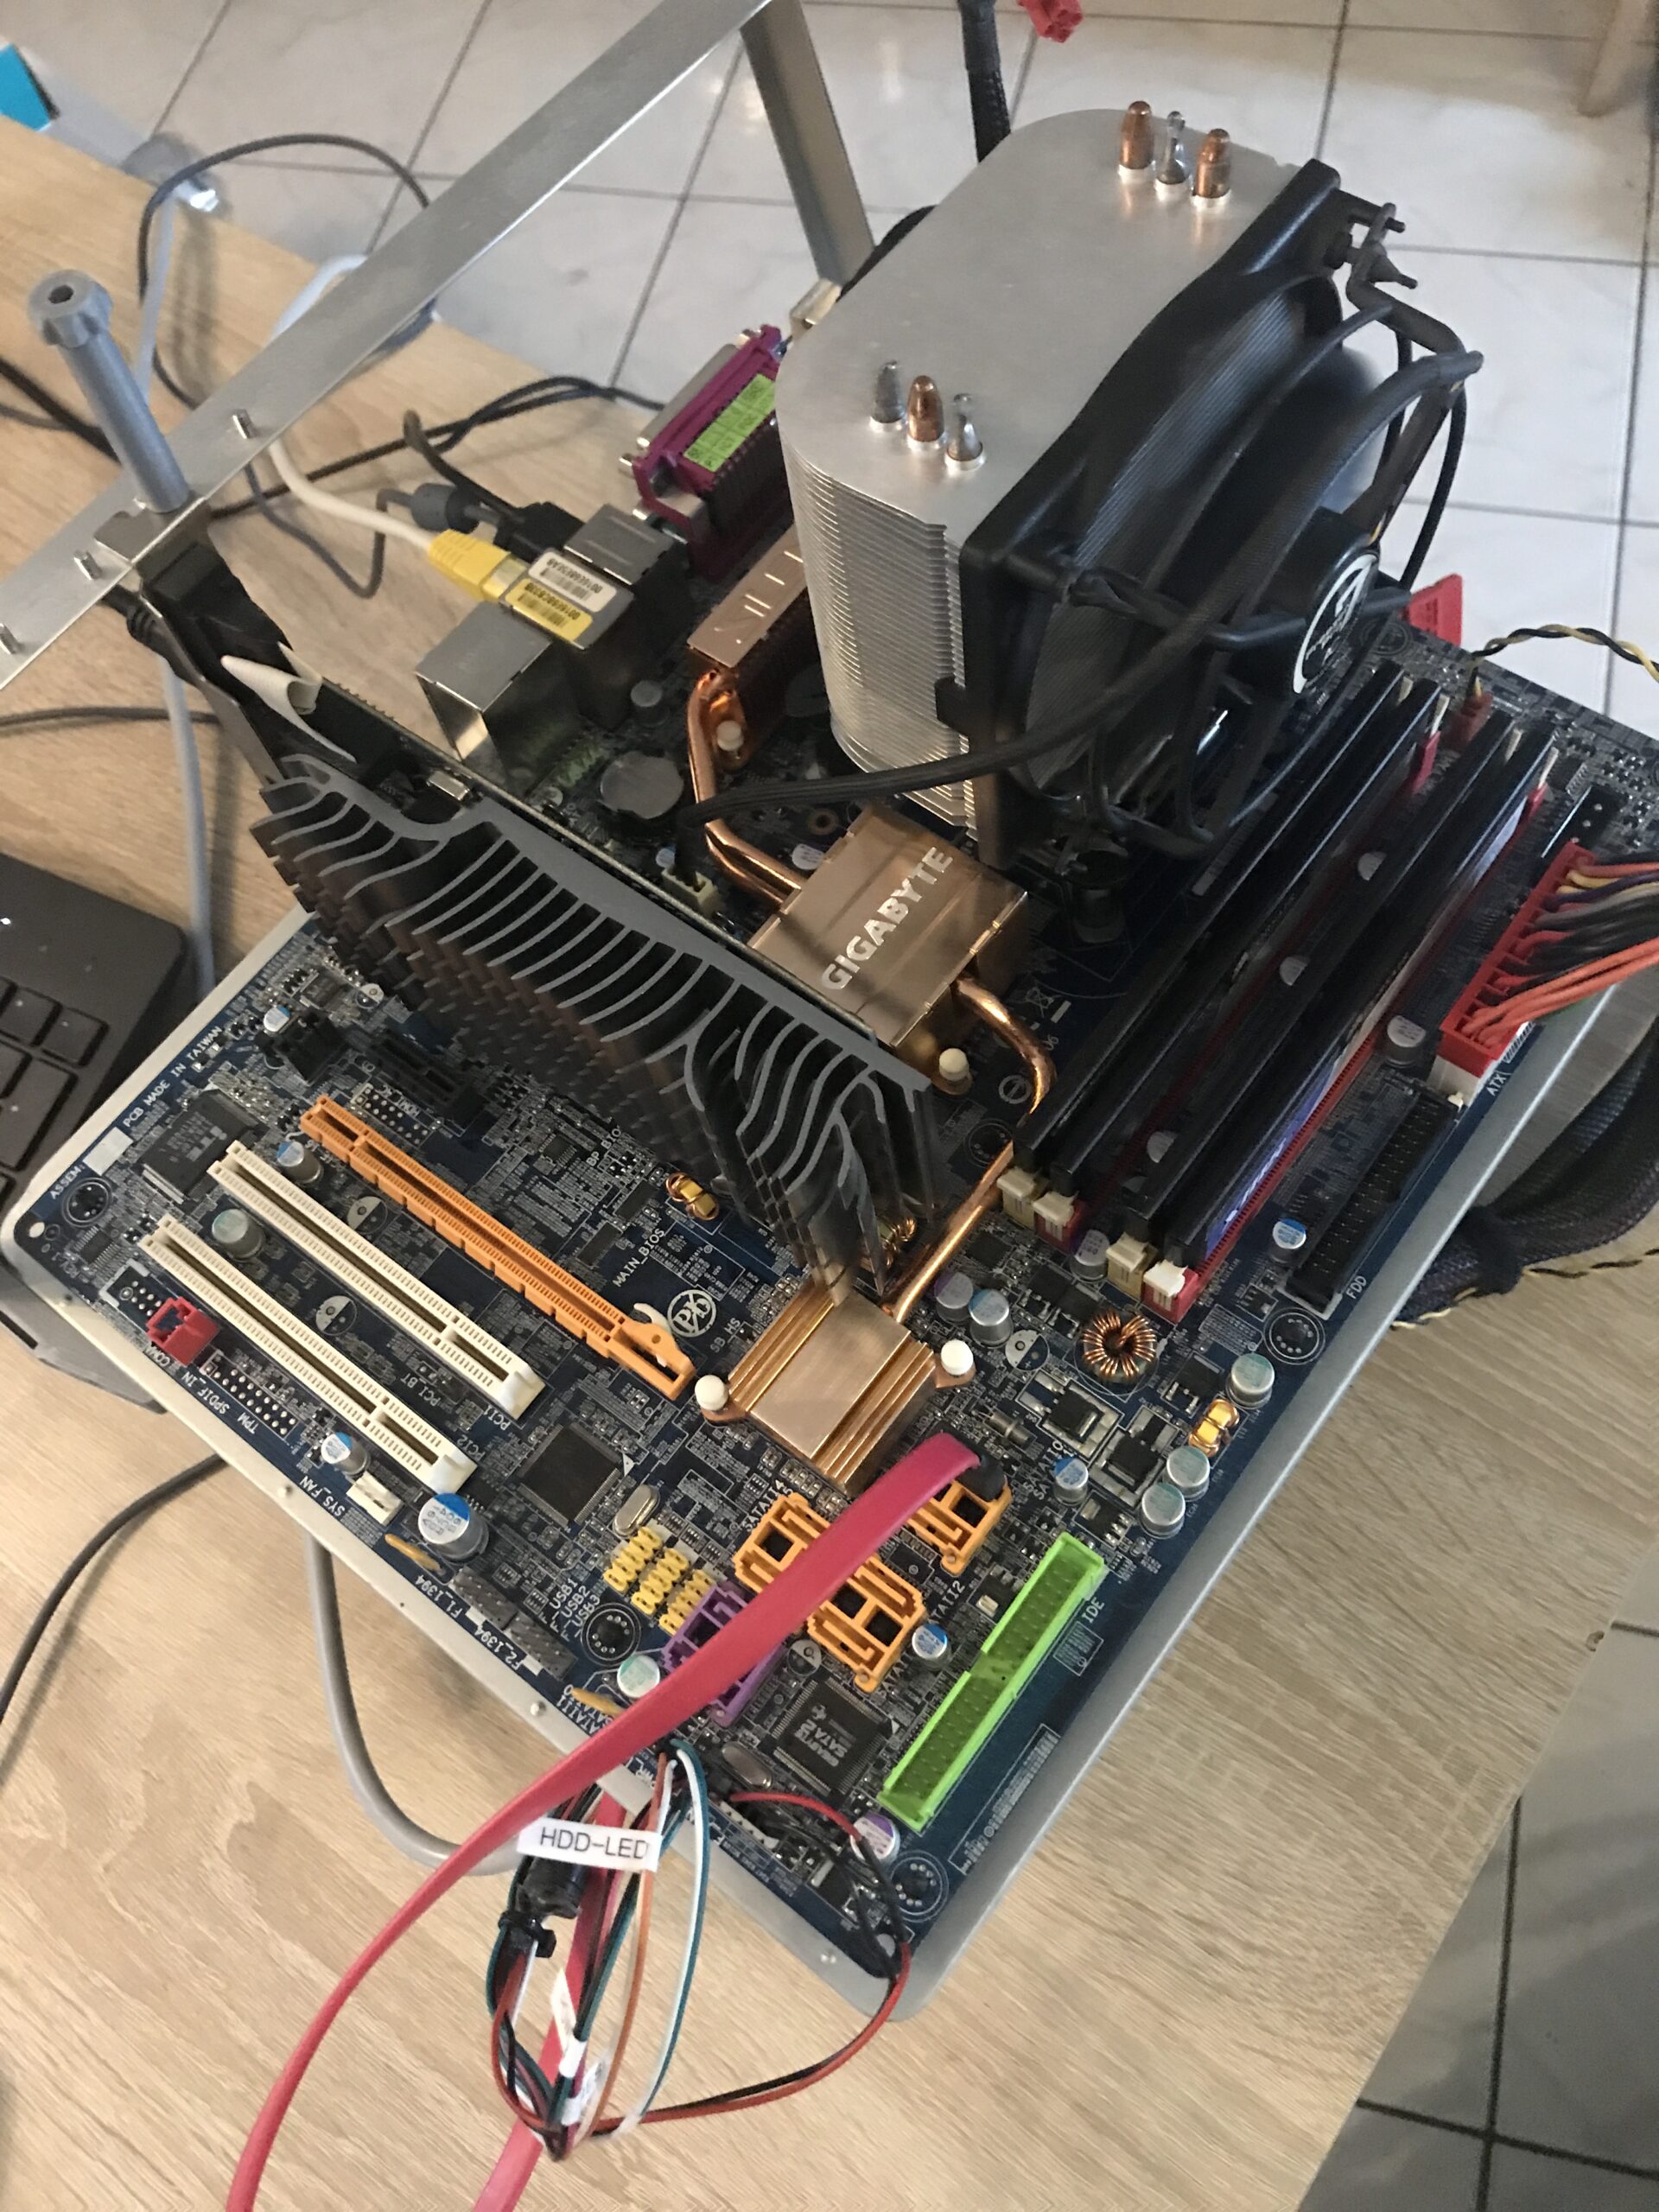
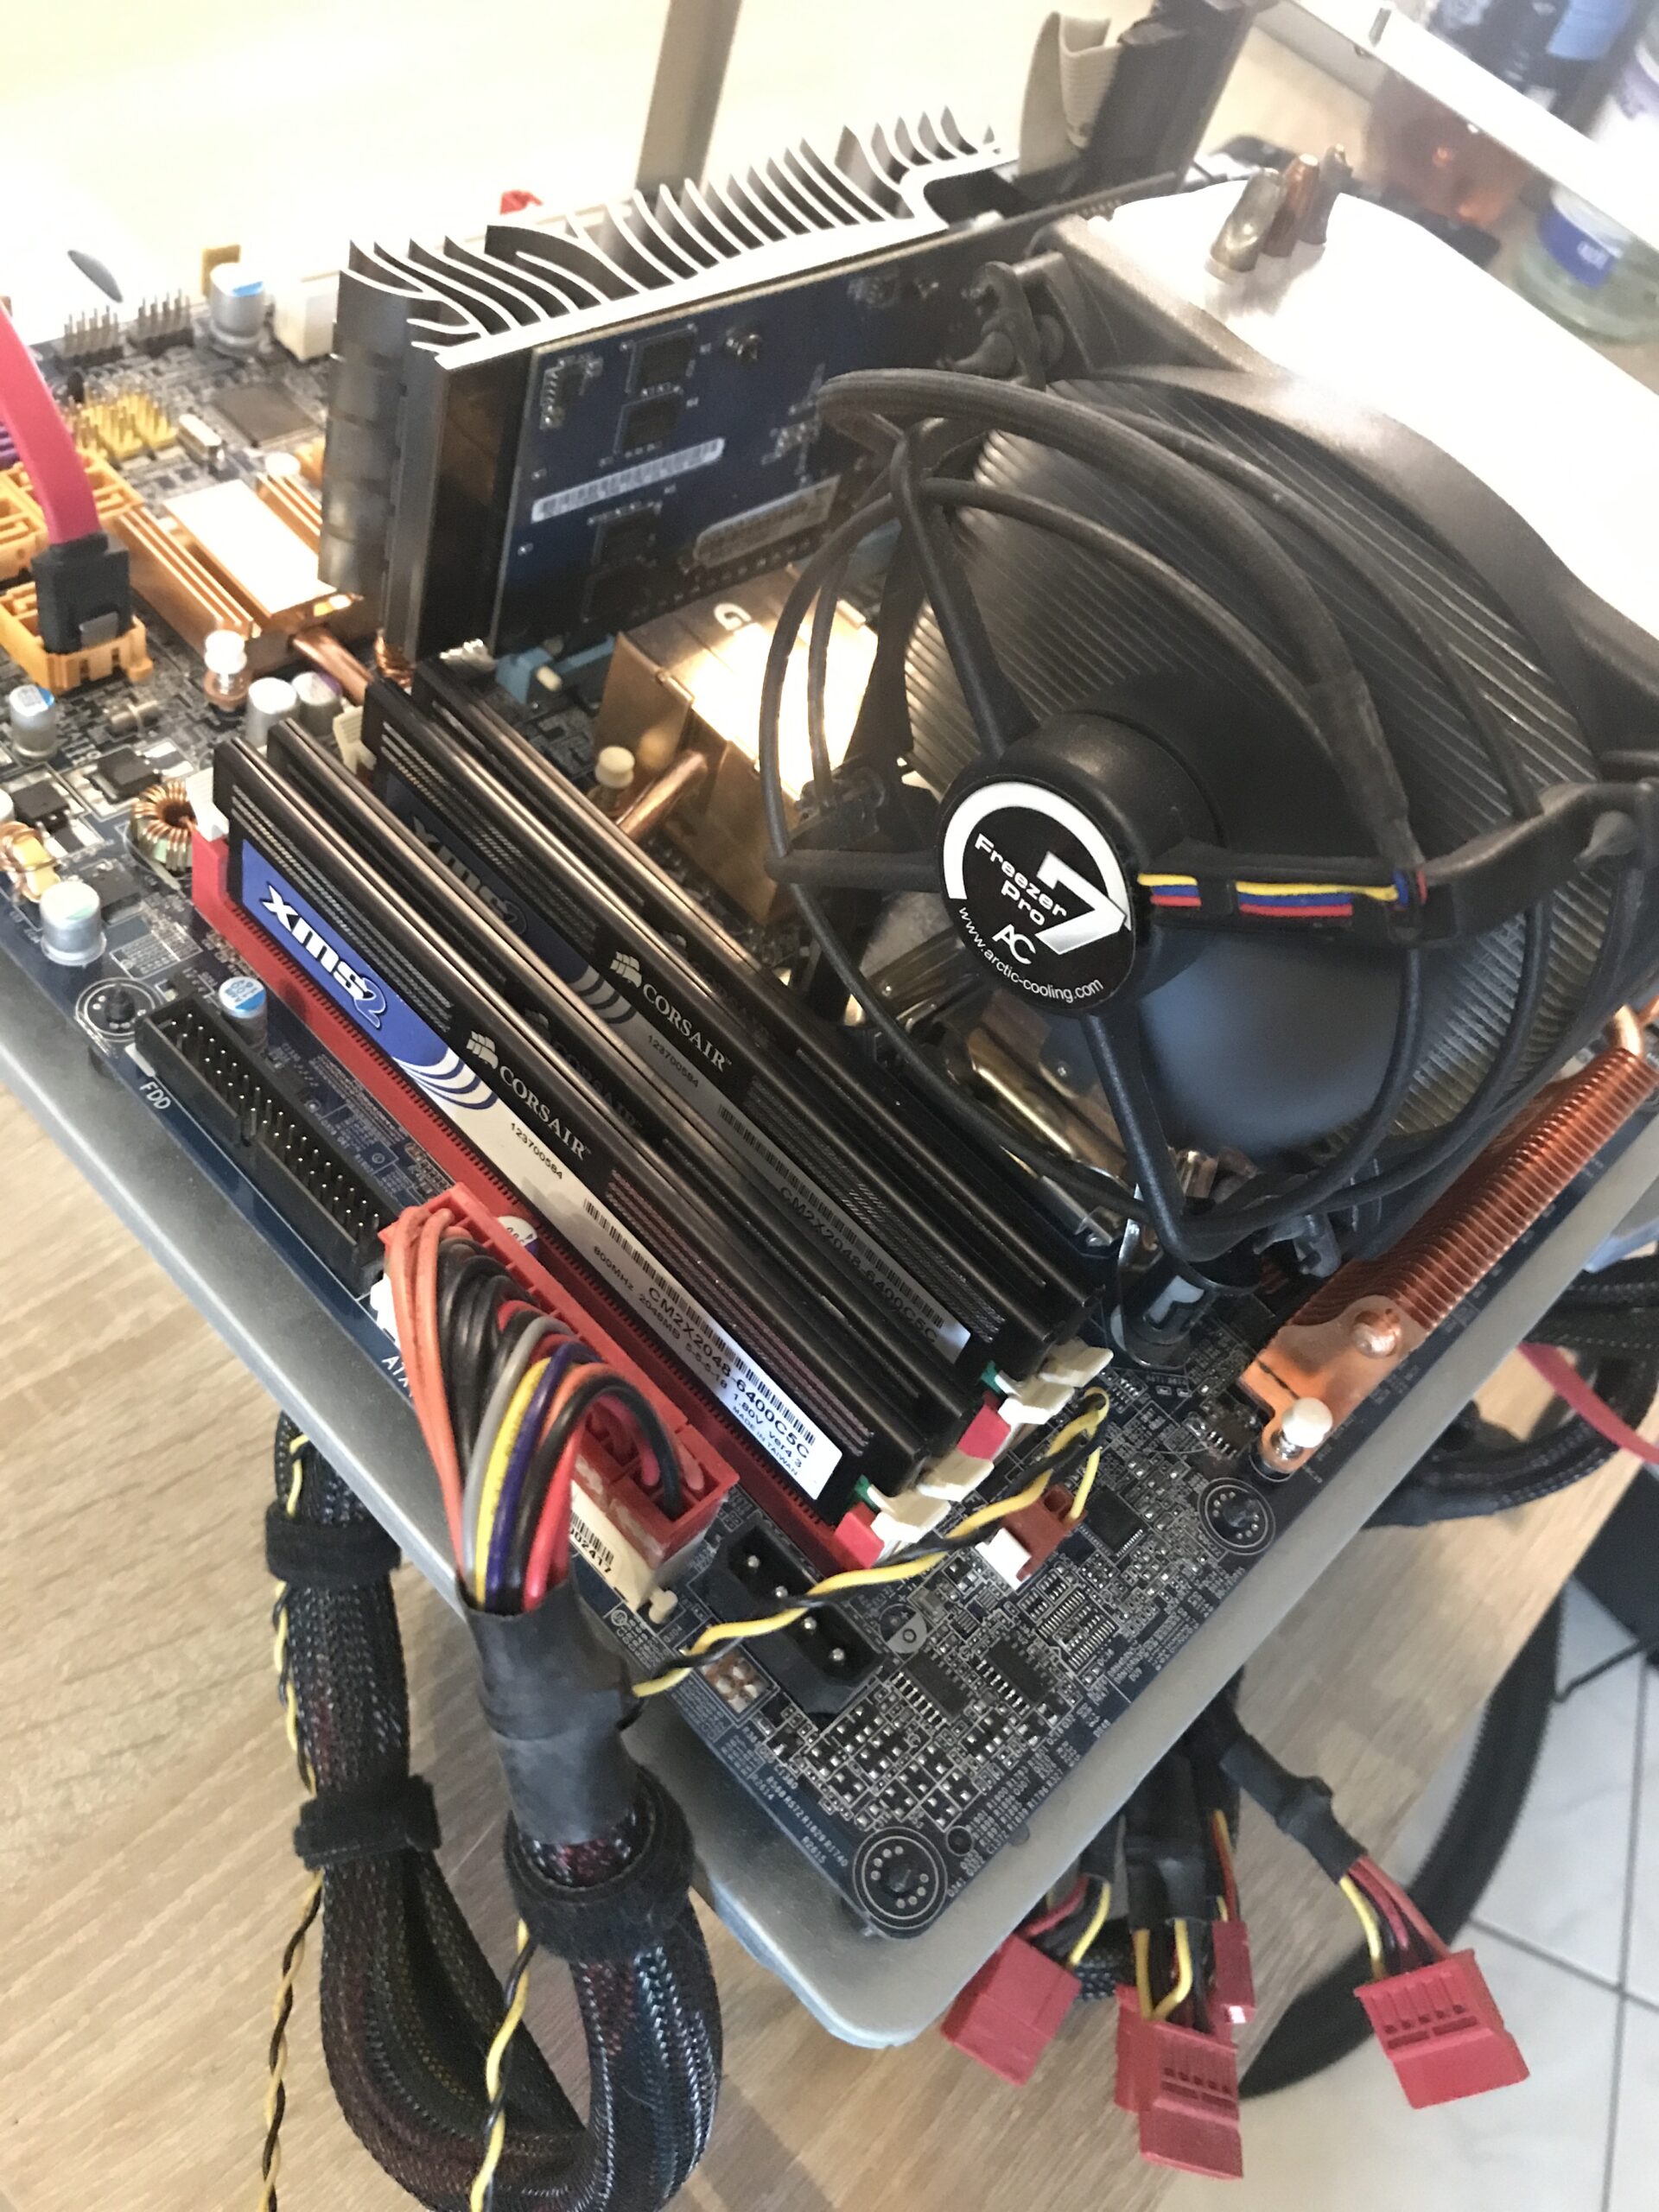
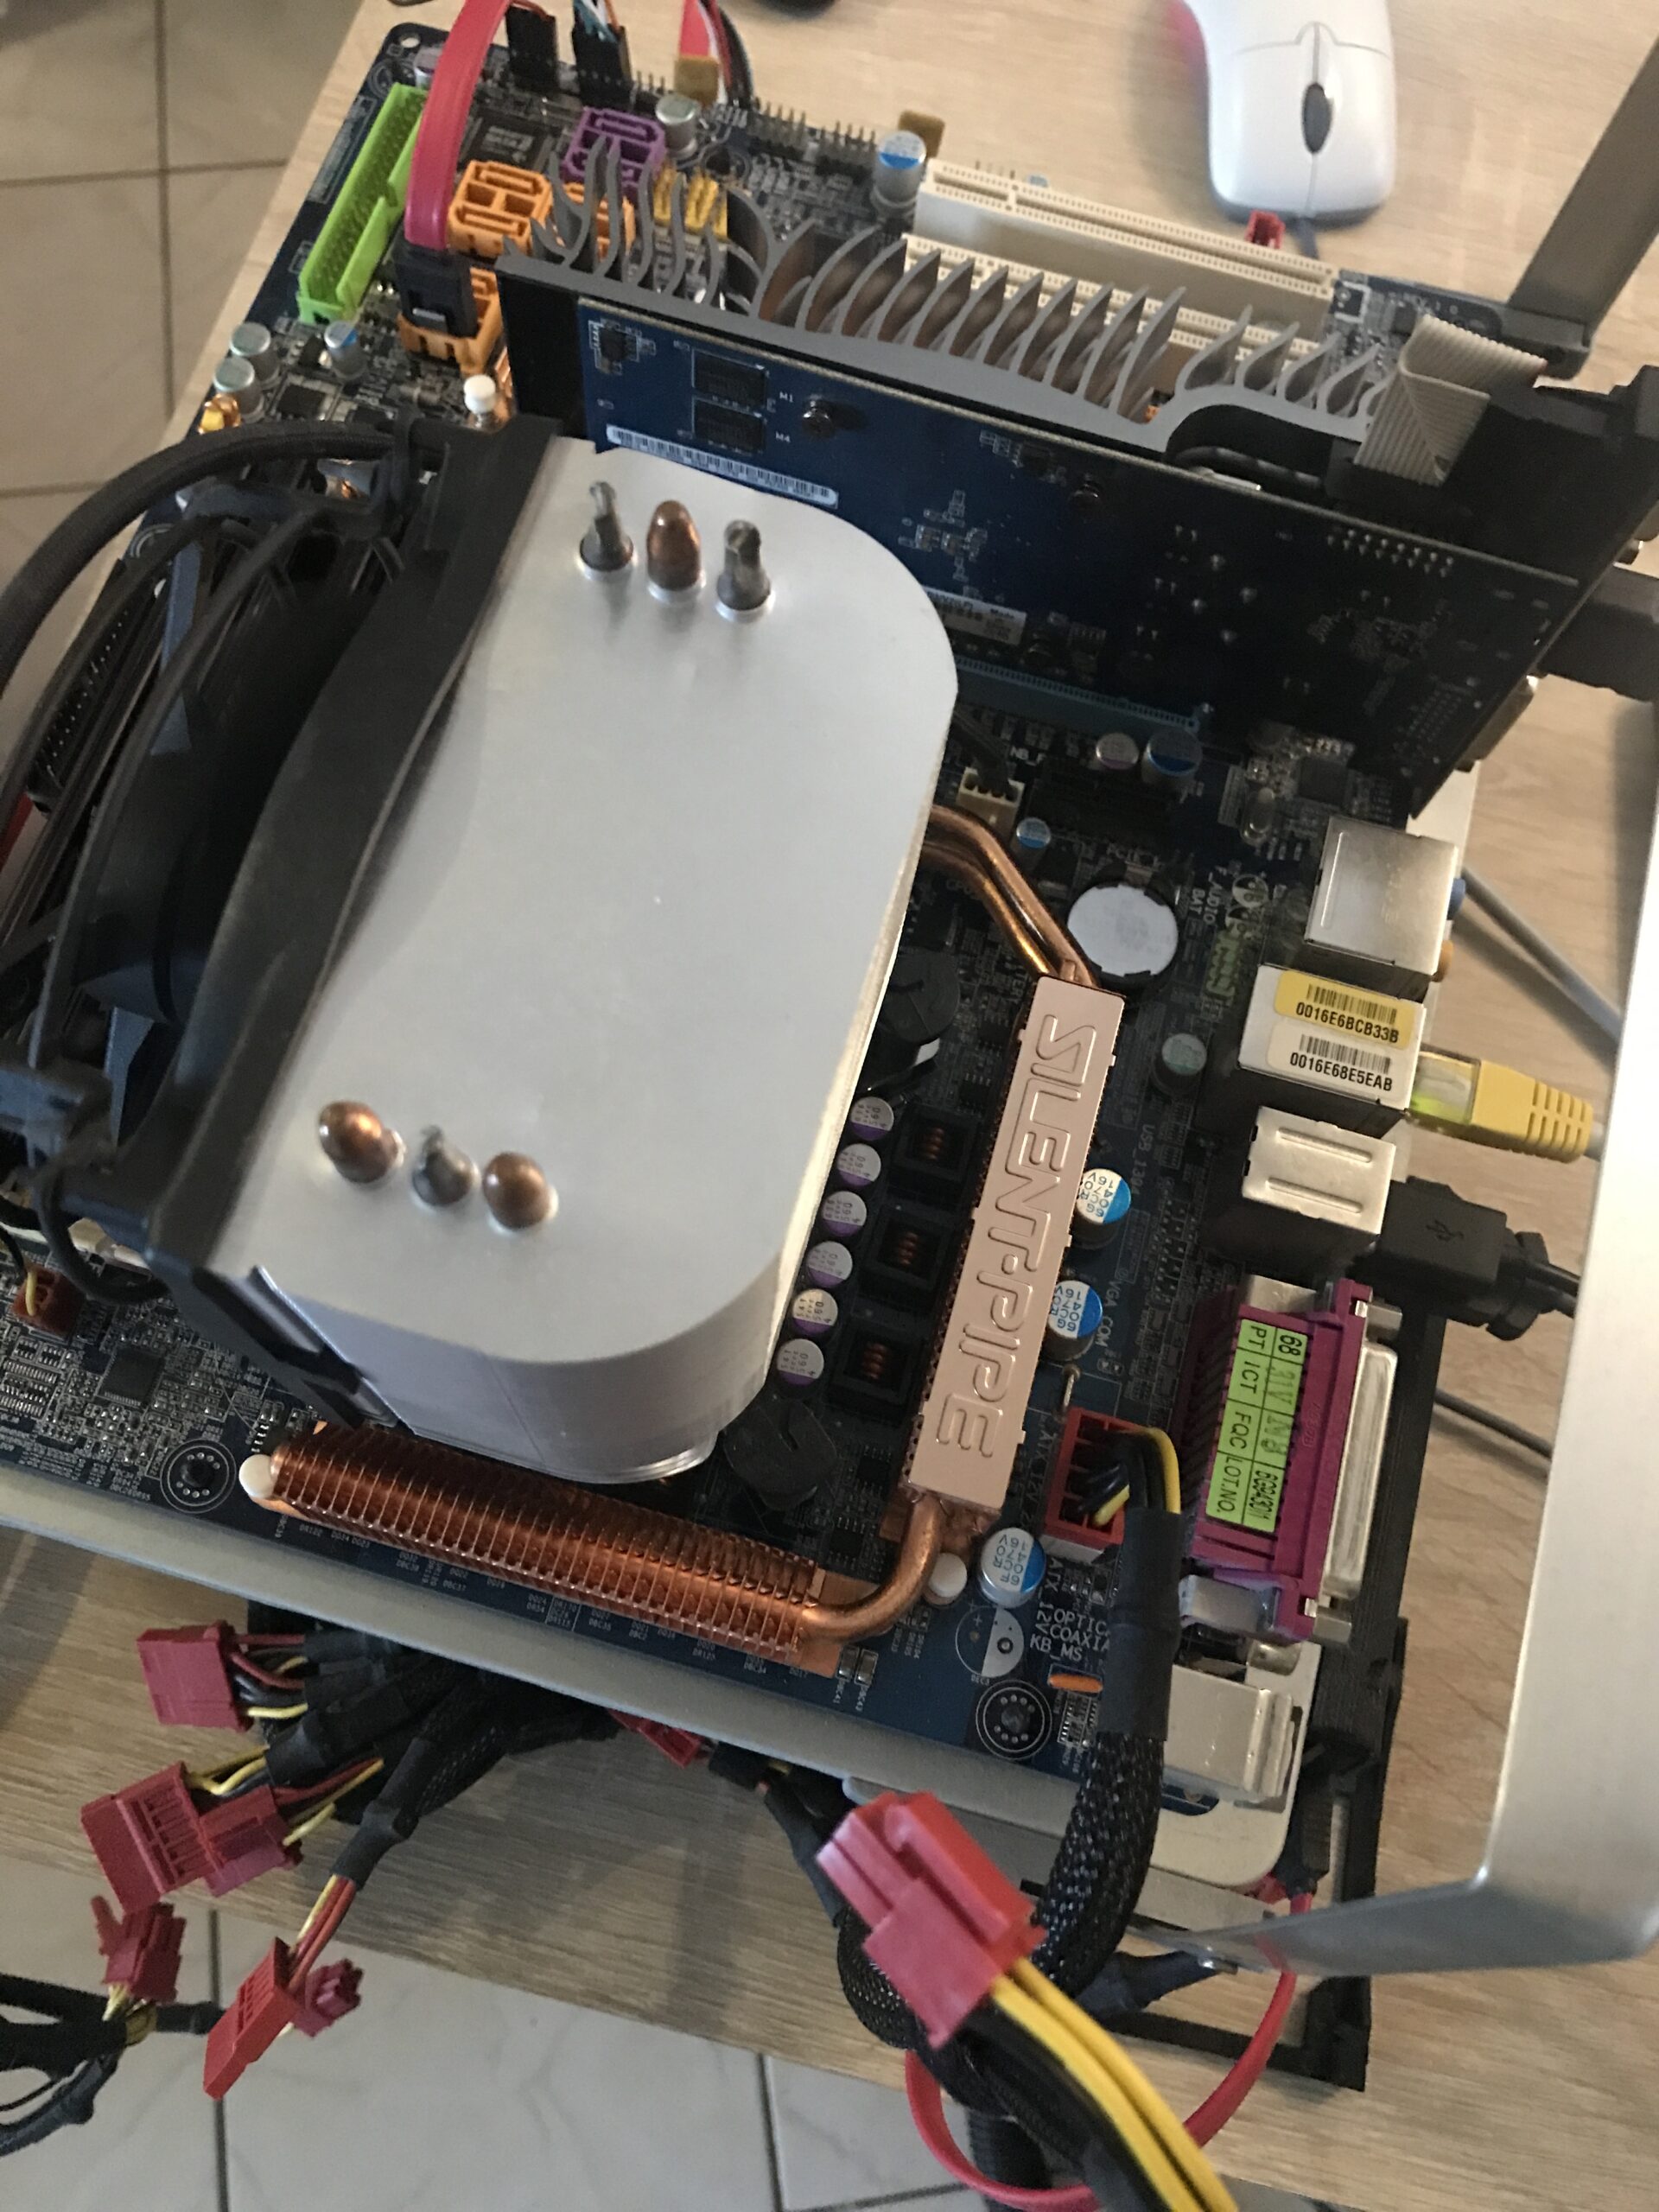
In good old DIY fashion, I put the motherboard on the benchtable, inserted all four RAM sticks, and connected the cables. For such projects, I like to use a “problem-free” GPU model, in this case an older GeForce 210 from ASUS with 1 GB VRAM – no additional power connection, no fan. PCI Express 2.0 with 16 lanes.
As the system drive, I used an inexpensive Intenso SATA SSD with 256 GB capacity* connected to the first SATA-II port, with Windows 10 22H2 Professional 64-bit installed. The BIOS was already up to date (F12 from June 25, 2009).
This is what it looked like:
Then let’s get started!
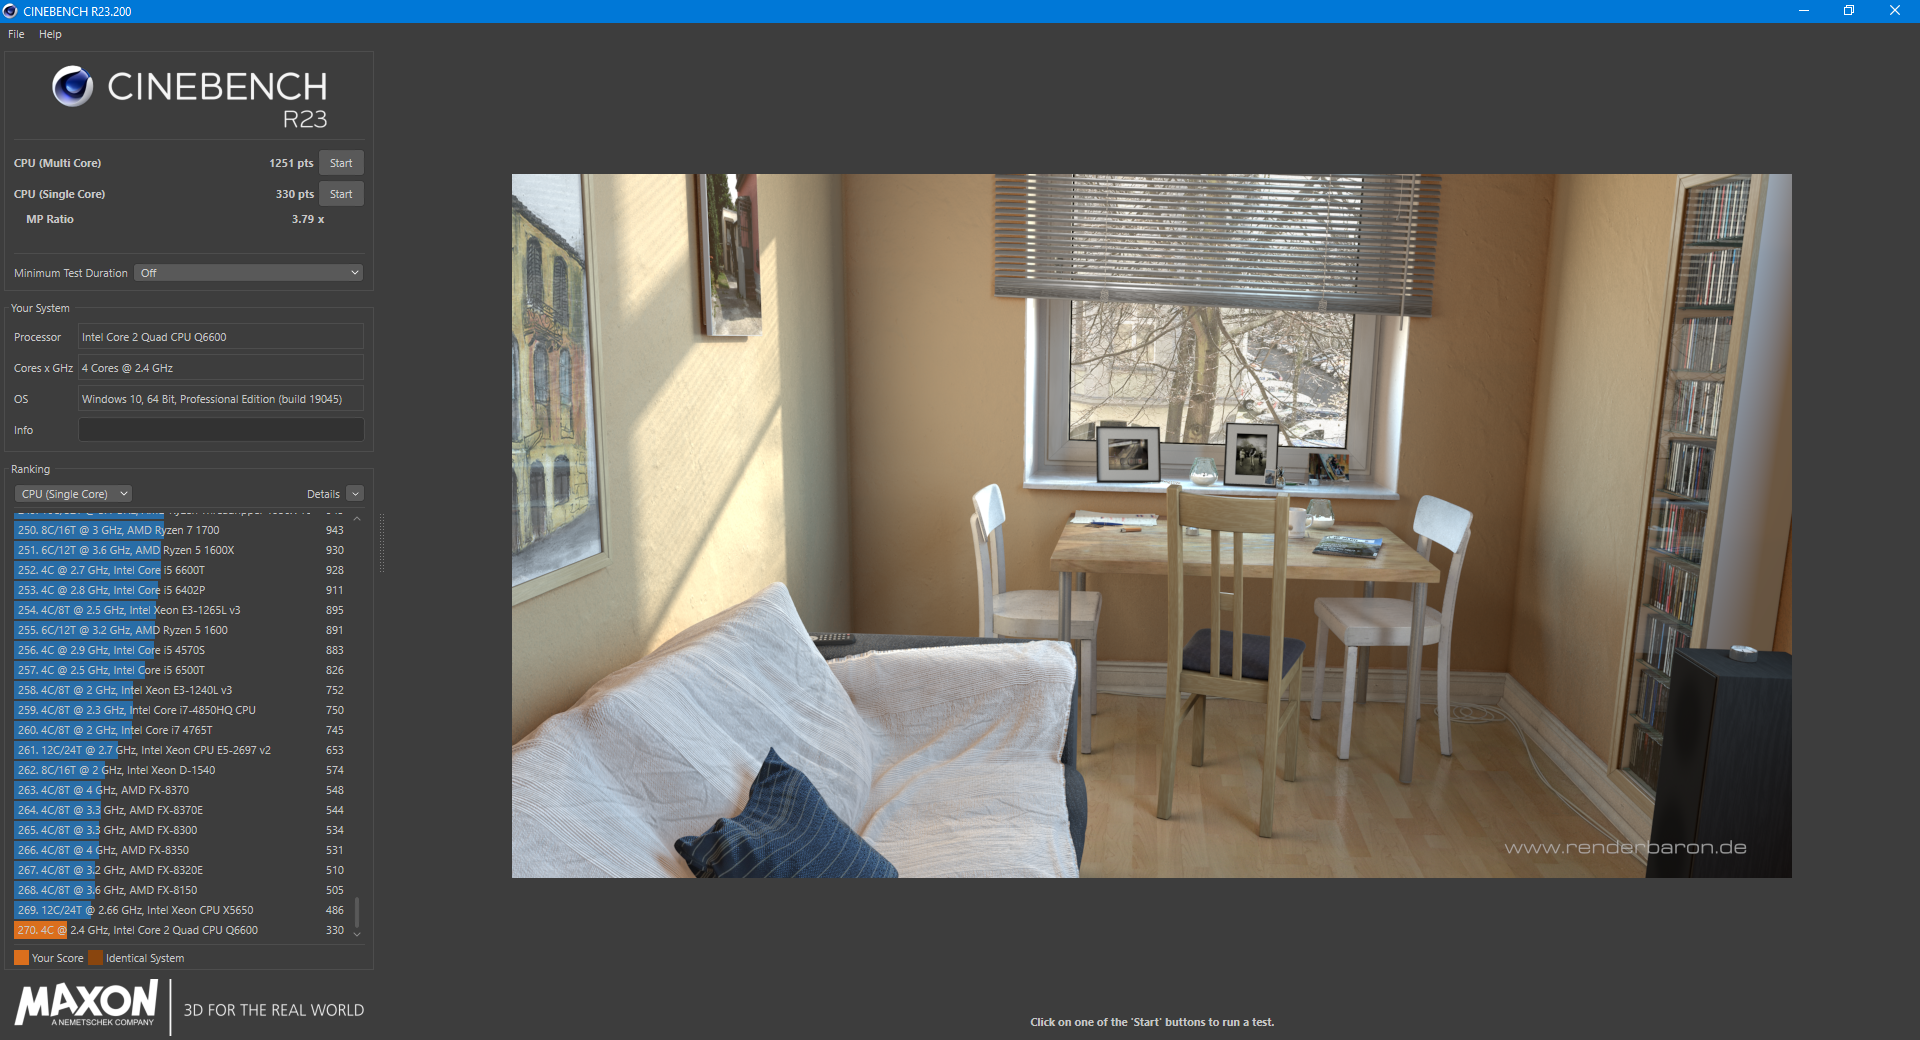
First of all, I ran Cinebench R23 for single and multi-core performance, using the default settings. Incidentally, the required VID for my model is a moderate 1.288 volts. The results were 330 / 1251 points:

As was previously common with Gigabyte motherboards, you have to press “CTRL + F1” in the main BIOS menu to display all options. At first, I wondered why I couldn’t enter RAM timings anywhere – but after pressing the key combination, all the options suddenly appeared in the overclocking submenu. You have to know this kind of thing first.
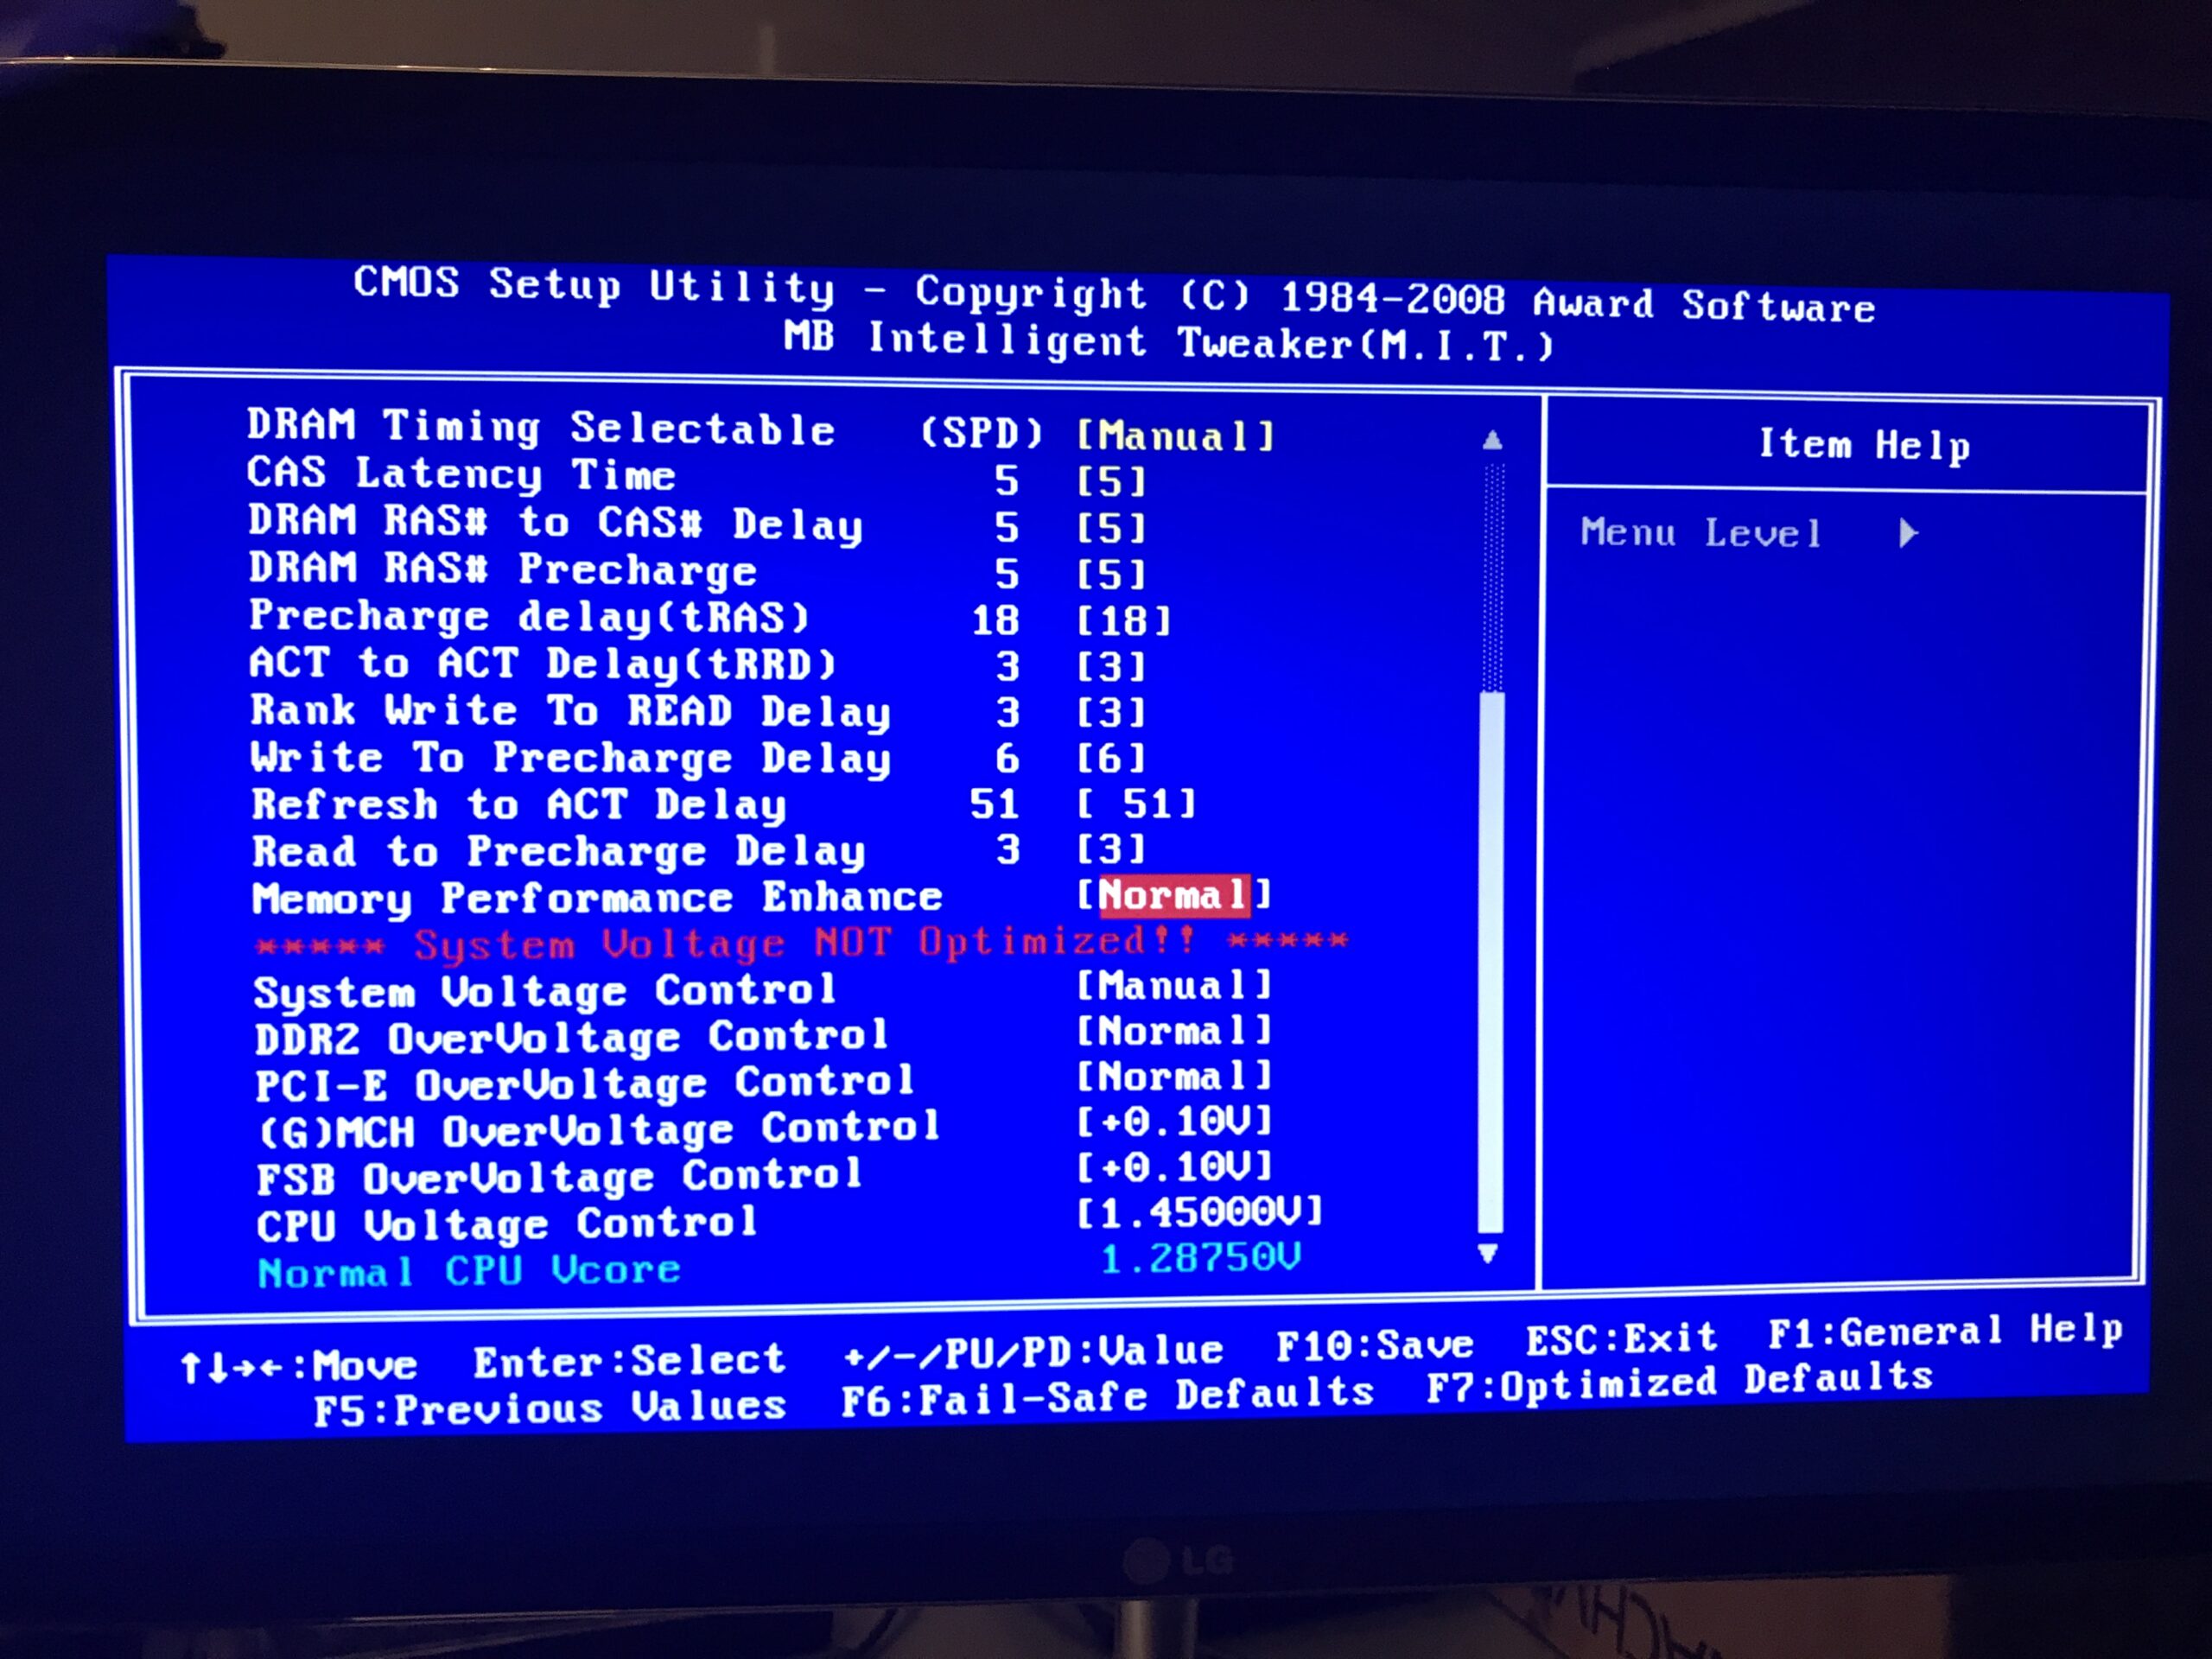
Once I had cleared the first hurdle, I set everything relevant from “Auto” to fixed values, primarily the RAM timings to those stored in the modules (5 – 5 – 5 – 18 at 1.8 volts) and the PCIe speed to “100 MHz”. I wanted to achieve a RAM divider of 1:1, so I always made sure that the final value was at or below the 800 MHz of the RAM modules.
The actual overclocking began here: First, I had to find out what this specific processor was capable of at its original Vcore voltage. According to the BIOS, this was 1.28750 volts, which matched the read VID of 1.288 volts exactly. 266 MHz is the original FSB clock, which has to run in any case.
Front Side Bus…
I slightly increased the clock speed, saved it, restarted, and then briefly checked stability with Cinebench R23. Starting with 300 MHz FSB – as expected, this ran smoothly and already resulted in a clock speed of 2.70 GHz (300 x 9). Next, 333 MHz also ran without any problems (333 x 9). This already resulted in 3.00 GHz instead of the original 2.40 GHz.
At a clock speed of 350 MHz, I had my first blue screen in CB23. No problem, just slightly increase the Vcore in the BIOS – in this case to 1.30 volts to have some leeway. Then everything ran smoothly again, reaching 3.24 GHz!
After further smaller clock jumps, instabilities, and Vcore increases, I had to increase the FSB and MCH voltage by a minimal 0.10 volts for the first time at 372 MHz FSB. Then it ran stably again. I pushed the whole thing much further, up to about 1.55 volts—that’s way too much, especially with air cooling!
I wanted to find out at what point the clock speed no longer scales well with the Vcore. With this very old hardware, I ultimately settled for 380 MHz FSB, as anything above that required really significant voltage increases for marginal gains (from 380 MHz to 386 MHz instead of 0.10 volts, now 0.25 volts on FSB and MCH, plus 1.525 volts Vcore!). Of course, the temperatures also rose disproportionately – I wouldn’t have wanted to go above 1.50 volts permanently anyway. The Arctic Freezer 7 Pro does a good job; thermally and voltage-wise, this is an acceptable range.
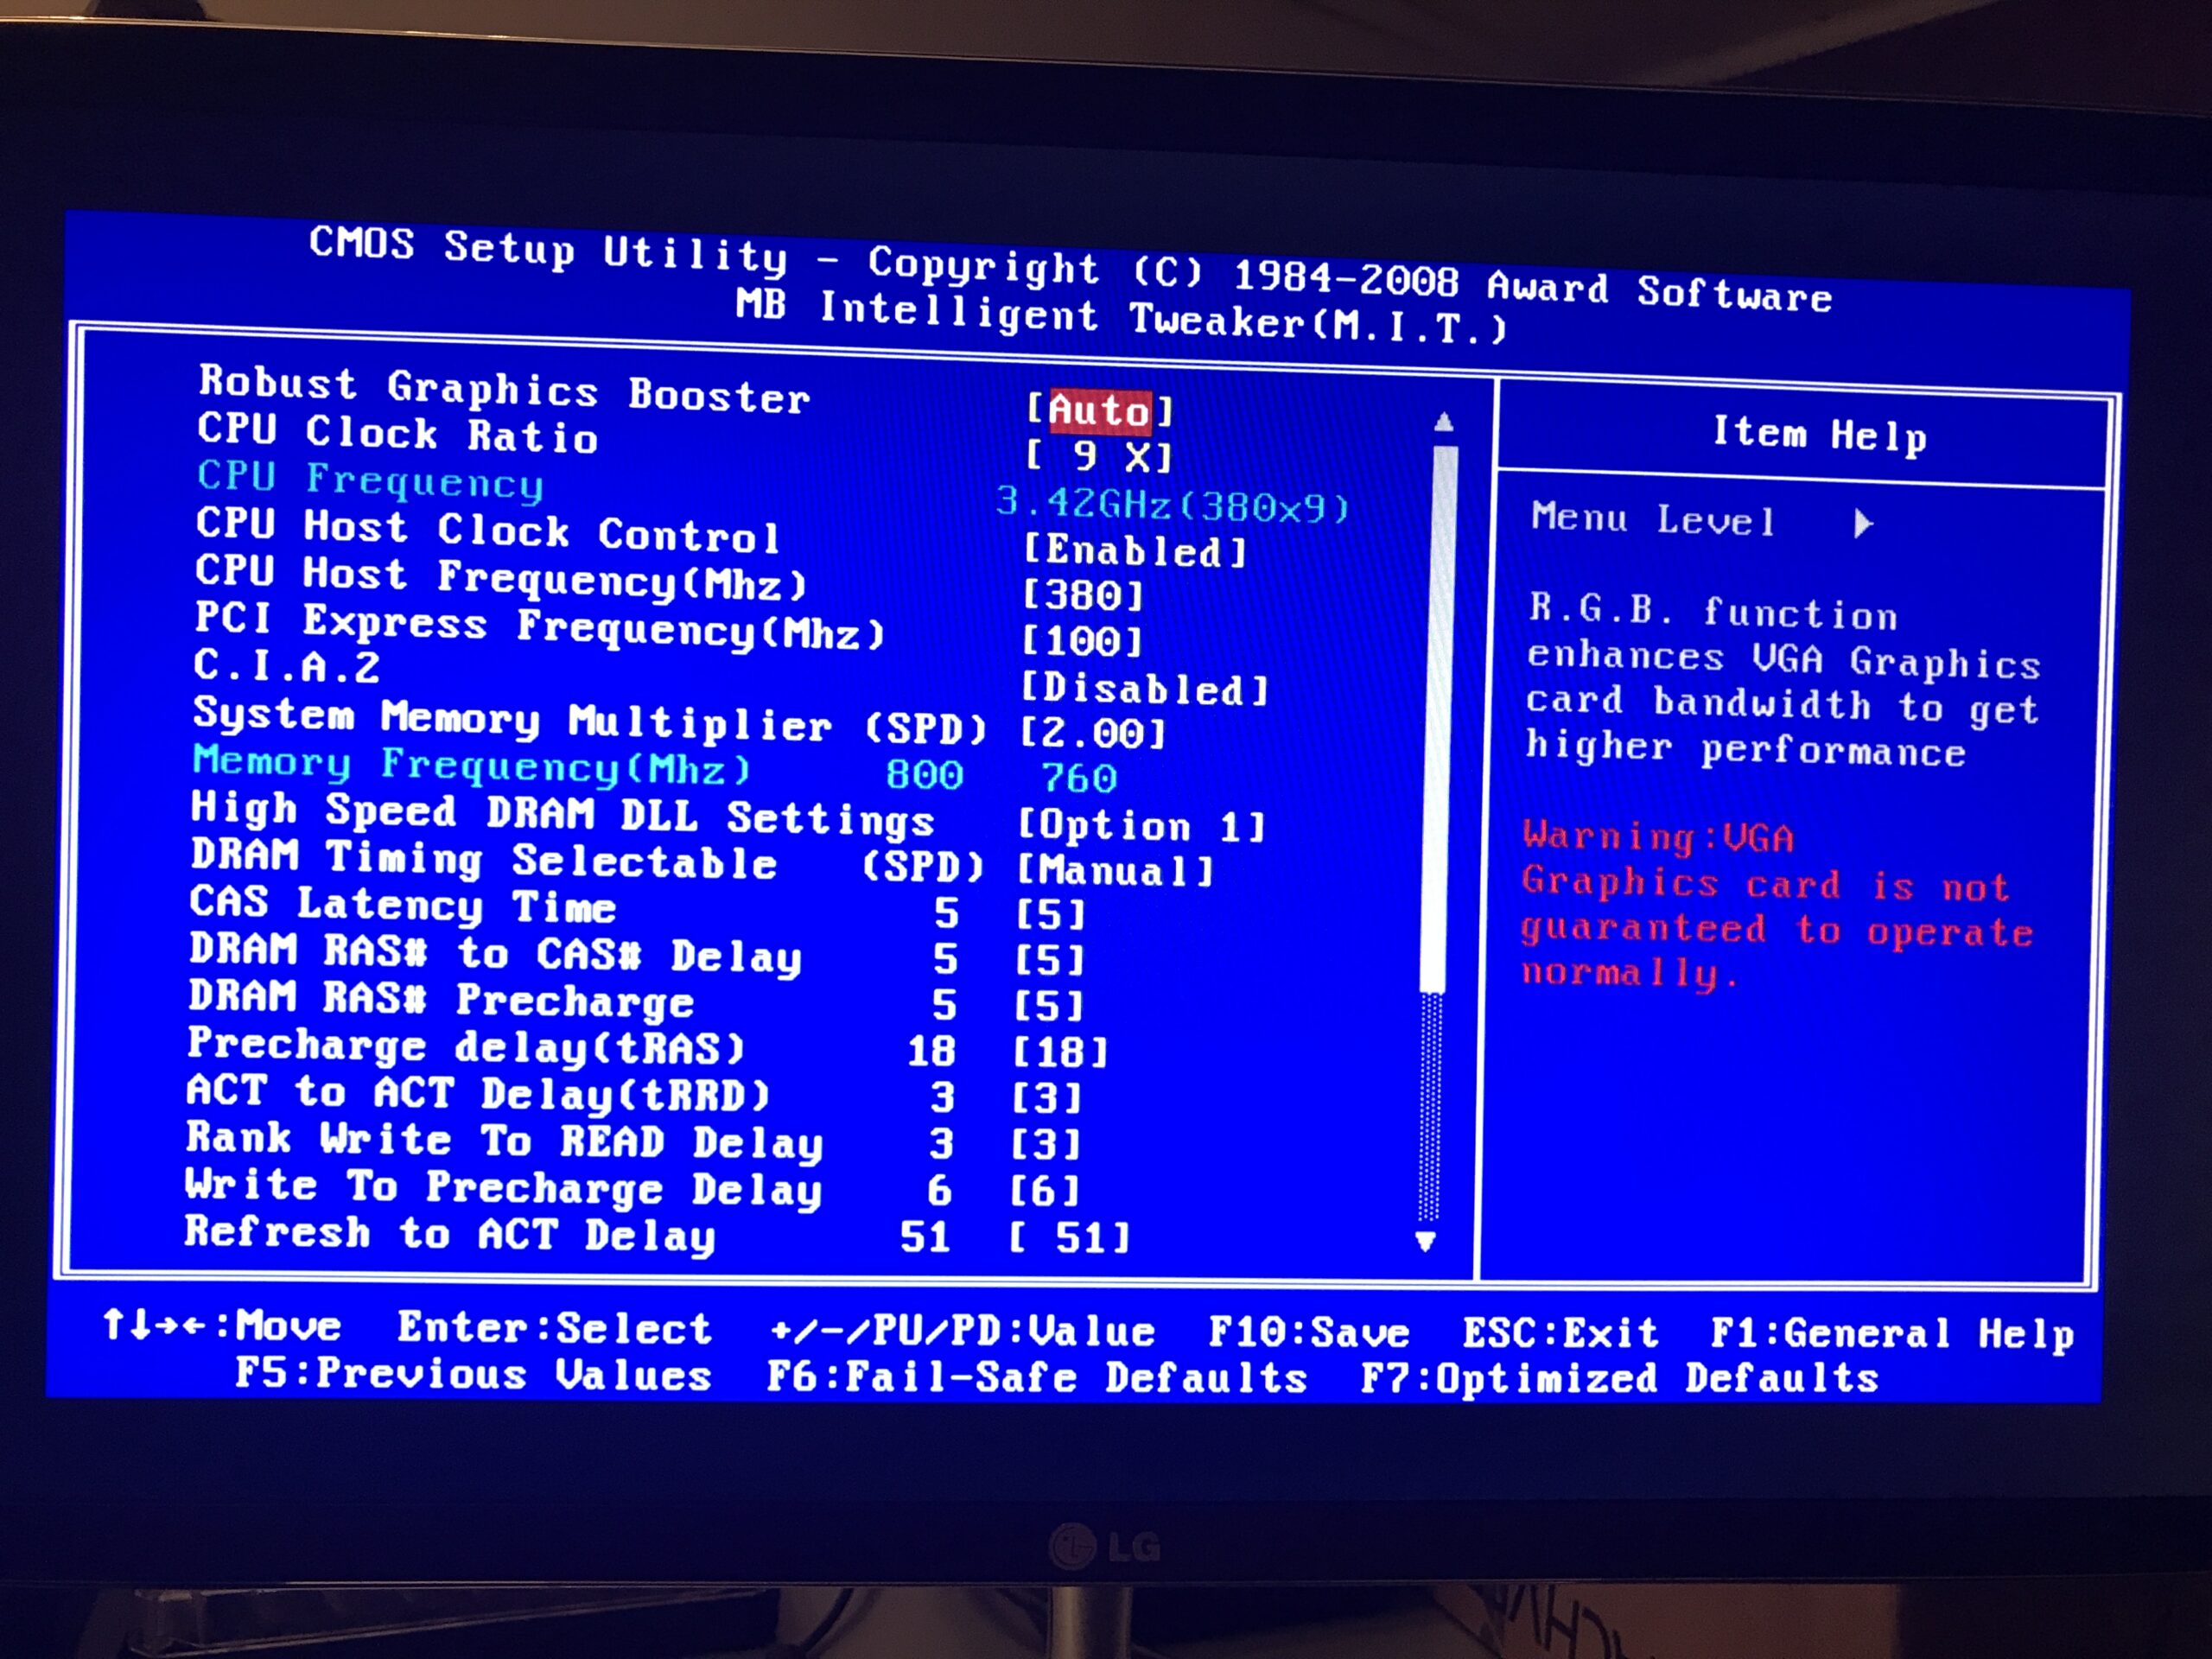
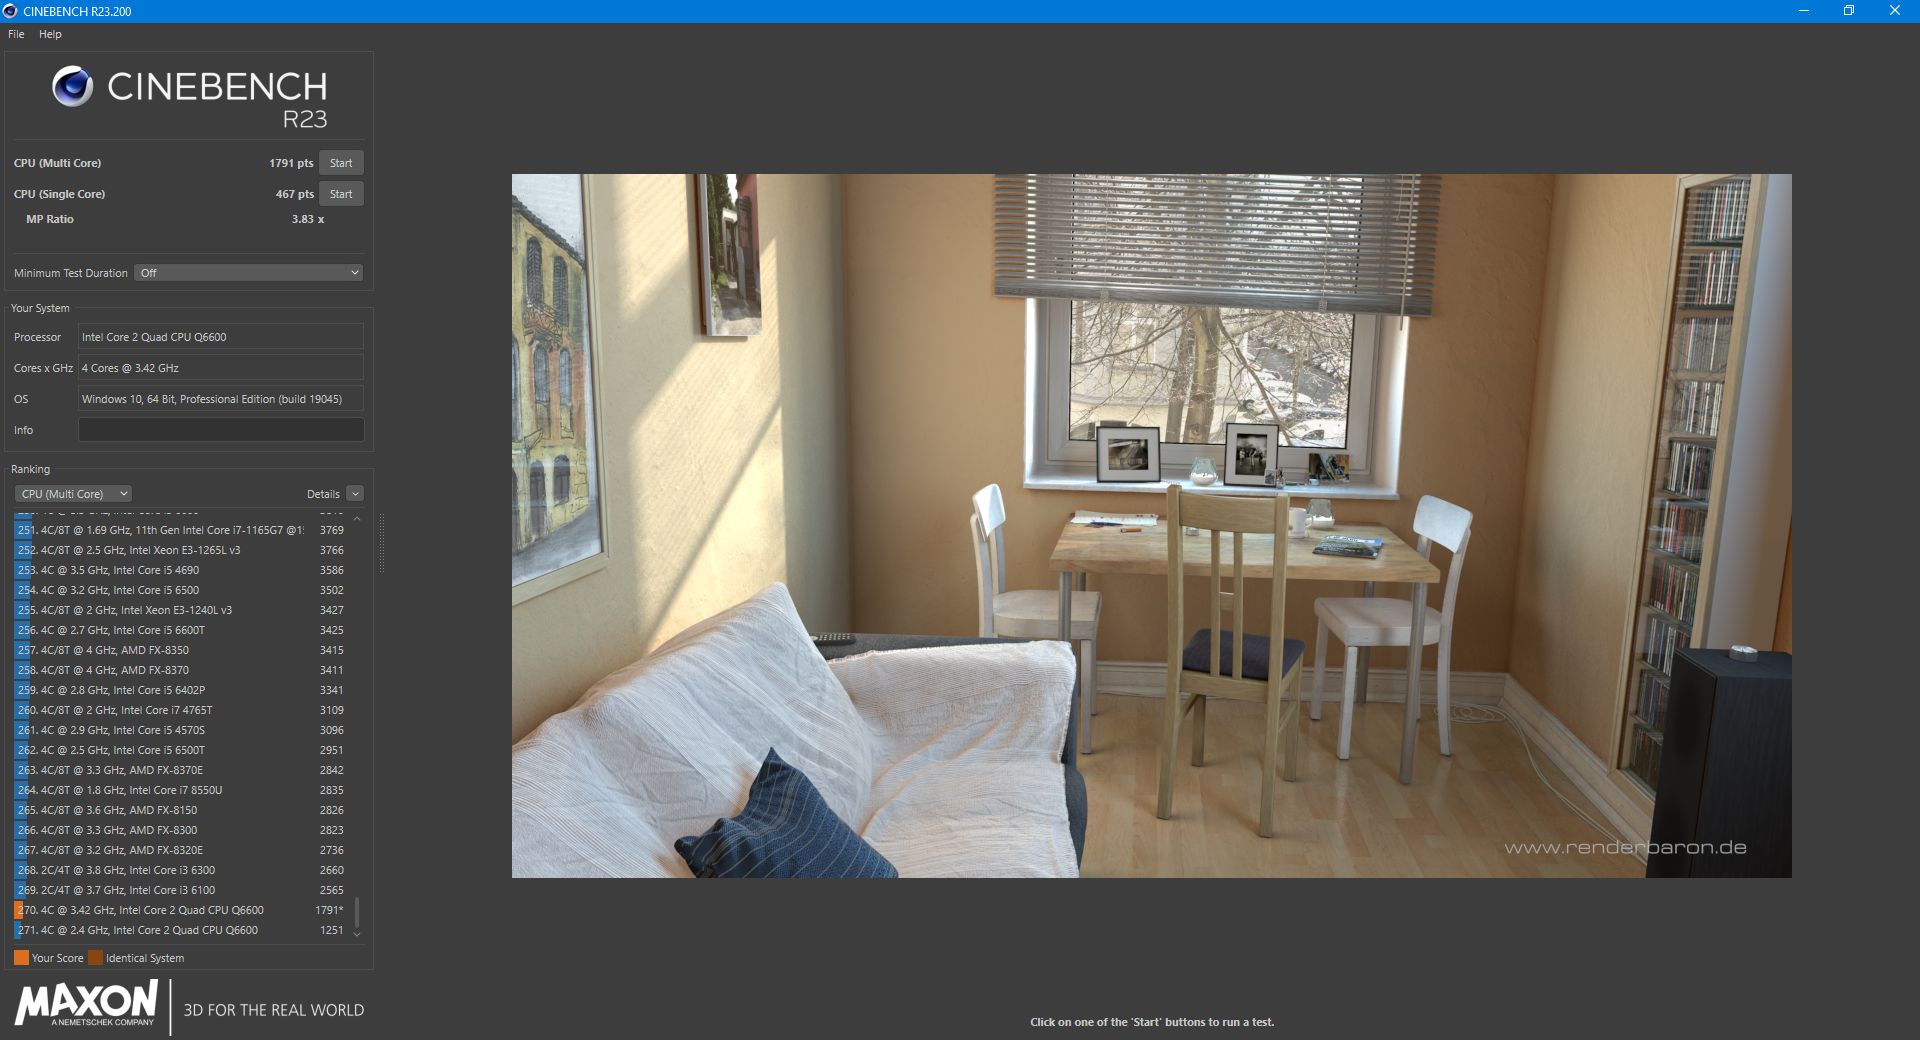
The result
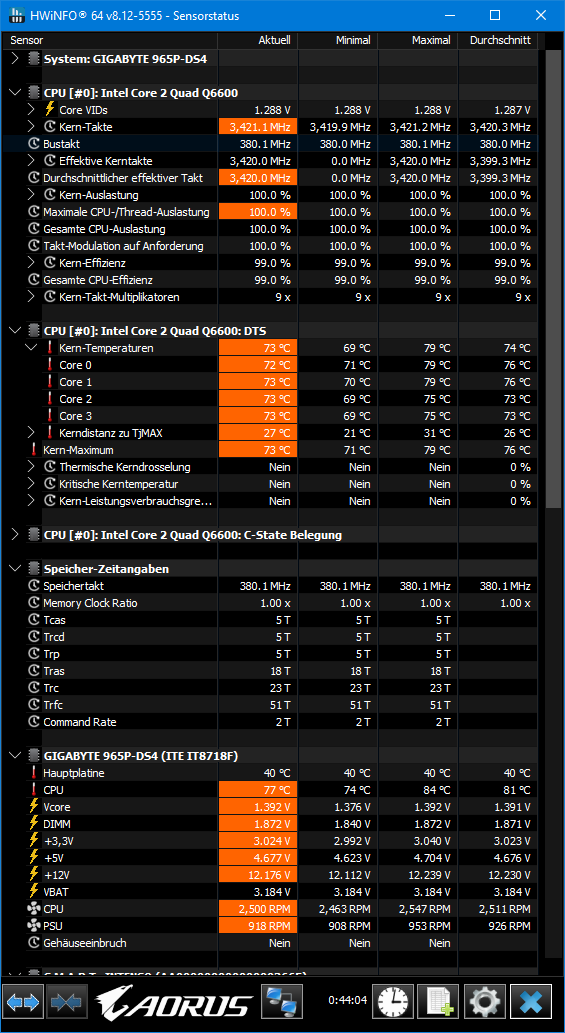
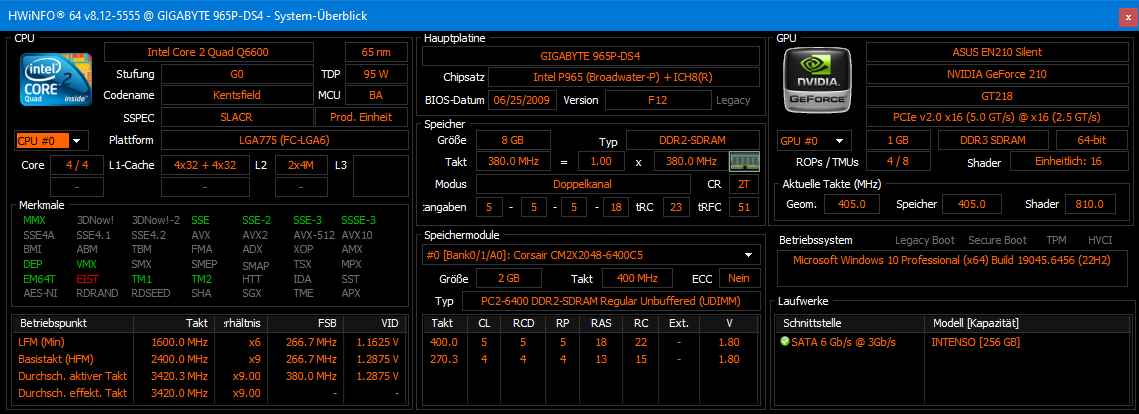
With 380 MHz FSB and 1.45 Vcore set in the BIOS, this results in 3.42 GHz at 760 MHz RAM clock speed (1:1 division, 380 x 9). That’s 1.02 GHz more than the original, even with a rather small air cooler. It’s clear why this CPU is so well known among overclockers around the world – my sample is actually only average in terms of silicon quality, as can be seen from the average VID. Under full load, HWiNFO reads only 1.392 volts as Vcore, so the Vdroop is clearly visible.
The processor does get very warm with these settings. After about 45 minutes of Prime95 Smallest FFTs, the hottest core was at 79 °C and the package at 84 °C. These are clearly too warm as permanent values, but in Cinebench R23, nothing ever exceeded 72 °C. Prime95 is a rather unrealistic load in normal operation anyway.
CB23 Comparison
Here, I have once again compared the changes between the original and the newly overclocked Q6600 G0:
| Original | Overclocked | Difference | |
|---|---|---|---|
| Vcore | 1.28750 Volts | 1.47500 Volts | + 14,6 % |
| FSB | 266 MHz | 380 MHz | + 42,9 % |
| Multiplier | 9x | 9x | – |
| Clock | 2.40 GHz | 3.42 GHz | + 42,5 % |
| RAM | 800 MHz (5 – 5 – 5 – 18, 1.80 Volt) | 760 MHz (5 – 5 – 5 – 18, 1.80 Volt) | – 5,3 % |
| CB23 Single | 330 | 467 | + 41,5 % |
| CB23 Multi | 1251 | 1791 | + 43,1 % |

This was a very nostalgic overclocking project. All that remains to be said is: you notice the difference in performance immediately. Both in terms of computing speed under Windows 10 and the significantly increased waste heat. Over 40% performance gain with a locked multiplier at only 15% more voltage!