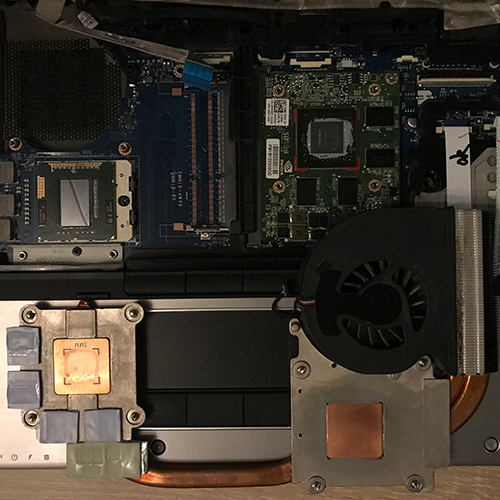
Even though using Honeywell’s PTM 7950 is anything but pleasant, I plan to equip all devices that are theoretically supposed to run “until the end” without major maintenance with it. In this case, I’m even using it as intended – namely, “Direct Die”, meaning without an IHS (Integrated Heat Spreader). At the same time, I’ve experimented a bit with passive heatsinks on the GPU VRMs (which get very hot!), though unfortunately with only moderate success.
GPU VRMs
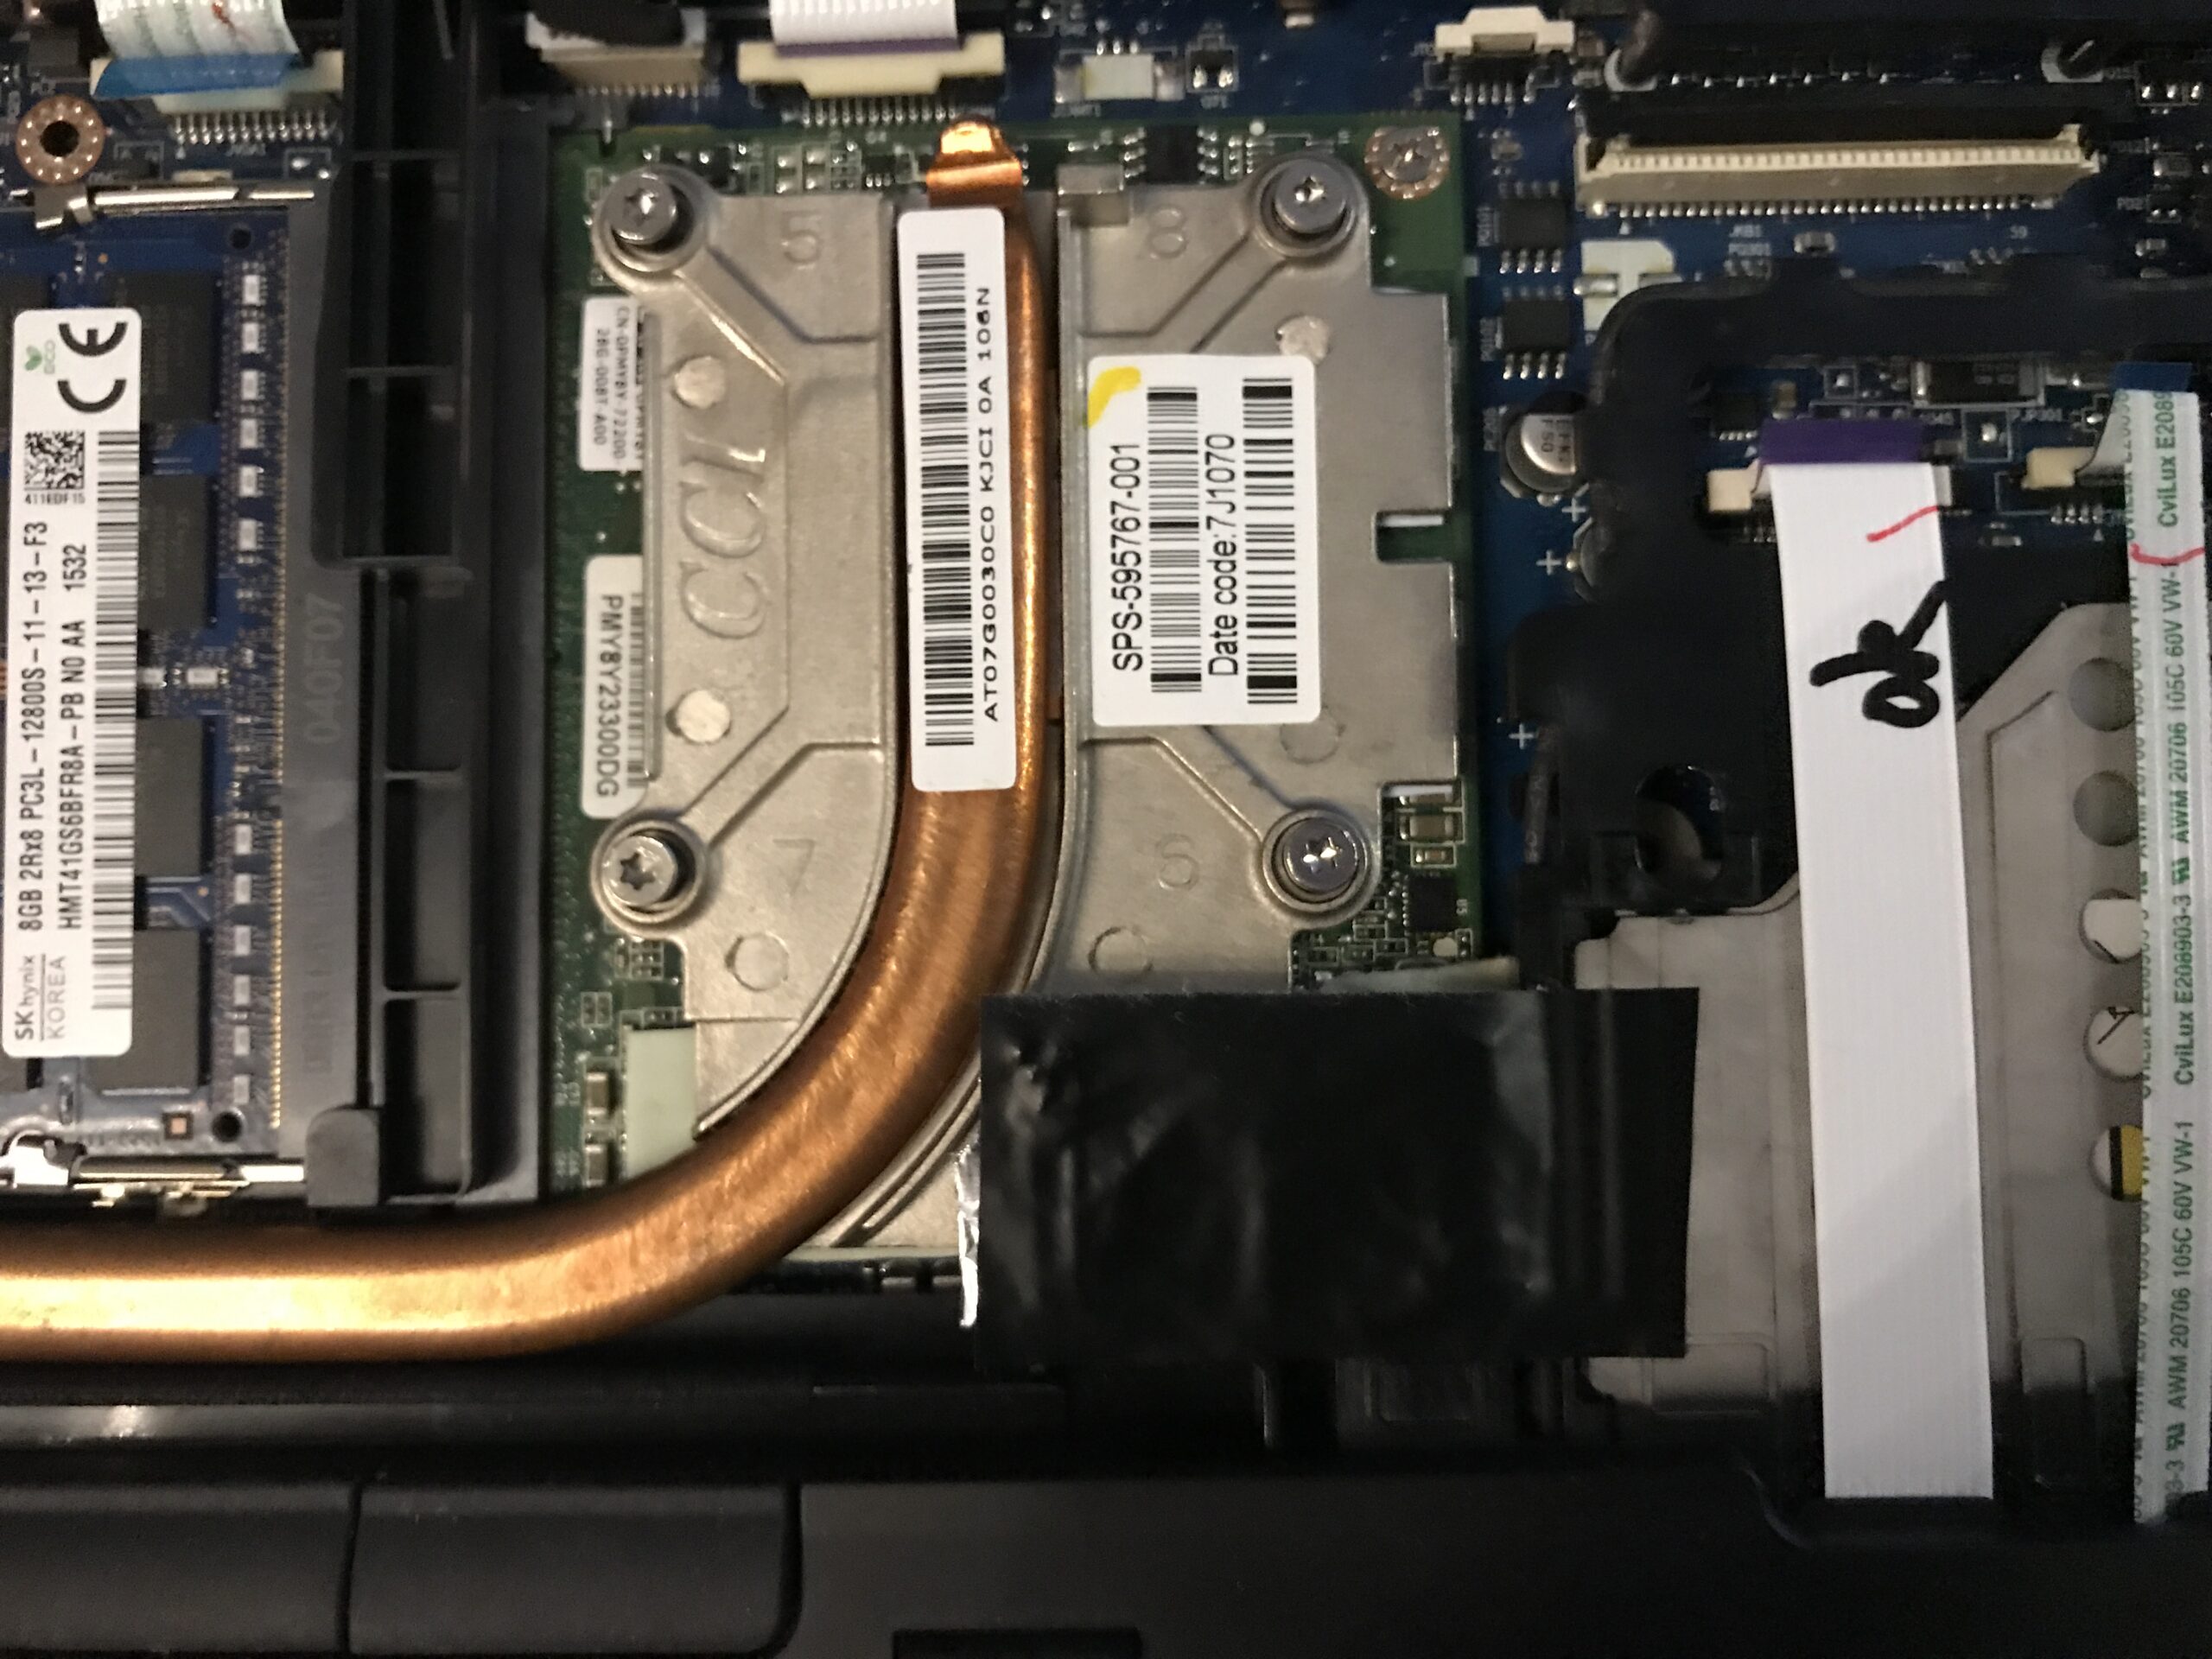
The cooling surface provided is just barely too small for the VRM components of the now-installed Nvidia Quadro 2000M, causing them to heat up quite quickly. This isn’t really a problem if you’re not aiming for continuous full load on the GPU, but in 3D-intensive games, temperatures rise relentlessly into uncomfortable territory, especially since the HP EliteBook 8540p has only one fan that has to cool both the CPU and GPU simultaneously.
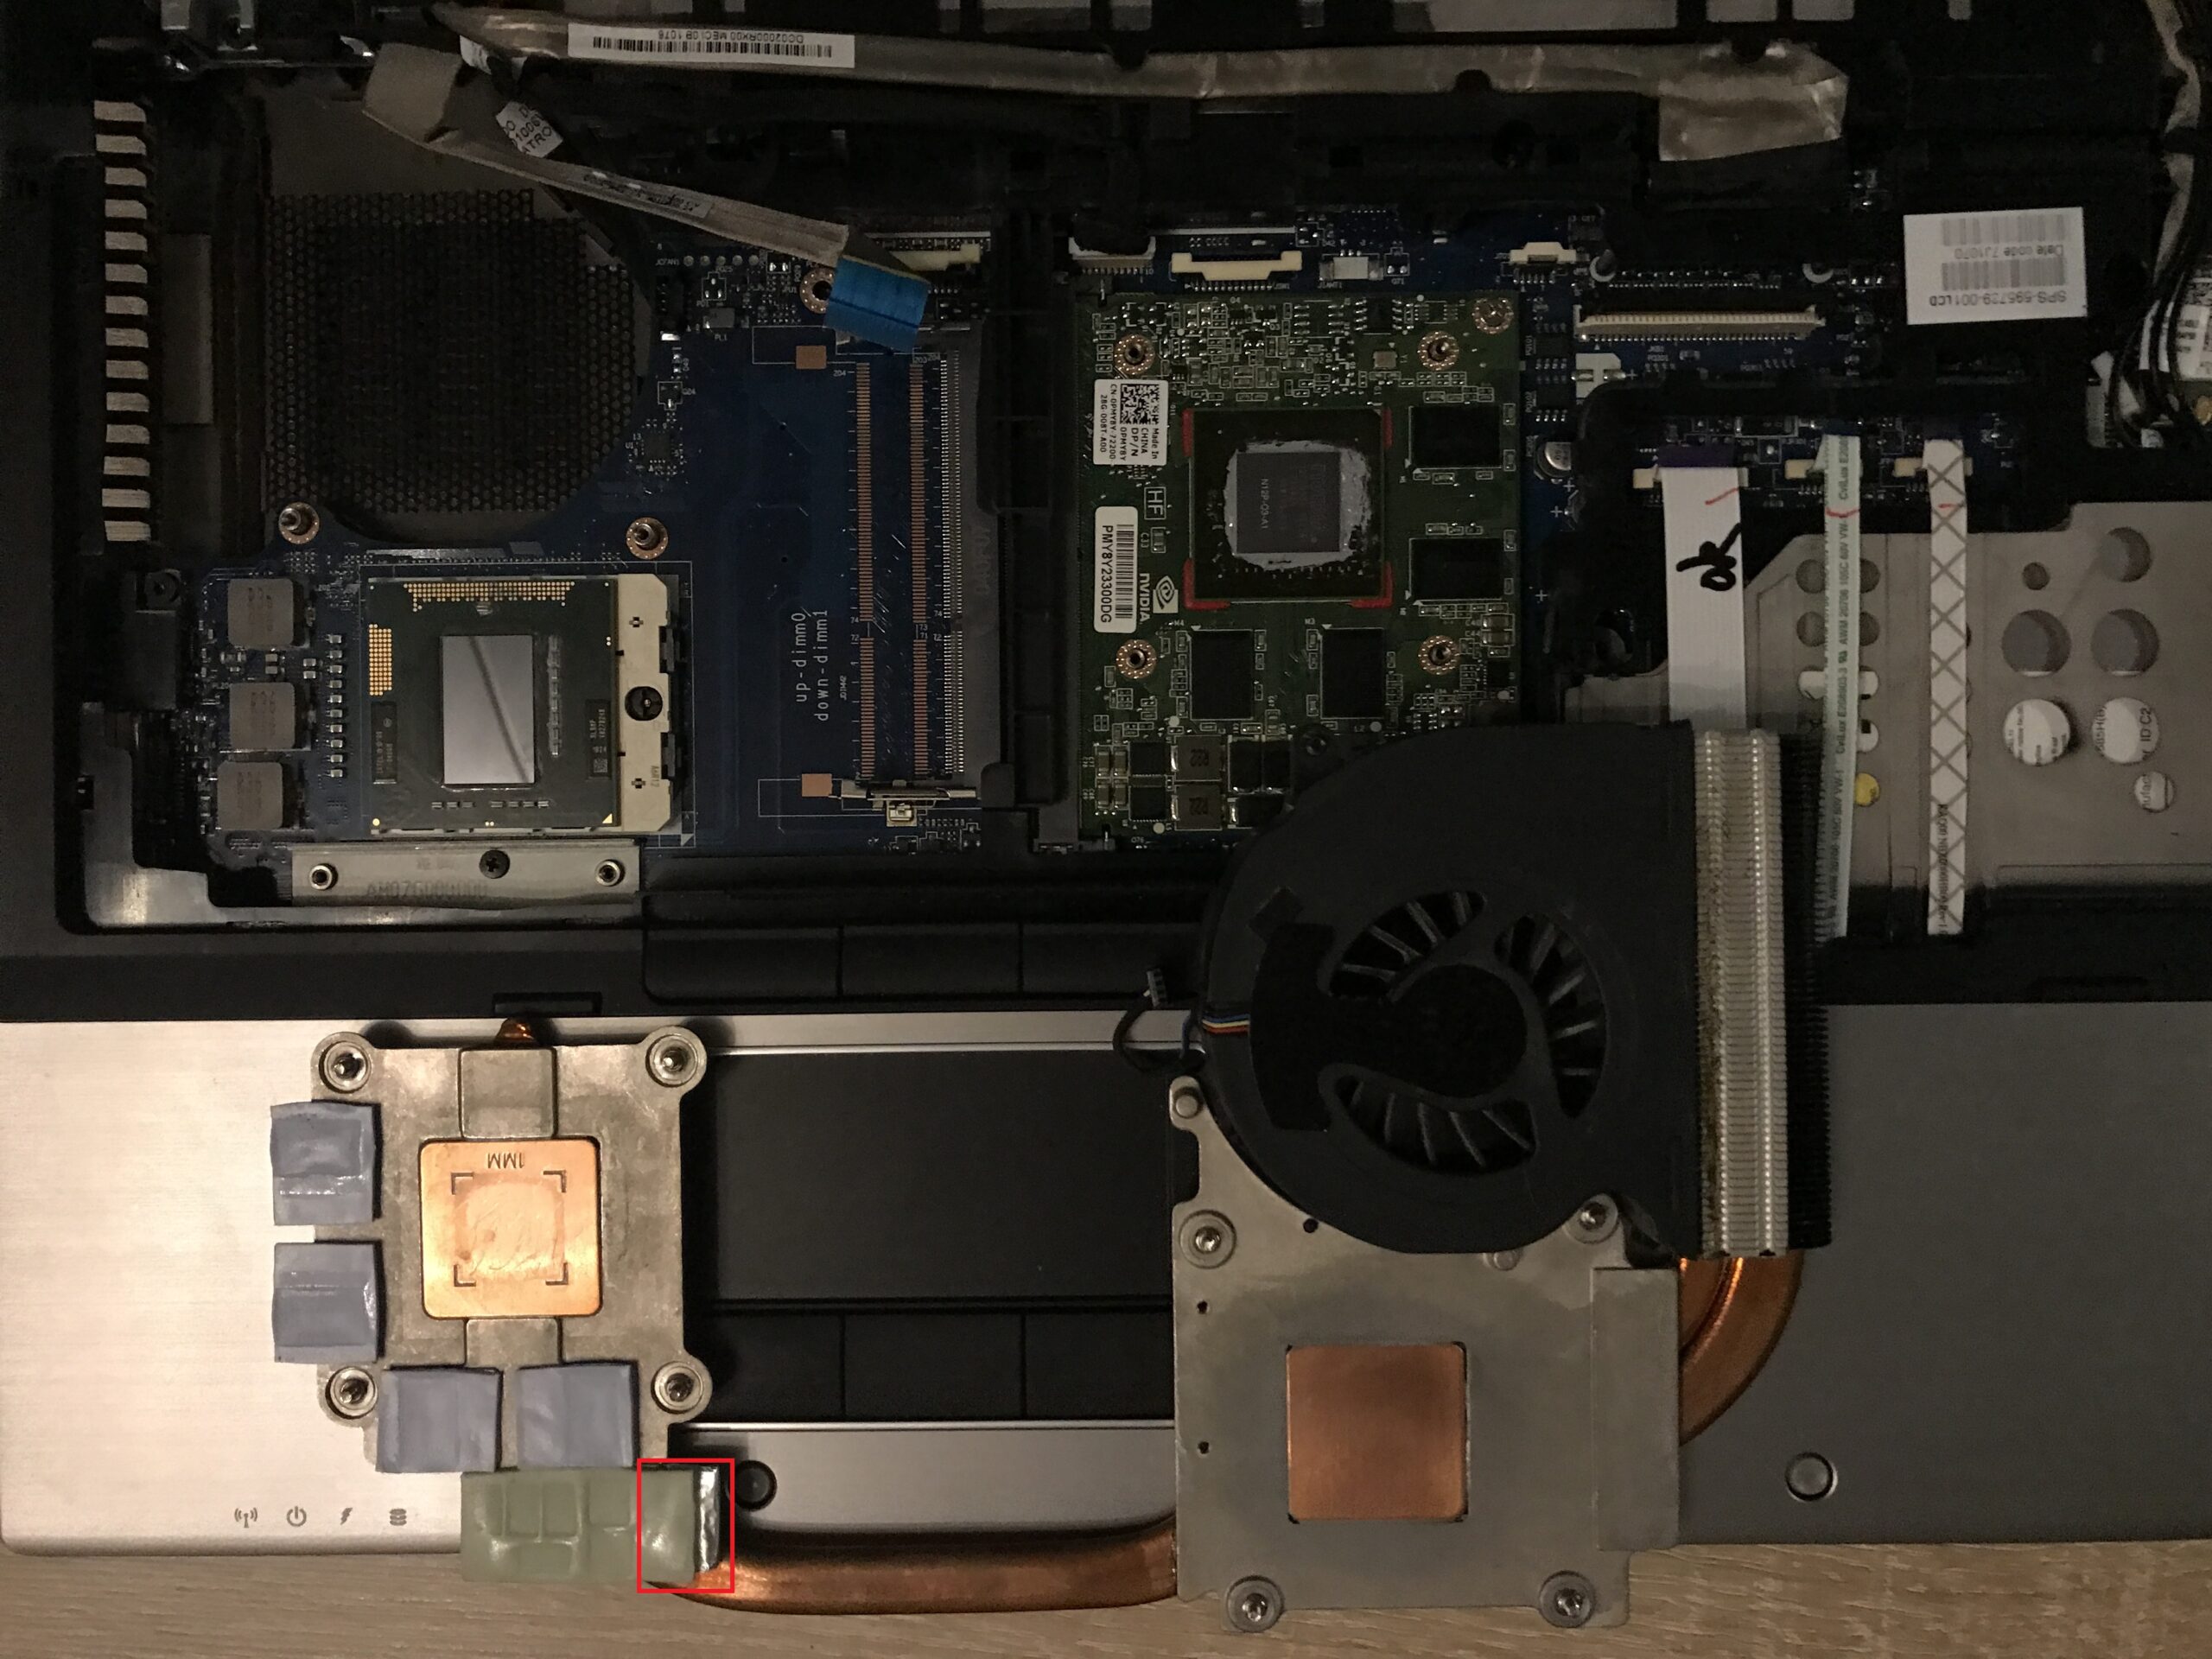
In this case as well, the optimal solution would be a part milled from copper – ideally – that is attached beneath the existing cooling surface along with a thin thermal pad and extends it laterally. Unfortunately, I don’t have either a suitable milling machine or the material on hand. These are the areas in question:
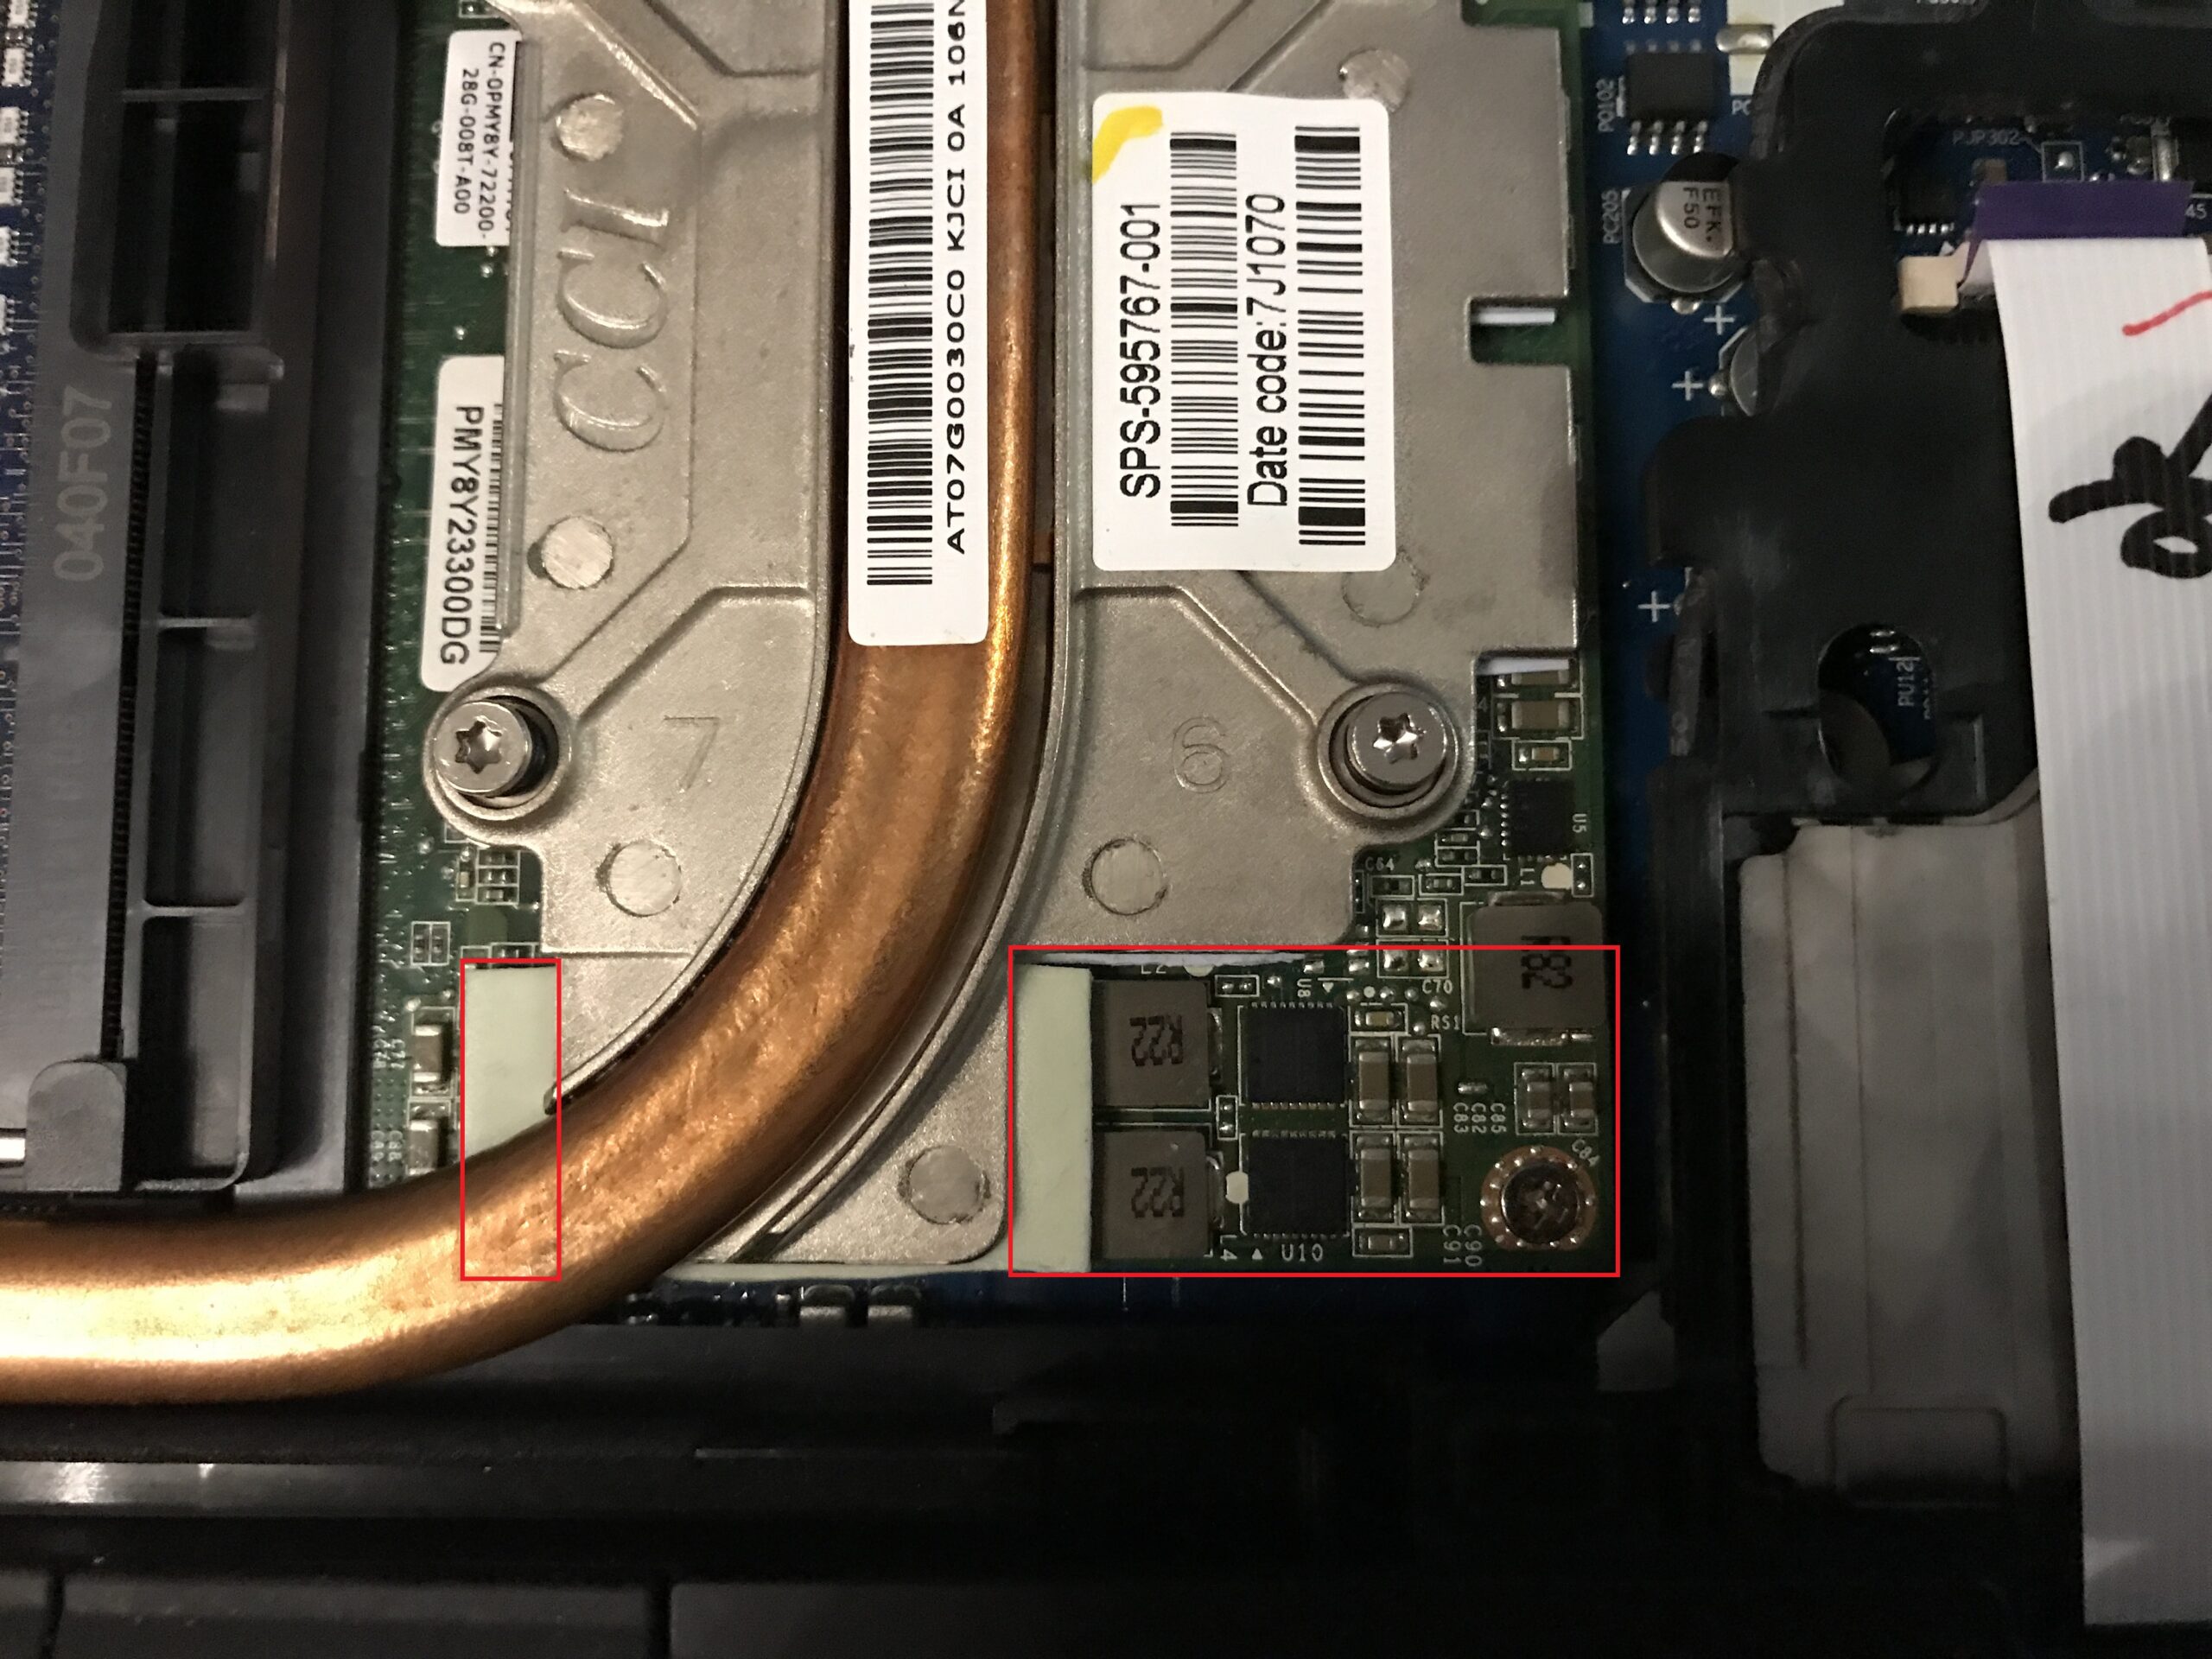
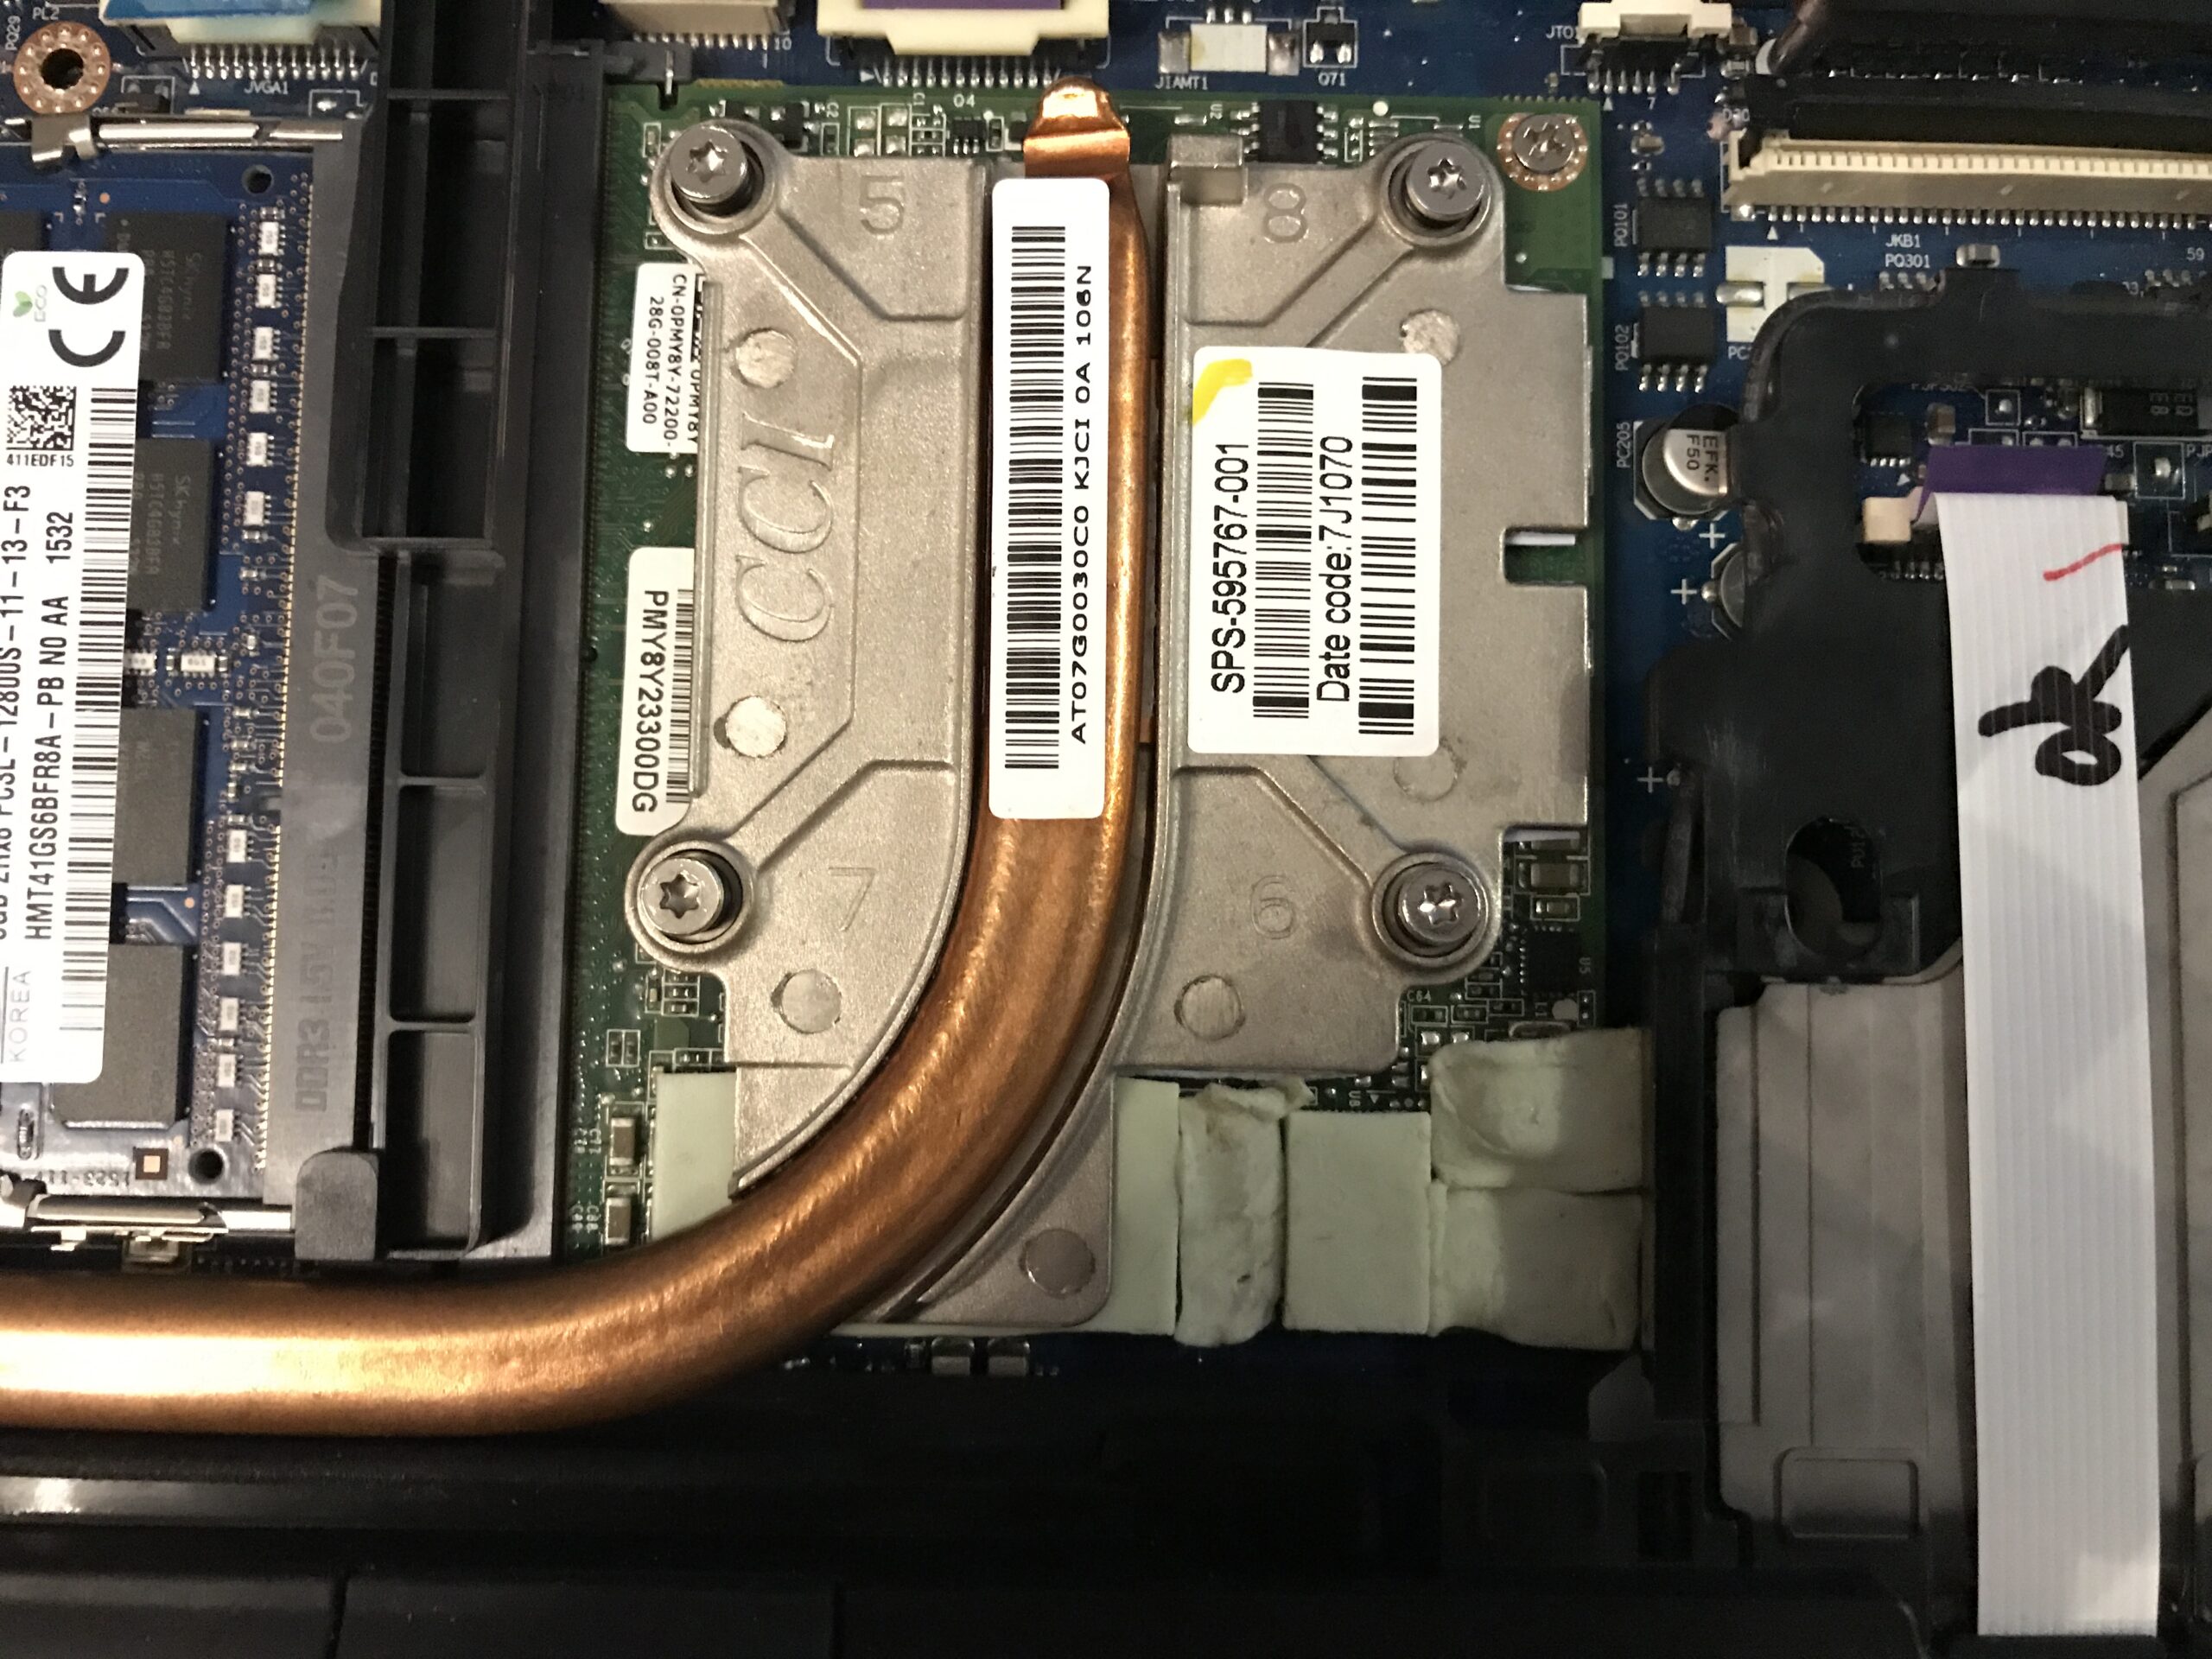
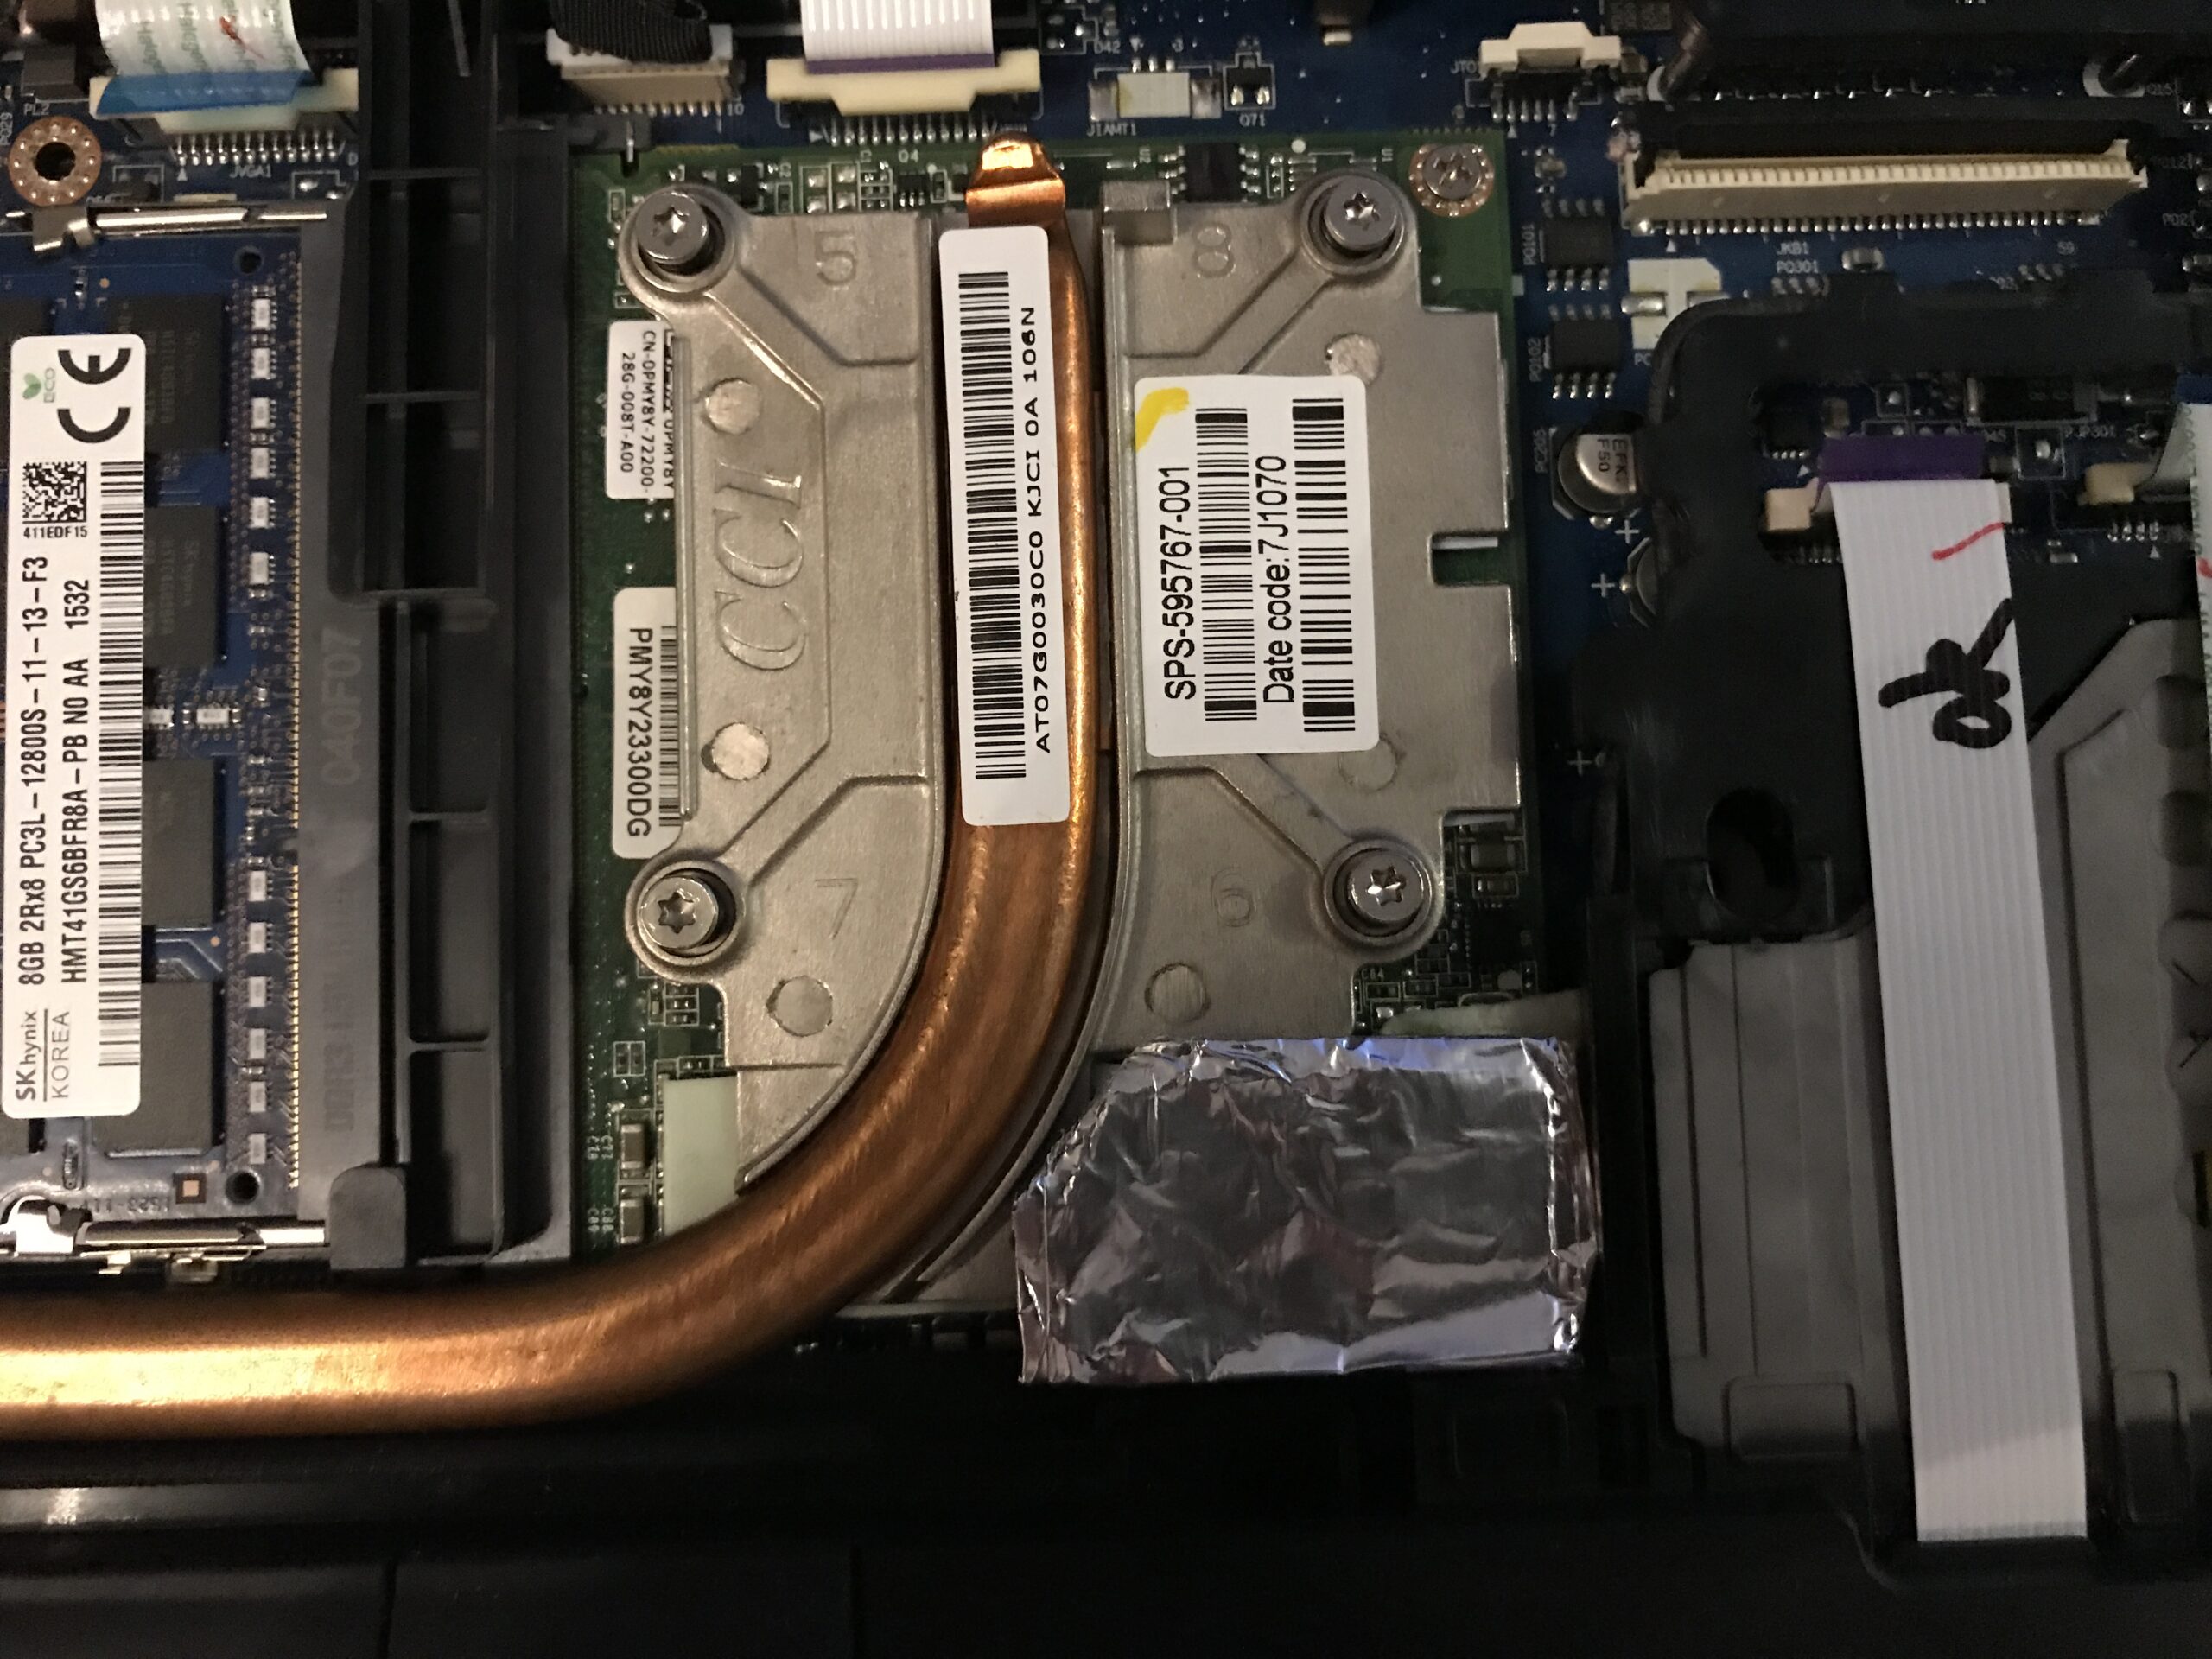
The black SMD components are the voltage regulators (VRMs), hidden on the left by the thermal pad and heat pipe. To build up at least some heat storage capacity, I constructed an improvised heat sink* out of aluminum foil – similar to what I’ve often done with M.2 SSDs – and used black PVC electrical tape* to prevent direct contact with the keyboard. It’s placed on carefully positioned additional thermal pads; after all, aluminum conducts electricity and could, in the worst case, cause a short circuit:
Up to this point, Arctic MX-4 thermal paste* was still applied to the CPU and GPU dies so as not to skew the VRM temperature readings.
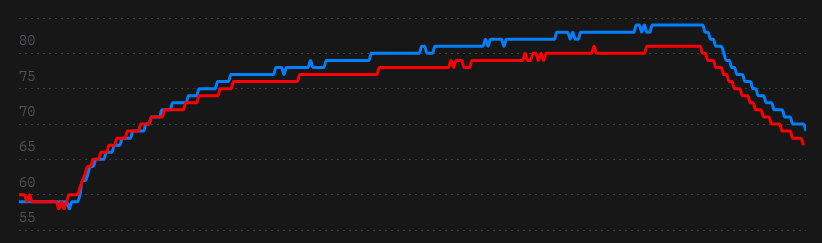
Temperature differences in the GPU VRMs
The three values in the table, from left to right, are: Minimum, Maximum, and Average. The values stated are in degrees Celsius.

As you can see, things still get uncomfortably hot. A properly designed heat sink would need to be added, and even that probably wouldn’t make much of a difference once thermal saturation is reached. The heat pipe and HP’s entire cooling design can only dissipate a certain amount of heat within a certain amount of time.
PTM 7950 on CPU and GPU
This time I used pre-cooled pads again; I cut the right sizes out of an 80 x 40 mm pad. The CPU die of the i7-840QM is about 25 mm long and 15 mm wide, while the GPU die is approximately 15 x 20 mm. So I cut a 40 mm long and 20 mm wide strip from the larger pad using sharp scissors and then trimmed it to fit.
A noticeable change in adhesion is evident: The bond to the CPU die was immediate and strong, much better and stronger than on the heat spreaders previously. On the GPU, however, the pad didn’t stick very well; perhaps there were still residues of thermal paste present (silicone oil!).
I didn’t take any photos of the process this time, as the procedure is already very well documented. The comparison results are likely to be much more interesting:
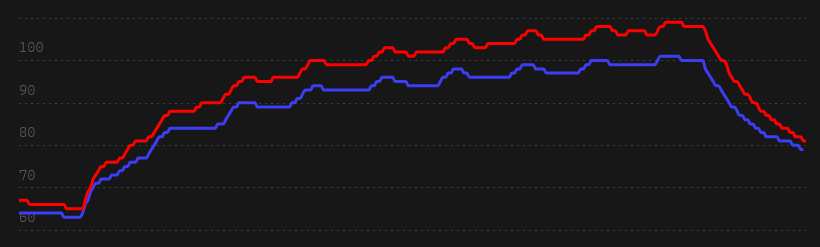
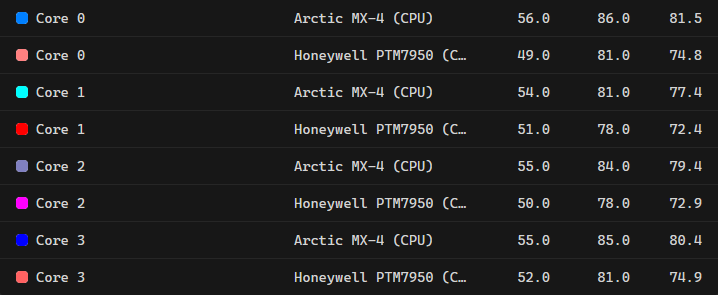
CPU – Temperatures of all individual cores
The three values in the table, from left to right, are: Minimum, Maximum, and Average. The values stated are in degrees Celsius.

CPU – Core-Maximum
The three values in the table, from left to right, are: Minimum, Maximum, and Average. The values stated are in degrees Celsius.

GPU
The three values in the table, from left to right, are: Minimum, Maximum, and Average. The values stated are in degrees Celsius.


Conclusion
I was surprised by the significant improvement in CPU temperatures. Of course, the thermal paste was already several hours and years old, but still. The GPU temperature hasn’t really changed much; unfortunately, its VRM temperatures remain in an undesirably high range, just as before. I suppose that’s just the way it has to be.